G@@@@/
@####RQ%7%#%
#####@777777777t~
K#####Rt77777777777
K#######@777777O7t7@
##K#####@77#Kt %K B
G#RRK@###t77 %7@#@
B#@t77R@@t7777s%77777@
@RK7777777777s##C7777t7t#
(R#RB7777777777777@7@s@#@@t@
^RRR@s@7777777777%Q7777777t@
@RR@sOOOBt7777777@7%t777%
@sOOOOOOO@777777@@t@tGt@ ---Behold! Best "Bartman Meets
/#OOOOOOOOOOSC7777777#tR#@ Radioactive Man" guide, ever!
/#sOOOOOOOOOOOOSe777777777#O
RsOOOOOOOOOOOOOOOsQ7777777@Os~
SOOOOOOOOOOOOOOOOOOOOsK@@@GOOOOs#
OBOOOOOOOOOOOOOOOOOOOOOOOOOOOOOOOOO
====================================================================
The FAQ/WALKTHROUGH for BARTMAN MEETS RADIOACTIVE MAN, v2.1
Based on the Nintendo version
Written and maintained by SubSane
Last Updated July 2, 2003
====================================================================
TABLE OF CONTENTS
1.0 INTRODUCTION
1.1 Game Details
1.2 Story
2.0 BASICS
2.1 Game Start
2.2 Status and Menu Screens
2.3 Controls
2.4 Items
2.5 Points
3.0 WALKTHROUGH
3.1 Swamp Hag's Junkyard of Doom
3.2 The Water-logged Lair of Dr. Crab
3.3 20,000 Miles Under the Earth
3.4 Brain-O The Magnificent
4.0 THE LIMBO ZONE (BONUS STAGE)
5.0 CODES & SECRETS
6.0 LEGAL / MISC.
5.1 Version History
5.2 Guide Credits
5.3 Contact Information
5.4 Legal Stuff
====================================================================
===== 1.0 INTRODUCTION =============================================
--------------------------------------------------------------------
1.1 Game Details
--------------------------------------------------------------------
The NES version was released in 1992, the Game Gear version in 1993.
Developed by Imagineering Inc.
--------------------------------------------------------------------
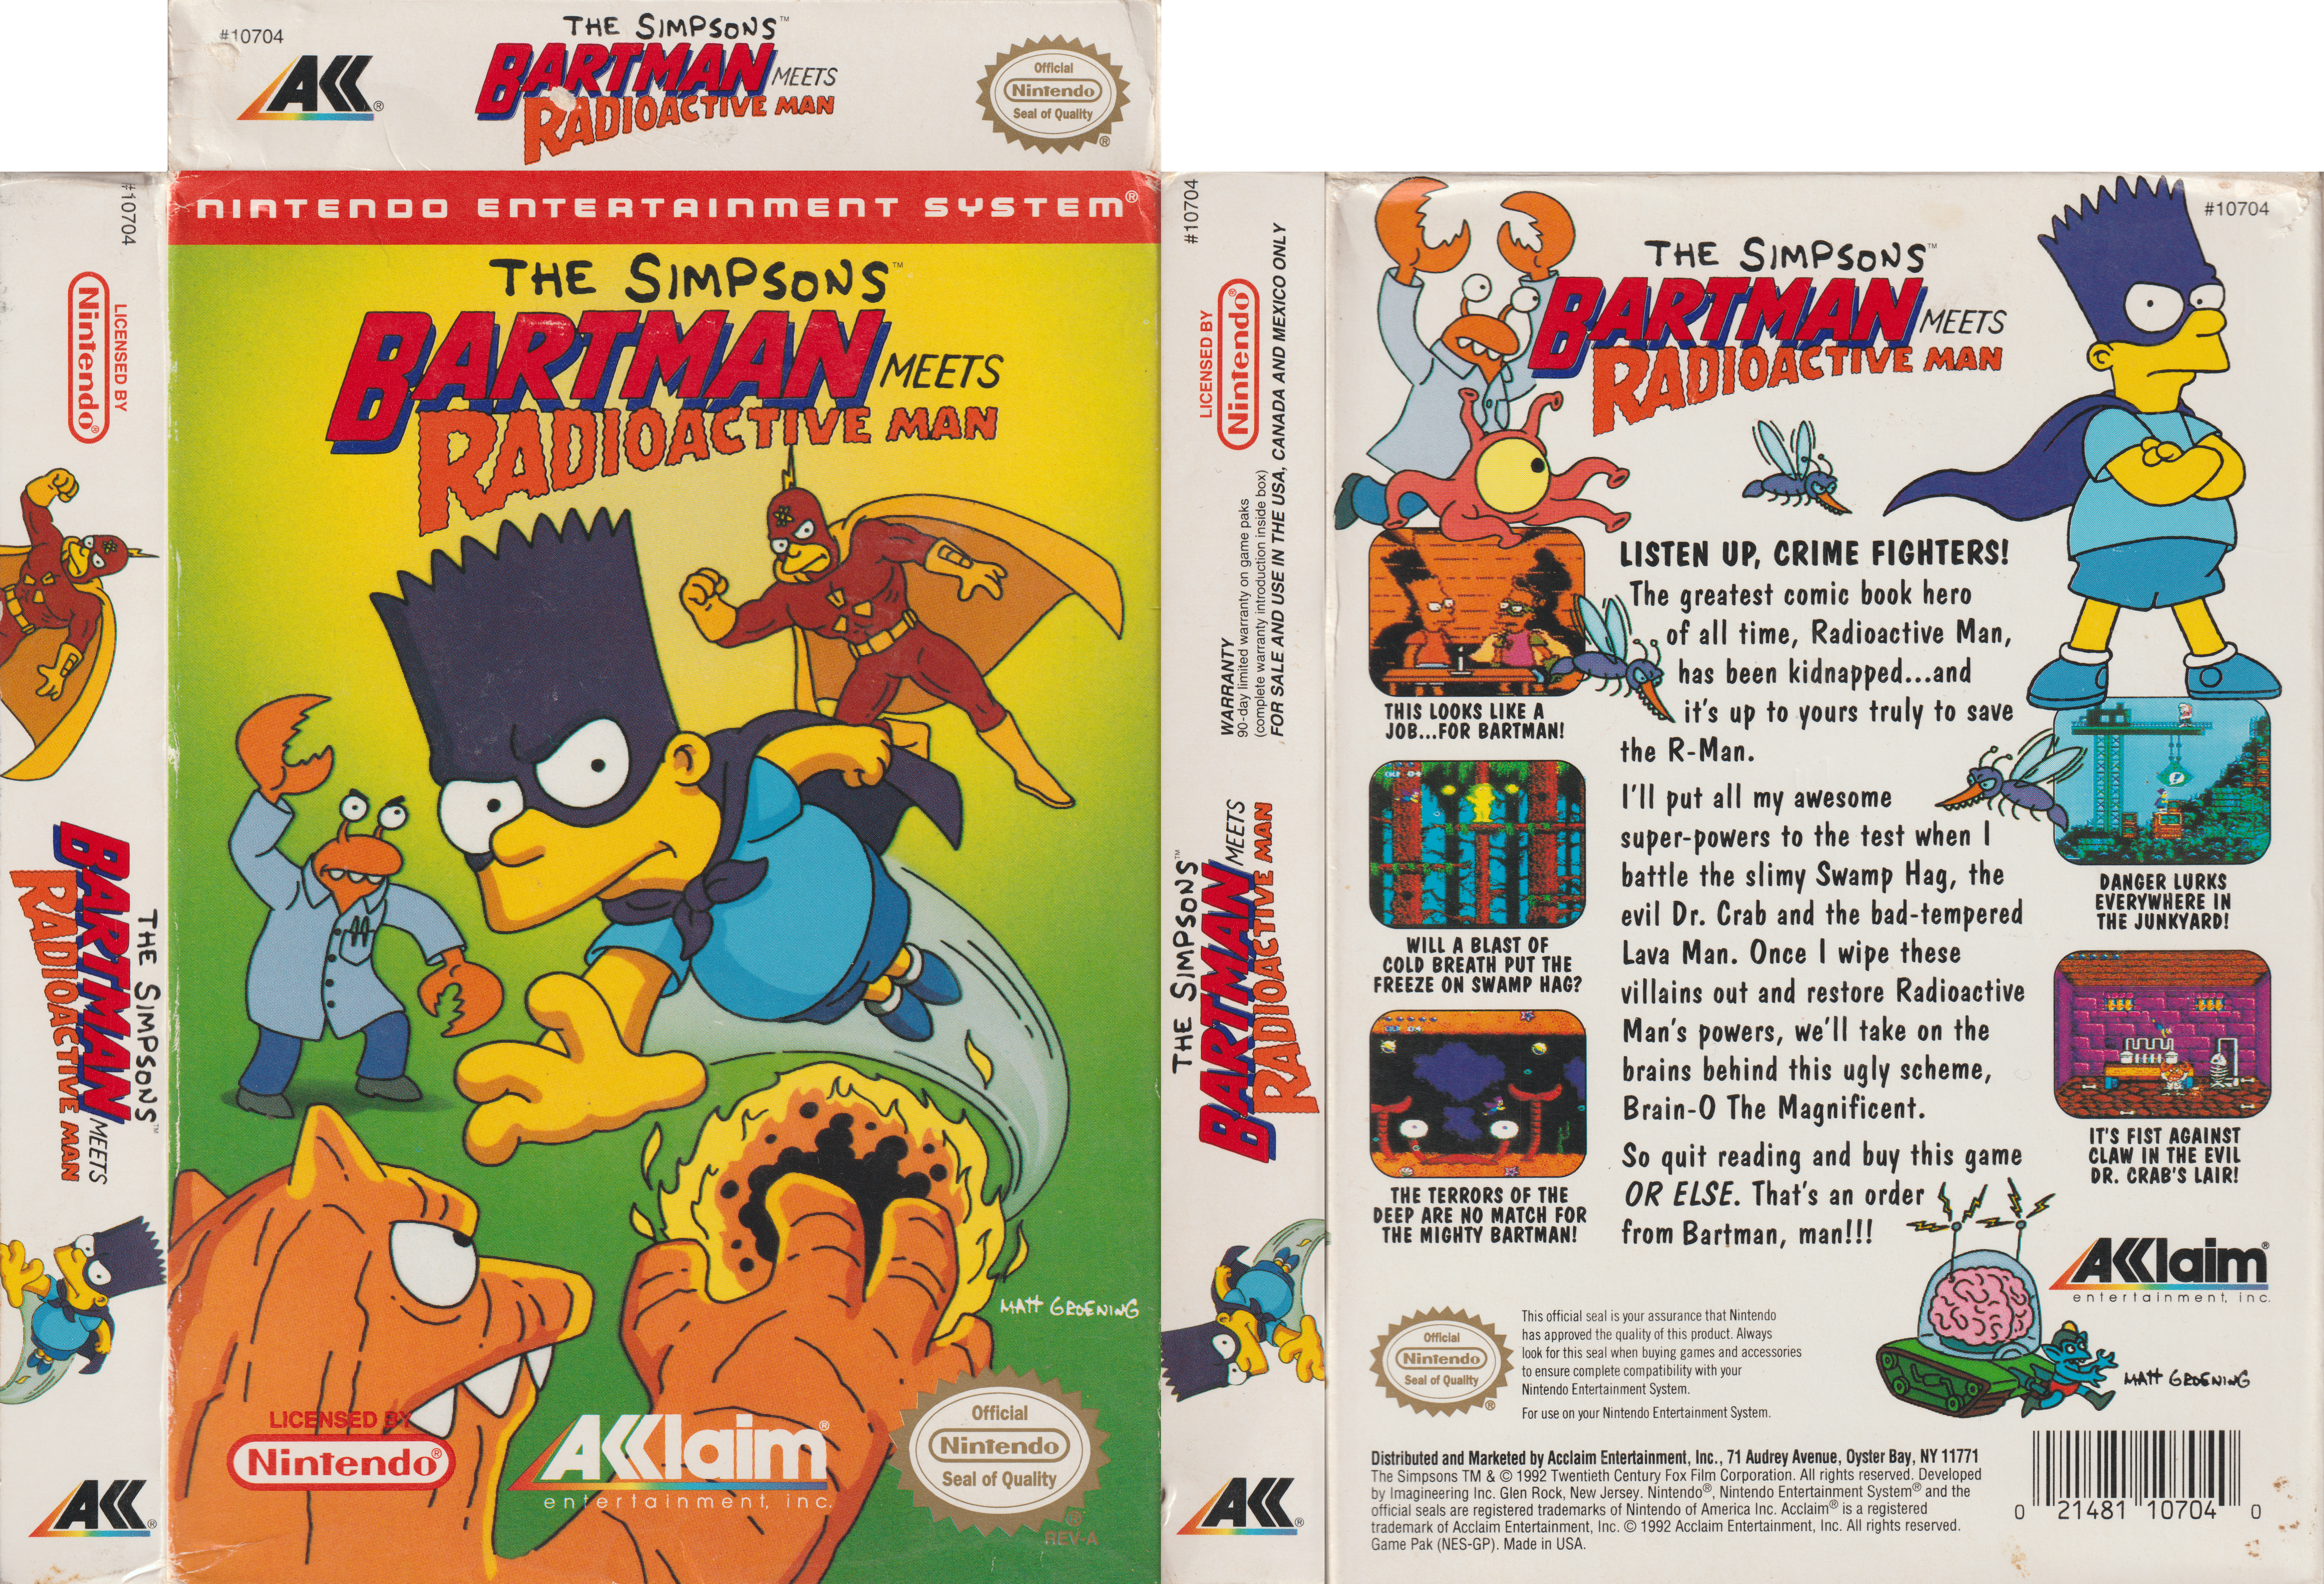
1.2 Story
--------------------------------------------------------------------
'Twas a dark and stormy night. Not a soul remained awake, save for
one boy. Bart Simpson.
Bart sat alone, reading another exciting tale from the comic book
hero, Radioactive Man. Apparently, in the comic, Radioactive Man
disappeared and could not be found.
Just as Bart turned the page, who should appear next to him but
Radioactive Man's sidekick, Fallout Boy! Radioactive Man has really
been captured, and it's up to Bart, nay, Bartman, to restore
Radioactive Man's powers and free him from the Limbo Zone!
====================================================================
===== 2.0 BASICS ===================================================
--------------------------------------------------------------------
2.1 Game Start
--------------------------------------------------------------------
Nothing special here, just press A or Start to start the
game.
--------------------------------------------------------------------
2.2 Status and Menu Screens
--------------------------------------------------------------------
Health
- - - -
Those blue circles in the upper left corner represent your health.
Maximum of five.
Weapons
- - - -
When you grab some eye beams, cold breaths, or a tornado they will
appear under your health.
Pause Menu
- - - - - -
If you press Start to pause you can view your points and remaining
lives.
--------------------------------------------------------------------
2.3 Controls
--------------------------------------------------------------------
Command | Character Action | Other
----------------------------------------------------------------
Start | Pause | -
Left | Walk, jump, fly, swim | -
Right | Walk, jump, fly, swim | -
Up | Fly up, swim up | Slow parachute
Down | Duck, fly down, swim down | Speed parachute
B button | Punch/kick, slow in tunnels | Use fist, icons
A button | Jump, hold to go faster | -
--------------------------------------------------------------------
2.4 Items
--------------------------------------------------------------------
Item | Purpose of item
------------------------------------------------------------
Lightning | 20 Eye beams
Tornado | Temporarily invulnerable, hurt enemies
Snowflake | 5 Cold breath shots
Exclamation | Extra points
Radiation | Gives you one HP(hit point)
1st | One extra life
Planet | The Limbo Zone
Orange B | This gives you the ability to fly
Blue B | The exit to the current stage
--------------------------------------------------------------------
2.4 Points
--------------------------------------------------------------------
(Every 8500-9000 points you gain one extra life)
Action/Item | Number of points
------------------------------------------------------------
Stage enemy | 50 points
Exclamation | 200 points
Radiation | 200 points
Lightning | 300 points
Snowflake | 300 points
Tornado | 300 points
Orange B | 300 points
1st icon | 500 points
Green bats | 1000 points
====================================================================
===== 3.0 WALKTHROUGH ==============================================
--------------------------------------------------------------------
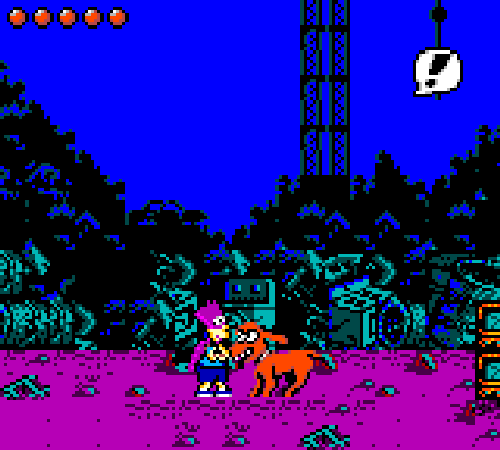
3.1 Swamp Hag's Junkyard of Doom
--------------------------------------------------------------------
-Junkyard-
Enemies: Rats, Junkyard goons, red mosquitoes, dogs, old tires, cogs,
screws
This area is pretty basic side scrolling, I'll point out any specific
stuff though. Just make your way to the right. All you can do so far
is punch, so avoid the dog, tire, and rat. A tip: always avoid the
rats. They are too low to the ground to kill, so just jump over them.
Collect any exclamation points you see for points. As you come across
gaps, wait a second by the edge. Often cogs will fly up from the gap,
and will hurt you. Also avoid the cranes that open and close, and the
screws and cogs that fly out of the stacked tires. Once you get the
lightning bolt icon, you can shoot enemies with eye beams, but use
them sparingly. Just avoid as many enemies as possible.
As you go further you'll come across car crushers that have items
under them. Best way to do it is to jump to the middle platform then
instantly jump over to the next one. The trick to using the springs
is that the third jump is the highest one, so time your jumps. Once
you get to the junk pile, be careful.
You can only step on the stacked tires or the old TV sets. Also this
is where the mosquitoes appear, so feel free to kill 'em off. There's
also a tornado icon up here: get it by jumping off the platform above
and use it to make your way through the enemies. Once you start to go
down the other side, it gets sorta' hard. The easiest way to do it is
to look for any screws or cogs flying up, that way you know that
there's a stack of tires to land on. If you don't see anything, take a
small step forward, off whatever you're standing on. Usually there's
something to land on, either a spring or a platform. Right before you
reach the bottom of this junk pile there will be a 1st icon; this is
an extra life. Best way to find it is to take a step forward and fall
off the last platform, you'll bounce on a spring and see the extra
life.
Proceed forward again, grabbing any items you feel you can get easily,
and feel free to kill whatever gets in your way. You should have quite
a lot of eye beams now. Anyway, once you get to the bottom of the
second junk pile, you'll notice this weird planet icon. Get this! This
is a bonus stage in the Limbo Zone. More on that in the Limbo Zone
section, below.
There isn't much left after this. Just proceed up the junk pile and
down the other side, collecting anything you think you need. Make your
way to the right until you reach the triangular grey B icon, this is
the exit out of the junkyard. On to the next stage.
-Sewer-
Enemies: Sewer goons, mounted laser guns, red sewage drops
This stage is sort of like a maze, but not really. Although the path
goes up, down, left, and right, it hardly ever branches out in two
directions. I'll point out every path though. Just follow the path,
avoiding the drops of red sewage and the electric shocks. Use the red
platforms to proceed down the shafts, or the small black circular
holes that are in the shafts. Always try to use the red platforms or
the holes because sometimes the shaft will be very long, and if you
make a drop from too high up you'll lose a life.
As you go along you'll come across shafts that turn up. Usually there
are red platforms to take you up, but if there aren't any, there have
to be some small green pipes sticking out for you to climb on. Watch
out for the electric shocks that sometimes come out of the pipes. If
the sewer goons bother you, just kill them. It may get kinda' annoying
because they follow you around, but not too bad.
After you go down three shafts, up another, down another, and up one
more you'll reach a shaft that goes down pretty far. About half way
down you'll see a path on your left. You can take it if you like,
there isn't much there. The one important thing would be the snowflake
at the bottom of the lower shaft, you'll see it. To get down there
just use the holes to get down the shaft. The snowflake icon is for
the cold breaths, another type of power weapon. You only get 5 of
these, so if you still have all those eye beams from the bonus stage,
just skip this part. One other thing here is a side shaft that seems
to be there for no reason. Up to you to take it.
While you go through the next shaft you'll notice that there are holes
in the walls, and sewer goons with guns inside those holes! Starting
from the first one, every other hole has a goon in it. Just be ready
to shoot them as soon as they pop out. There's a small tunnel under
the pipe that has a few items if you need them. From here proceed to
the right, up the next shaft, and up the last one. At this point
there's an important fork in the road, so to speak. You'll come to
an intersection that has a path going up, one going down, and one
that goes to the right. I suggest going down.
As you follow the shaft you'll see another shaft that seems to be
there for no reason, as it takes you back to the tunnel you were on.
I'm thinking all these different paths are supposed to get you lost
or confused, but I'm not positive. Anyway, using the bottom path
will eventually lead you right back to the intersection, you'll come
out of the right hand path. That little detour is mainly to collect
extra lives and other icons you may need. Now head up, grab the
tornado if you haven't already. Once you reach the top you'll have to
go through one more shaft, to the right. At the end of this you'll
see the familiar orange B icon, it's flyin' time!
-Swamp-
Enemies: Green mosquitoes, red mosquitoes, bats
This stage is very basic: flying to the right. Pressing right will
make you go faster, left will slow you down. Along the way I suggest
you pick up as many power icons as possible, and definitely pick up
the one tornado icon that comes out after the second wave of green
mosquitoes.
To deal with the green mosquitoes, just stay in the corner and hit any
of the ones that get in your way. To kill off the red ones, stay at
the left edge and continue moving up and down to dodge their flame
shots. Kill any that you feel you can't dodge safely. The last enemies
are the bats, and they're pretty simple to dodge too. Stay on the
lower left edge until the bats are nearly above you, then quickly
speed up and move to the right edge. The bats will drop either
arrowheads or fish, I couldn't quite tell. Anyway, they'll end up
dropping the weapons behind you. Wait at the right edge until they
are almost above you again, then hold left and return to the left
edge. Repeat this process and they won't even touch you. Eventually
you'll reach the blue triangular B icon, meaning you're nearly out
of this stinkin' hell hole. One more challenge awaits...
-Swamp Hag-
Enemies: Swamp hag, brown blobs
That's right, you have to now defeat the Swamp Hag herself! You'll be
placed on some grey rocks, never step off these. You'll fall in the
swamp if you do. Right away you'll notice these three-eyed brown
blobs falling from the trees (I hope they're not what they look like).
Also, unless you already have these, you'll get some cold breaths.
Use the cold breaths to freeze the blobs and make steps. Be careful,
the blobs also hurt you.
After you get to the left branch right next to the one with Swamp Hag
on it, wait there for a few seconds. Then avoid her blobs and quickly
get up on her branch when she's away from the edge. Shoot her with a
cold breath and she'll temporarily freeze. Walk up right next to her
and proceed to physically beat her. Repeat this freeze and beat process
and the Swamp Hag will return to the swamp she loves so much, and you
will finally be finished with this level.
--------------------------------------------------------------------
3.2 The Water-logged Lair of Dr. Crab
--------------------------------------------------------------------
-Outside the Underwater Lair-
Enemies: Mini submarines, blowfish, starfish, jellyfish, manta rays,
sea horses
As you swim through the first part you'll have to avoid the spiked
mines, octopus tentacles that pop out of the ground, clams that
release bubbles (which hurt you for some reason), very quick and
painful starfish, blowfish that blow up into four attack projectiles,
and mini submarines.
Ok, the best strategy would be to just float forward along the bottom,
you'll avoid most of the enemies like that. If you have to swim over
a clam or tentacle or something, use A button to swim quickly. Use
this strategy until you get to the blue steel structure.
Once you get here swim up. You'll come across some vents that try to
push you back and other stuff like extra lives. You should also spot
a square black hole in the wall. Go in and pick up the extra goodies.
Leave and keep going right, staying close to the top.
Eventually you'll reach the reef tunnels. In here I suggest you take
the top path. Through here you'll find some eye beams and a room all
the way at the top of the tunnels. There's some fish in the room that
blow up to reveal some icons. Continue to go right until you go down
the big tunnel and right through one more. At this point you'll see
a bunch of different tunnels, but only one of them leads to the exit.
The exit is the one with the fish swimming in it, but if you want
points you can collect the ones in all the other tunnels.
Next you'll come across one big tunnel. In this tunnel there are more
blowfish, spiked mines, jellyfish, manta rays, and this time giant
crabs! The only part of the crabs that'll bother you are their giant
pincers, and if the pincers grab you, you'll lose a life. Easiest way
to avoid the pincers is to wait for them to go down, then quickly swim
through the gap. Make your way through and eventually you'll see the
good ol' blue B icon.
-The Path to the Lair-
Enemies: Hermit crabs, squids
You start off in a steel chamber that eventually goes dark. The only
light comes from the target that's looking for someone to hit, so
obviously you want to avoid the target's crosshair, unless ya wanna
lose a HP. Also beware the floating hermit crabs. Head straight until
you hit a wall, then float down as you hold right. A gap will appear,
go through quickly and hold up to return swimming along the top.
Continue sticking to the top until you hit another wall, then float
down again until you come through another gap. Float up once more,
head right again, and find the planet icon, known as the Limbo Zone!
In case you didn't manage to beat the Limbo Zone, head back to the
place where you turned up to get in the tunnel, then float down. Keep
heading right and up until you see the B icon, then get out of there.
Before we move on, let me just say that there are a lot of icons and
such scattered through out the chamber. Getting them can sometimes be
too dangerous, on account of the many hermit crabs and the roaming
target. If you wish you can look around for stuff, but the Limbo Zone
stage should get you all the extra stuff you need.
Next you'll pass through another giant crab tunnel. Pretty much the
same as the last one, except this one is filled with holes which
little squids come out of. Make your way through, don't forget to
pick up that tornado icon. Get to the B, time to move on.
-The Lair-
Enemies: Octopus
Finally out of that damn water. But, of course, it gets harder. As
you go up the conveyer belt you'll notice some light blue platforms
on your right. Try jumping on one of them. As you'll see, they sorta'
get pushed down like a spring. Keep this in mind... Eventually
you'll reach the platforms with the word ON on them. Jump on these
to turn the switch OFF. What you turn off are the water vents placed
in the wall. If you don't turn them off they can hurt you.
Once you reach the top kill off the octopus and take the conveyor
belt back down the left side. This way only leads to some icons, and
to get back up just jump back up the conveyor belt. Once you're done
head to the right and go up the next conveyor belt. Take it all the
way up then back down again. Once you're near the bottom you should
see a blue platform down there, jump on it.
From there jump back on to the solid ground. From here there are a lot
of platforms to jump, so feel free to take a break. Go have a drink,
take a pee, maybe even watch TV.
Well, it's not really hard. But if you've been playing and you're here,
well, I know my eyes were tired by this point in the game. Anyway,
jump across them until you reach the small waterfall, consisting of
yellow water. Jump on to the platform on the right of this waterfall,
then jump on to the one right below it. From this point go left, then
right when the platforms turn that way. At the end of the line you'll
get the infamous orange B icon, which lets you fly. Use this to continue
heading right then up, collecting all that cool stuff. Finally you'll
reach the doorway and the familiar blue B. Then, time to meet...
-Dr. Crab-
Enemies: Dr. Crab, hermit crab
That's right, that evil denizen of the deep himself has challenged
you! First thing you'll notice is that pressing B makes you hold up
your fist. Use this to beat Dr. Crab. As he jumps around, wait for
him to make a high jump and land on you. Be ready, and as he's about
to hit you hold B. He'll get it right in the kisser, and if you did
it right he'll be thrown against the right wall. Do this three times
and he'll be thrown into another lab. Actually, Dr. Crab is relatively
easy, just always make sure to hit him after a high jump, when his
claws are aimed downward.
The annoying thing here is that little crab. In the first lab he's
pretty slow, doesn't really bother you. In the second lab he gets
faster, sometimes running into you. Come the third lab, well, he
doesn't leave you alone. Best thing to do is not get hurt in the first
two labs, so you'll have plenty of HP to spare in the third one. Once
this is over it's time to warm up a bit.
--------------------------------------------------------------------
3.3 20,000 Miles Under the Earth
--------------------------------------------------------------------
-Underground caverns-
Enemies: Snakes, lava drops, bats, robotic orbs, lava goons
Hahahahaha, welcome to hell! Seriously. This stage, well, this whole
level is seriously hard. The previous two levels were the warm up for
this. Not too difficult to get through the stage, just a lot of enemies
and other obstacles to avoid. A good tip would be to avoid anything
orange or red, no matter what it is. Also, obviously, be weary of the
snakes, bats, robo orbs, and lava goons. Remember the rats in the
Junkyard stage? Well, the snakes are the same deal. They can't be
killed easily, so just jump over them. The bats just require a bit
of ducking.
All right, once you start you have a choice of either right or left.
Go to the right and pick up the eye beams, then from there it's your
choice. To take out those lava walls use your eye beams. If you take
the left path you'll get some eye beams, if you head right you'll get
an HP. Also remember that those little mounds shoot out lava drops.
After you've reached the next floor you should eventually run across a
narrow shaft that goes down. The trick to getting through safely is
holding B as you fall through. This'll make Bartman hold out his hands
and slow down. Use this to avoid getting hit by the drills in those
narrow shafts.
For the next floor it's best to stay to the right. Eventually you'll
see a 1st icon and some other stuff. Then just take the narrow shaft
down to the next floor. You can choose to go to the left, but there's
only another shaft that leads to the same floor. Might as well pick up
the extra life on the right.
Once you reach the next floor, get that radiation symbol (you know you
need it), and get ready for three shafts. That's right, three ways to go.
The best path is the one farthest to the left because through here you
get the almighty planet icon and some exclamation points. Just go right
to head to the spot where the other two shafts would have taken you.
Once you make your way to the lava pool use the platforms to get across.
You can't make regular jumps here, you have to hold A to run fast and
then jump further. Be careful because the lava goons fly up from the
lava pool to the ceiling. Eventually you'll reach a purple bridge full
of gaps. Fall through the second gap in the bridge to pick up the B
icon, the one that lets you fly. Now at this point you have two options.
Use the B icon to fly straight ahead until you reach another set of
platforms, or fly up and pick up all the icons 'n stuff. If you
choose to use the flight to get all the icons, you're going to have
to jump across all the gaps using the hold A method. If you choose
to fly straight, you'll miss the extra lives, HPs, and exclamation
points. My personal choice is to fly straight, but that's just me.
So, if you fly straight get ready to get your ass kicked. You'll have
to fly over a pool that has a ceiling over it. This one is just like
the last one, including the flying lava goons. These guys are the main
problem in flying, they always manage to hit you if you fly straight.
Best thing to do is slow for a second when you see one, or just avoid
them as best as possible. If you were fast enough you'll reach another
pool with platforms over it right when the flying power ends. Follow
the platforms and you should see another B on an upper-right platform.
Take this and wander around, going up and down then right. The best
way to go would be up to get the extra life, then head right and
collect everything along the way. You should have enough flying power
left to make it through the opening in the wall and shoot out the lava
wall to get the orange B icon.
Damn, that was a lot! Please folks, grab the planet icon and use the
shortcut. There's too much to go through when all you have to do is
beat the Limbo Zone bonus stage (see guide for Limbo Zone below).
-Underground city-
Enemies: Gargoyles, trolls, red bats, mounted guns
All right, this place is one hell of a maze. The gargoyles and trolls
aren't big problems, so just kill them if they get annoying. Also,
when ever you see a purple stone statue head with water coming out of
it's mouth, jump over the spot where the water goes through the floor.
Otherwise you'll fall through. Keep one important thing in mind: you
can not jump off a platform. Do this and you'll instantly die. Also,
do NOT grab any cold breaths. Hopefully you've gathered plenty of eye
beams, and you definitely don't want to lose them.
Proceed to the end of the walkway to find a green door and a purple
door. The purple door leads to some eye beams and an exclamation point,
so get them if you want. Head back to the green door and go through.
At this point you can either go up or down, and both paths lead to the
same place. I'll cover both ways so you won't be lost.
1. Go down to go through a single door. Then take the next door to your
right. Then take the right door again. At this point DO NOT take the
middle door. It will only lead you back to the beginning. Take the
door farthest to the left. Grab the radiation symbol and take the next
door. Take the door on the right, then take the one on the left. Then
finally take the door on the left to go to THE room.
OR
2. If you choose to go up, take the door. Follow the walkway all the
way to the right, collecting only eye beams and enter the next door.
Follow the walkway to the right again. You'll be in THE same room as
the bottom path. Obviously the top path is a bit shorter, but also has
more enemies than the bottom path. I suggest the bottom path.
Make your way to the top of the room and ride the red platform down,
watch the gun. Go through the door and you'll be in a room with three
other doors to choose from. The two middle doors will take you back
to the tunnels you just came from, so only go through there if you
want some exclamation points or some HPs. Take the left door, then
follow the walkway all the way to the green and red doors. Don't take
the left red door unless you want to return all the way to the
beginning.
Take the green door, then left to the next door, then up this room to
another door. Head right down the walkway to another door, and you'll
be in another multiple door room. Take the left door, then you can take
either of the two left doors to end up in the top-left corner of that
same room. From here enter the right door, then the right door. The
door on the very left will lead you to another door that has a
radiation symbol and some eye beams. Back track back to the four door
room and take the one second to the left, then take the right door.
Follow the walkway to the right, then to the left. Make your way
through the green room, then down the walkway to finally get out of
here.
-Lava Man-
Enemies: Lava man
After all that, what's your reward? A battle with Lava Man. Semi
difficult, but nothing too bad. The hardest part is those two lava
balls he throws out. The falling drops also hurt you. The basic way
to beat him is to freeze the water drops that fall from the ceiling
so that the frozen water falls on his head. But it's not that simple.
If you stand on a platform on his immediate right or left, you will
be hit.
One easy method I found is to stand on a platform until he comes out
right below you. If one of the water drops is on it's way down before
you see his hands charge, freeze it quickly. If you were quick enough
it'll freeze and hit him. You can also freeze a drop from far away,
if you've mastered the timing of the falling drops. Keep one thing in
mind: there is no time limit.
Do not risk taking a shot if you're in danger of getting hit. Just be
aware that you only have 99 cold breaths. After five hits you'll see
the end of Lava Man, and finally save Radioactive Man!
--------------------------------------------------------------------
3.4 Brain-O The Magnificent
--------------------------------------------------------------------
-Brain-O-
Enemies: Brain-O
Kinda' easy actually, for the last boss. As soon as the battle starts
head over to the bottom-left corner and duck. You should receive 20
eye beams.
After this just shoot some beams straight ahead, making them bounce
off the bumper of the tank and fly up. The trick here is to make the
deflected eye beam bounce off of Radioactive Man and hit Brain-O. Just
wait for Radioactive Man to hover over the tank, then let loose a couple
of eye beams. If he gets near you don't worry.
Often if you're ducked down in the far left corner he'll jump over.
If he shoots out a missile, just jump over it. Hopefully you've gathered
enough lives to last through the battle. After five hits Brain-O will
be no more.
You just beat this obscure gem called
BARTMAN MEETS RADIOACTIVE MAN!!! CONGRATULATIONS!!!
====================================================================
===== 4.0 THE LIMBO ZONE (BONUS STAGE) =============================
-Limbo Zone-
Enemies: Blue aliens
This isn't a regular stage, so I put it in it's own section. You get
this bonus stage if you find the planet icon in each level. However
it is VERY important, at least if ya wanna beat the game.
In the Limbo Zone you'll notice lines of space debris moving at
angles. Get on one of these and it will change direction from up-right
to down-right. That's how these lines of debris work: every time you
step on a piece of debris, all the lines change direction. Anyway,
once you get the 1st icon, quickly make a small jump and land back on
that same piece. It will go from down-right to down-left. After you
go down a bit further you'll see a blue alien just chillin' on a piece
of debris.
As the debris you're standing on makes it's way down, face the alien
and shoot him full of eye beams. He'll die and will leave a triangular
orange B icon. Get this! With this you can now fly around! While you're
flying you can collect tons of lives and max out your eyes beams at 99.
Head right first and collect that one 1st icon if you missed it, then
head left, collecting EVERY icon you see. Once you come to the next
alien, in the corner, kill him and you will get another orange B icon,
to keep you flying a bit longer. Each orange B icon lasts a while
anyway, so don't worry about falling.
Head up from the corner, once again killing every alien and collecting
every icon along the way. Once you reach the top-left corner, head right,
collecting every icon and killing any alien you see. Once you reach this
corner, go down and (you should know this by now), collect every icon and
kill every alien. Go down past the last alien until you see a lightning
bolt icon and a 1st icon. Collect these and...
POOF! Congratulations, you just took a secret shortcut to the next stage.
You can only take the shortcut successfully if you collect EVERY icon,
even the ones left by the aliens. I used the path above, but feel free to
go whichever way works for you. Never touch the red area on the edges of
the Limbo Zone, these will cause you to fall out and return to the current
stage. As for the 60 second time limit, don't worry. Eventually you'll be
breezing through the stage with plenty of time to spare.
Folks, I can not stress enough how important the Limbo Zone bonus stages
are. You get an extreme amount of points and lives here, and believe me
you'll need the lives later in the game. Practice in the first one if you
need to, what ever it takes to master the Limbo Zone.
All right, good luck!
====================================================================
===== 5.0 CODES & SECRETS ==========================================
Game Genie Codes for NES
Unlimited lives:
OLVYAZOP
Unlimited credits:
SZENNEVK
Unlimited energy:
AAUYPYGA
Unlimited cold breaths:
AAKYKPPA
====================================================================
===== 6.0 LEGAL / MISC. ============================================
--------------------------------------------------------------------
6.1 Version History
--------------------------------------------------------------------
July 02: Version 2.1
- - - - - - - - - - -
Yup, I'm still at it. I just updated the format again.
March 22: Version 2.0
- - - - - - - - - - -
I can't believe this guide reached 2.0. Anyway, I changed the format
and made the guide more pleasing to the eyes.
Feb. 10, 2002 - Feb. 13, 2003: Versions 1.0 - 1.9
- - - - - - - - - - - - - - - - - - - - - - - - -
Um, this section was just full of pointless version history, so I've
shortened it. I wrote the guide, fixed all mistakes, added codes,
and added little tid bits.
--------------------------------------------------------------------
6.2 Guide Credits
--------------------------------------------------------------------
Thanks to...
1. Matt Groening. The man created 'The Simpsons', which has been on
the air for 14 years and is still going strong. Shine on you crazy
bearded bastard!
2. If I thank Matt Groening, then I also have to praise the hundreds
of individuals who are involved with the show. To the writers, voice
actors, animators, producers, gofers, and every other person
involved... thank you!
3. Wilson Lau gets mad props for his kick ass 'Bart vs. the Space
Mutants' guide. It inspired me to write guides for Simpsons video
games.
4. Nintendo and Imagineering for making the game.
5. A good Radioactive Man site that helped with some general
Radioactive Man and game info:
http://www.geocities.com/dh374/radio0.html
6. Rey Esteban for letting me know that this game did not come out
for the Gameboy.
7. Thank YOU for reading. After all, I didn't write this for my own
health...
--------------------------------------------------------------------
6.3 Contact Information
--------------------------------------------------------------------
The address is: darksub01@yahoo.com
The issue of too many e-mails isn't a problem, so I'll most likely
respond to any questions (for now). But, I do delete e-mails without
a subject. Put 'Bartman Meets Radioactive Man' or something similar
in the subject line.
--------------------------------------------------------------------
6.4 Legal Stuff
--------------------------------------------------------------------
1. "Bartman Meets Radioactive Man" is copyright © 1992 Acclaim
Entertainment Inc. The Simpsons and any related Simpsons characters
are property of Twentieth Century Fox Film Corporation.
2. This guide copyright © 2002-2003 SubSane. This guide may be
distributed freely as long as it remains in it's ORIGINAL and
UNALTERED form. It is only for private use and may not be reproduced
for commercial purposes.
If I discover that this guide has been altered in any way and is
being displayed publicly, I reserve the right to have the guide
removed from that location.
3. The following sites will always have the latest version:
GameFAQs: http://www.gamefaqs.com
IGN FAQs: http://faqs.ign.com
CBG's VGC: http://www.simpsoncrazy.com/cbg