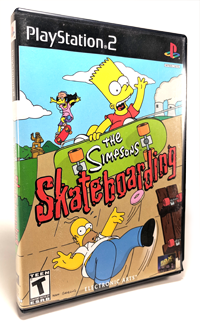
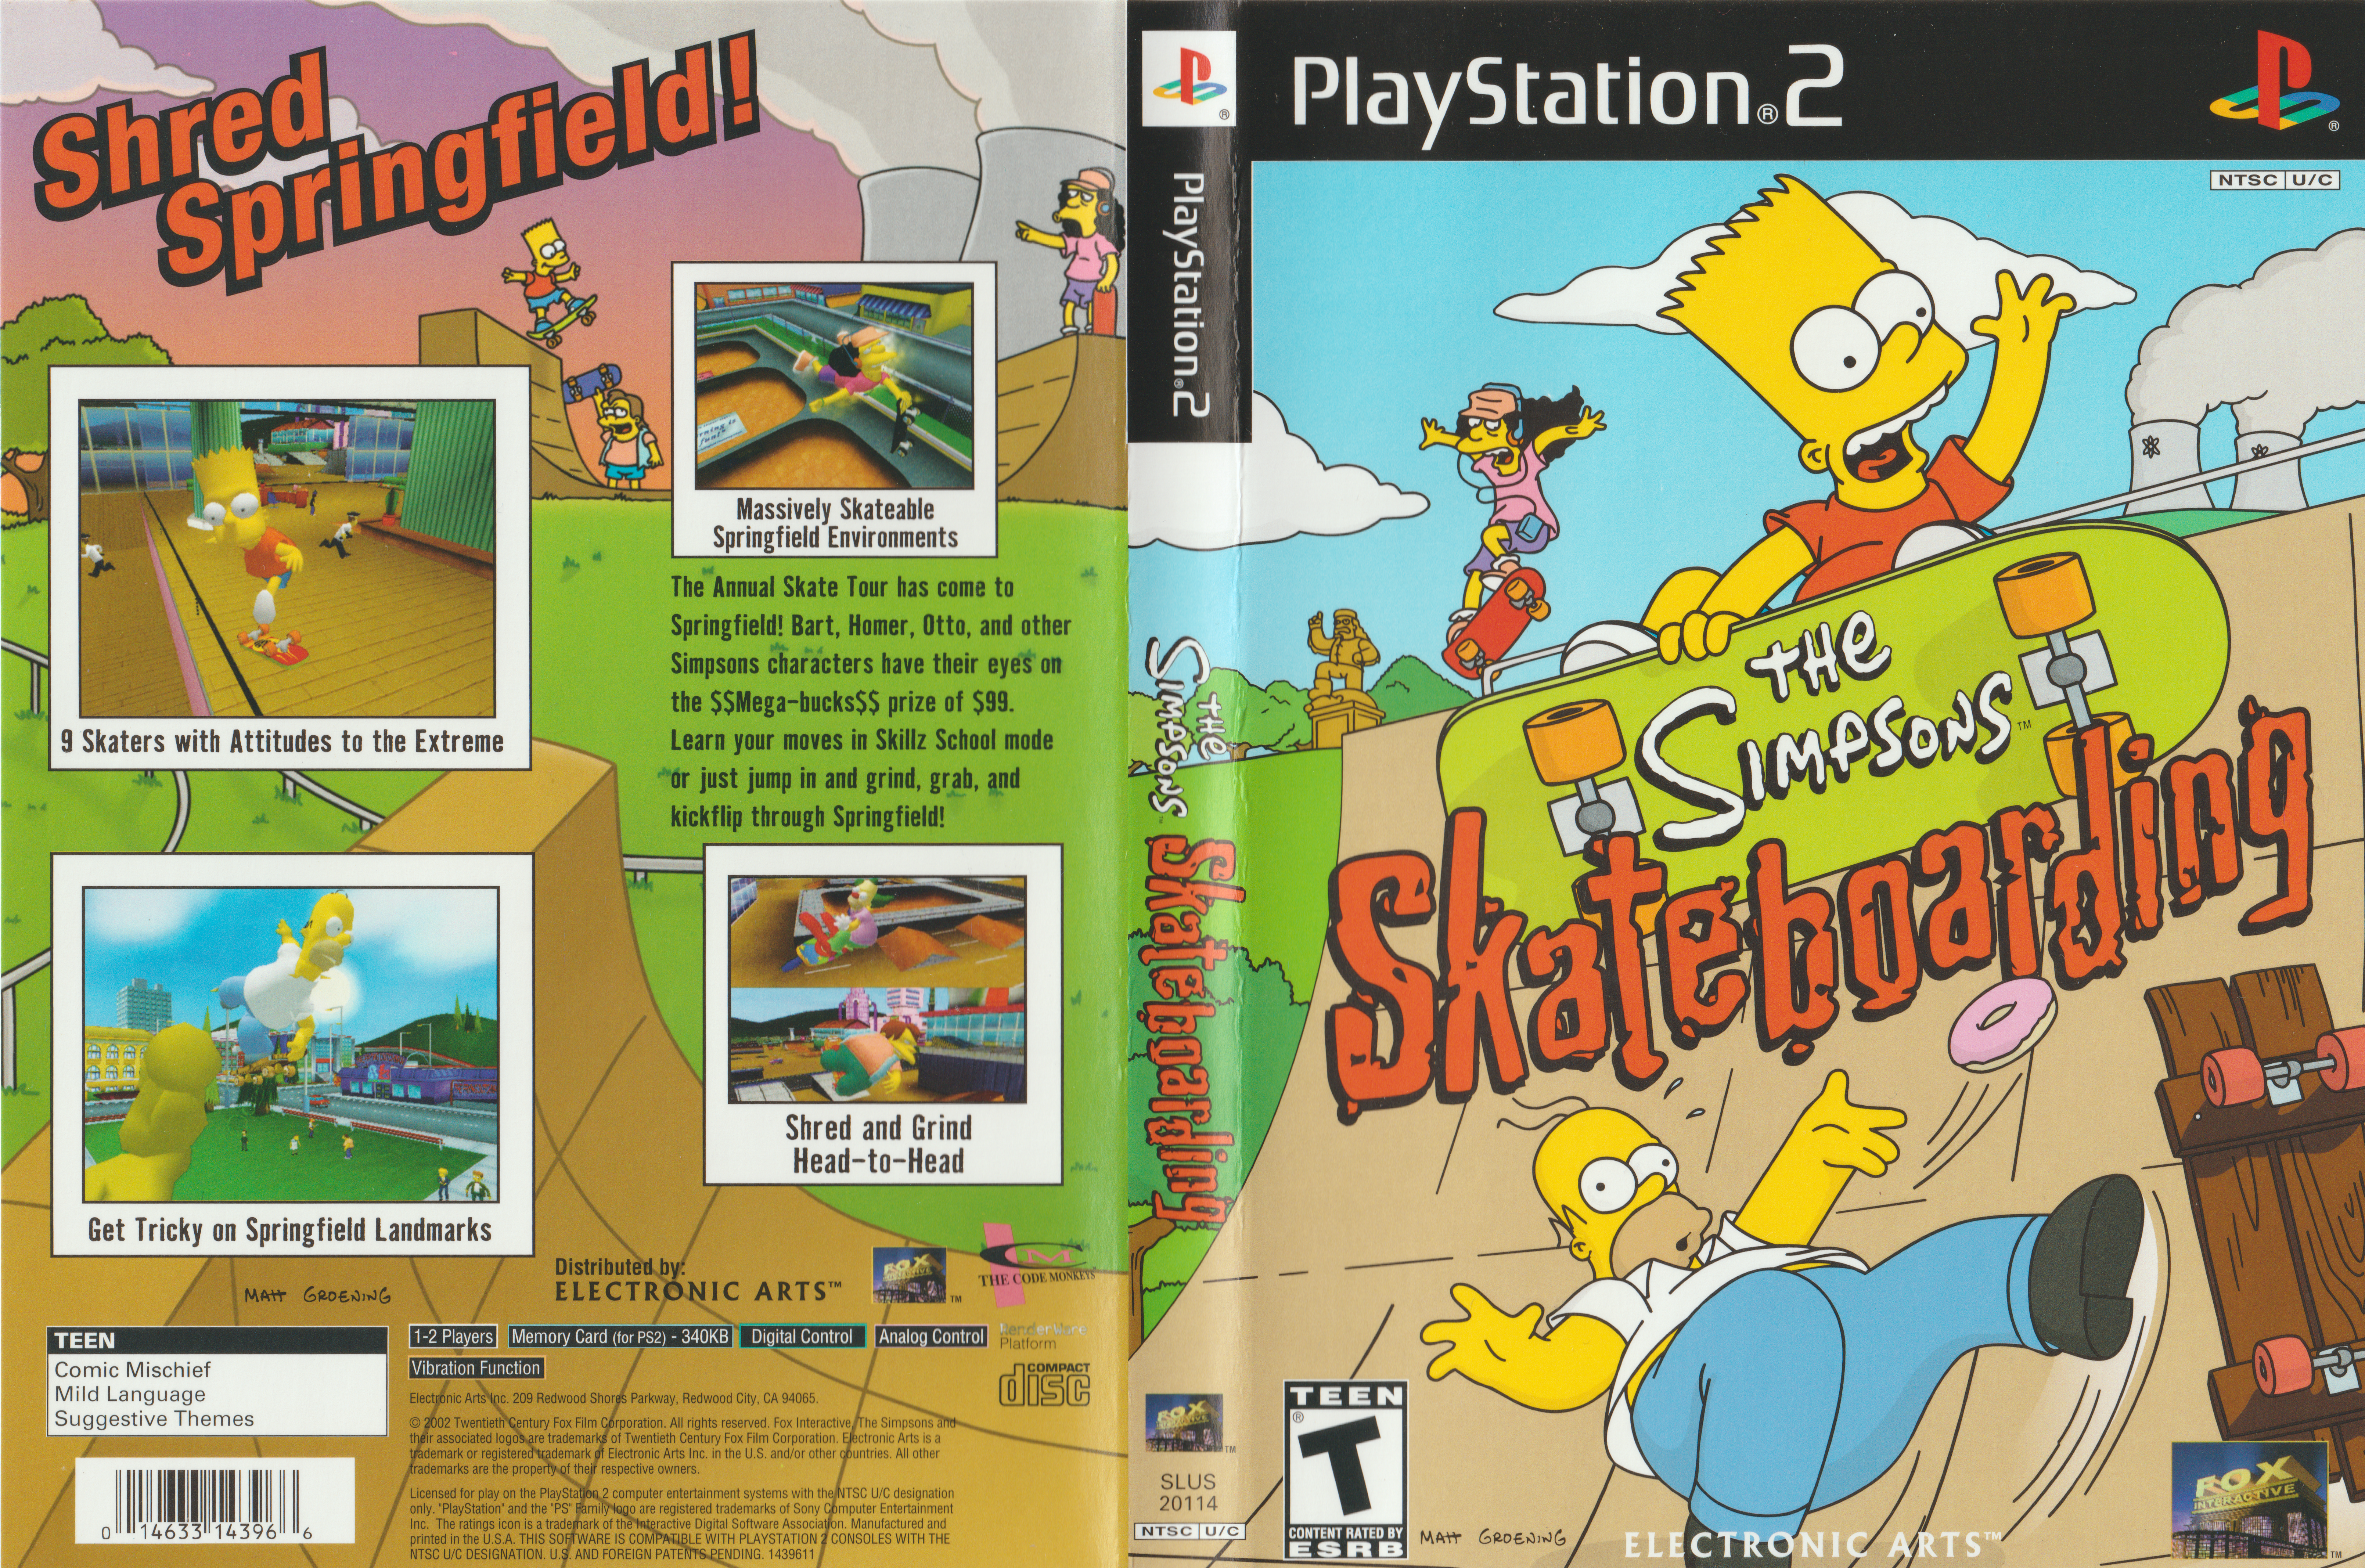
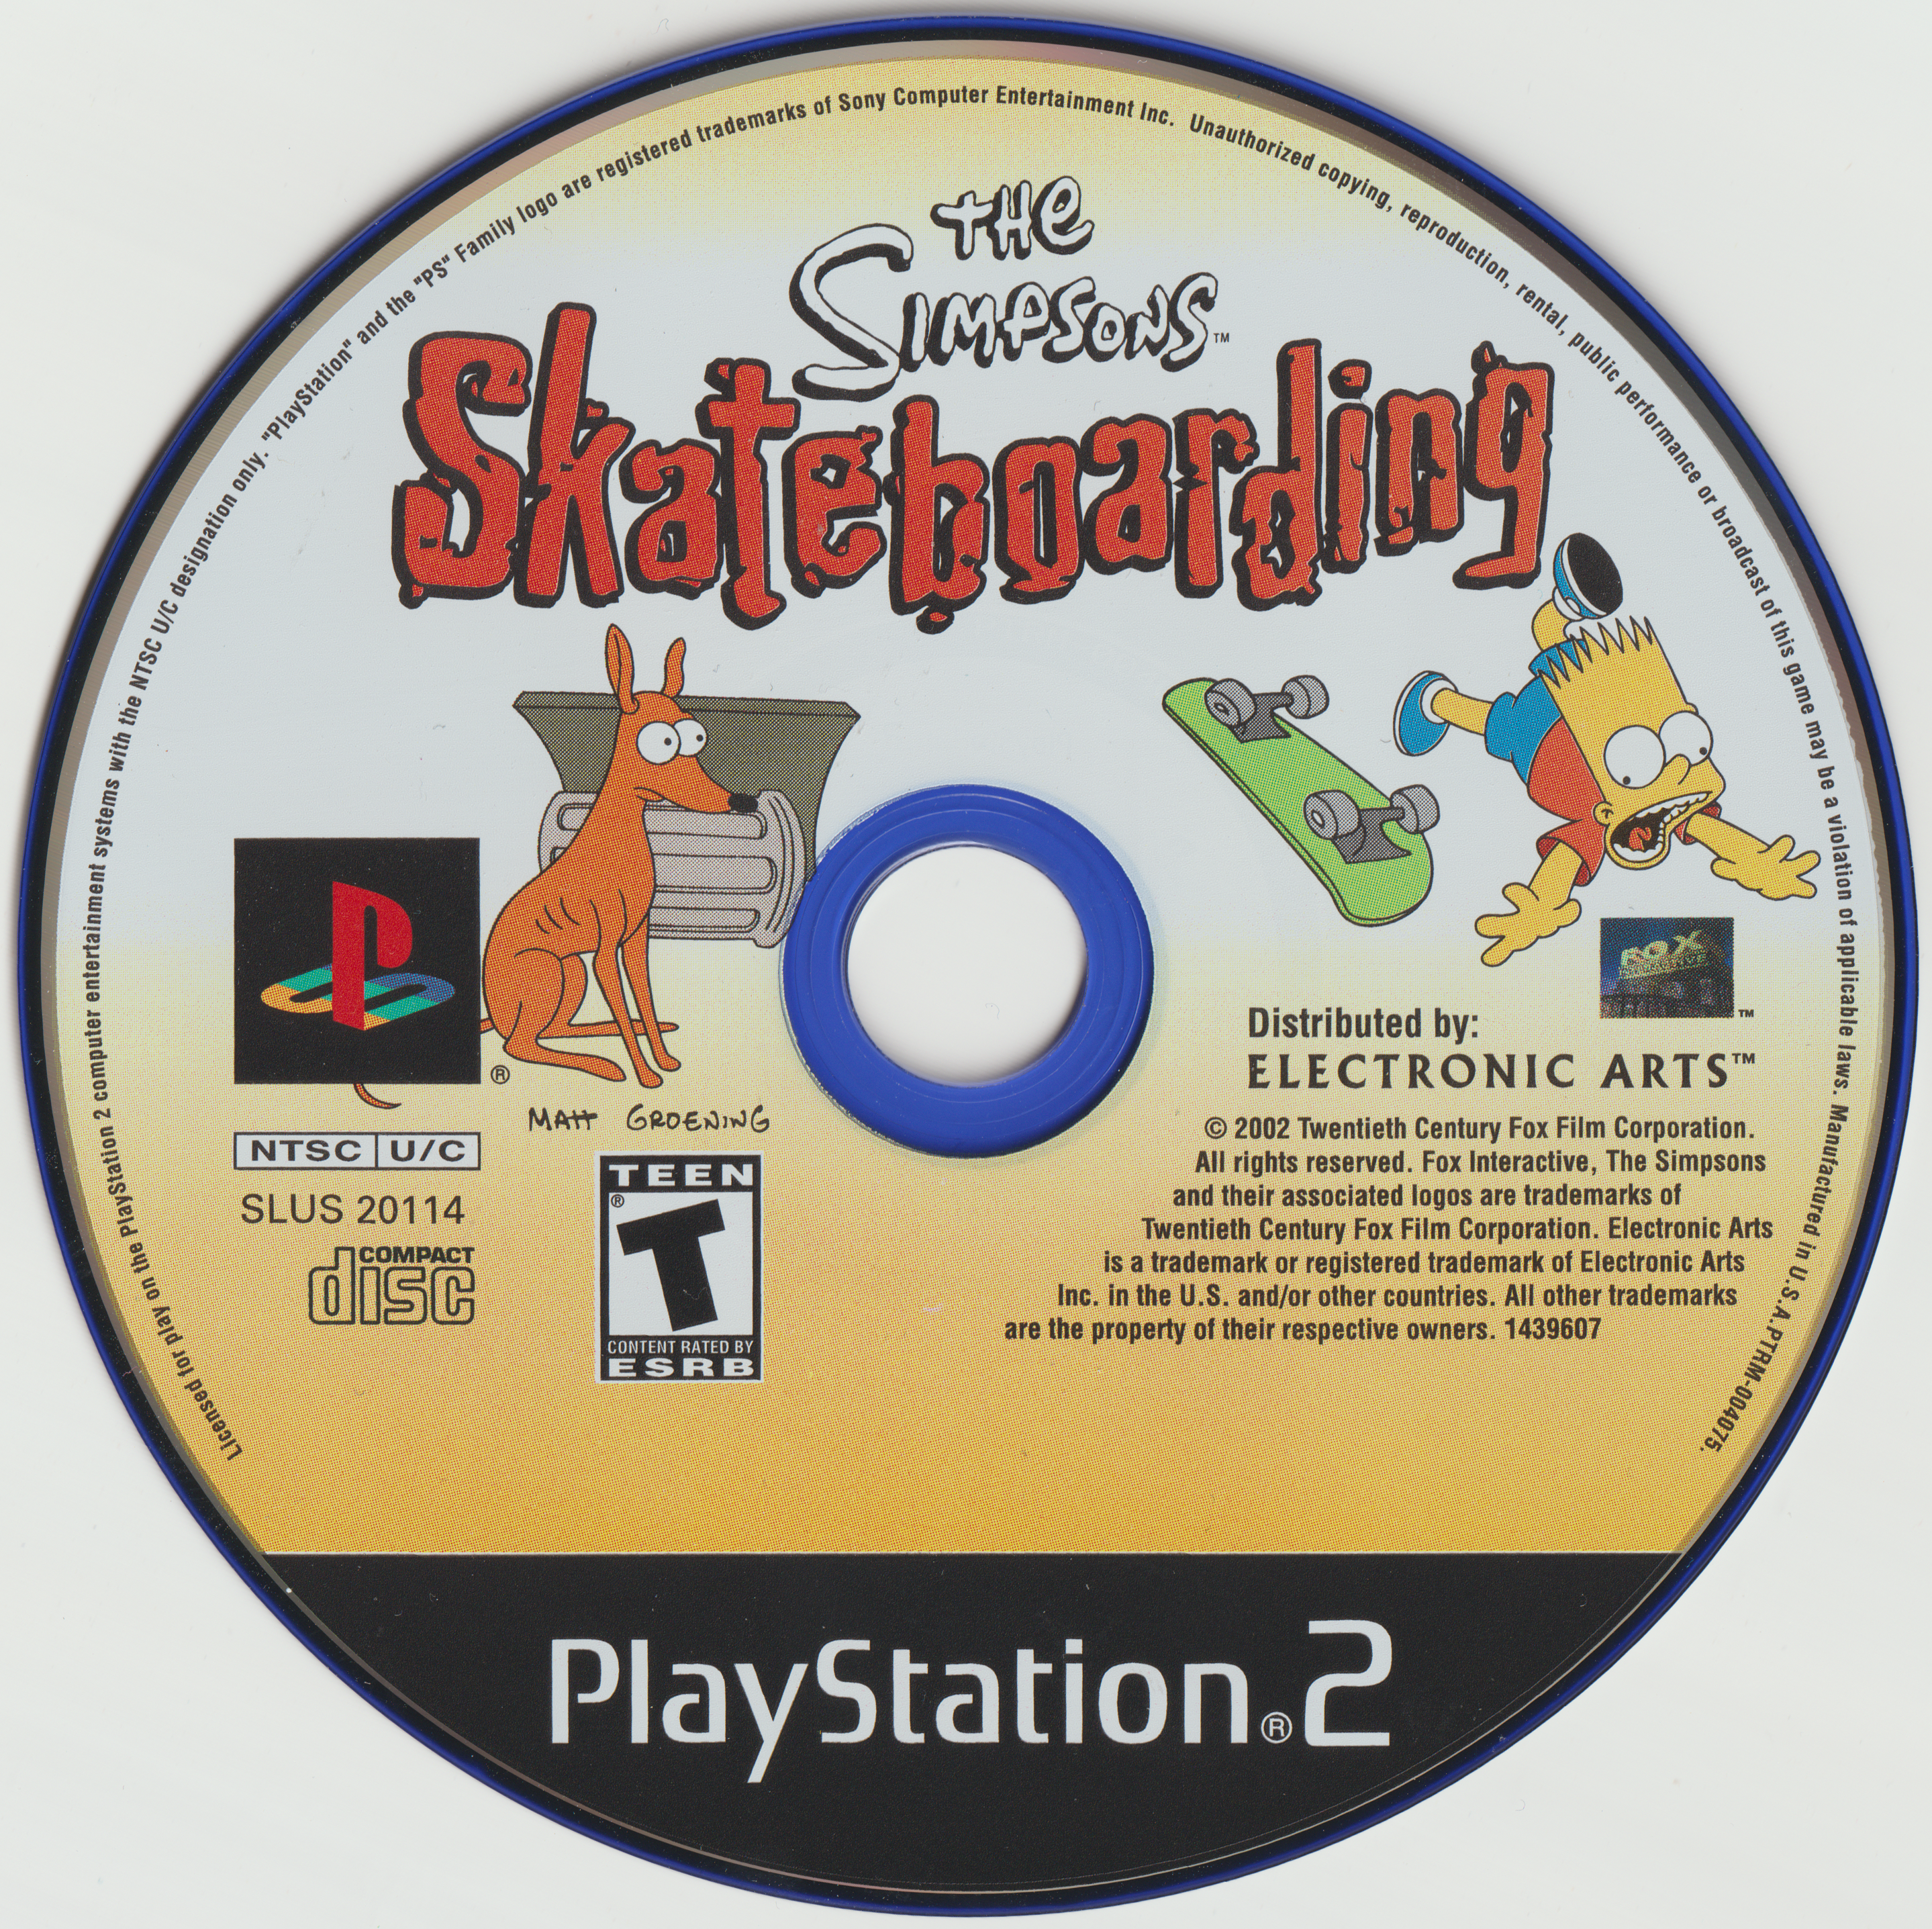
Game: The Simpsons SkateboardingRelease: November 13, 2002Platforms: PlayStation 2Publisher: Fox Interactive/Electronic ArtsDeveloper: Code MonkeysPlayers: 1 or 2Play: eBay
A cast of Springfield regulars star in this latest take on the skateboarding sub-genre of the video game world. Players start with Homer, Bart, Marge and Lisa and must build their way from lowly poser to the star of the Springfield skateboarding circuit by unlocking new skaters and locations. Highlights include a variety of skaters, many tricks to perform, and familiar and well-rendered Springfield locales such as Springfield Elementary, the ill-fated Monorail, and the location of Springfield's greatest (and most painful) skateboarding accident, Springfield Gorge.
Behind the Pixels
Files
Images
Videos
Codes/Cheats
Guides
Click to open PDF file.
By the Numbers
Photographs
High Resolution Scans
Screenshots
Otto Gameplay VIDEO
Marge Gameplay VIDEO
Click to expand or close the codes and cheats.
PlayStation 2
SIMPSONS SKATEBAORDING CODES FOR PS2

You get codes whenever you complete the game with a character, or when you complete
a level's Skatefest with Wiggum.

Hold L1, L2, R1, and R2 at the character select screen and press the following codes:

Big-Head Homer
 Press O, X, T, S

Tightie Whitie Homer
 Press T, O, X, S

Big-Head Bart
 Press X, S, O, T

Gangsta' Bart
 Press O, X, S, T

Demon Marge
 Press X, S, T, O

Big-Head Lisa
 Press S, T, X, O

Gangsta' Lisa
 Press S, T, O, X

Big-Head Nelson
 Press T, S, O, X

Ballerina Nelson
 Press T, S, X, O

Men In Black Otto
 Press S, X, O, T

Big-Head Frink
 Press S, X, T, O

Groovy Frink
 Press X, O, T, S

Business Suit Krusty
 Press O, T, S, X

Big-Head Wiggum
 Press X, O, S, T

Man-Eater Wiggum
 Press T, O, S, X

Unlock All Skaters
 Press O, T, X, S

Unlock All Boards
 Press X, T, O, S

Unlock All Levels
 Press T, X, S, O

Get $99.00
 Press T, X, O, S

Fuzzy Skaters
 Press X, T, S, O
Click to expand or close the guides.
Walkthrough Guide
===============================================================================
The FAQ/WALKTHROUGH for THE SIMPSONS SKATEBOARDING, v1.3
Written and maintained by SubSane
Last updated August 7, 2004
===============================================================================
TABLE OF CONTENTS
1.0 GENERAL INFORMATION
1.1 Game Details
1.2 It's All About the Money
1.3 The Skaters
1.4 Navigate the Guide
2.0 THE BASICS
2.1 Game Start
2.2 Saving/Loading
2.3 Status and Menu Screens
2.4 Game Modes
2.5 Controls
3.0 SKATE THE TOUR
3.1 Skillz School
3.2 Skatefest
3.3 Timed Trick Contest
4.0 MULTIPLAYER
5.0 MOVES & TRICKS
5.1 Moves
5.2 In the Zone
5.3 Hop and Grind!
6.0 CHARACTER UPGRADE
7.0 UNLOCKABLES
8.0 CODES & SECRETS
9.0 GUIDE TO SPRINGFIELD
10.0 LEGAL / MISC.
10.1 Version History
10.2 Guide Credits
10.3 Contact Information
10.4 Legal Stuff
===============================================================================
===== 1.0 INTRODUCTION ========================================================
-------------------------------------------------------------------------------
1.1 Game Details
-------------------------------------------------------------------------------
The Simpsons Skateboarding was released on November 13, 2002. It was the second
Simpsons game released for the PS2, after Simpsons Road Rage.
Developed by Code Monkeys and published by Fox Interactive and Electronic Arts.
-------------------------------------------------------------------------------
1.2 It's All About the Money
-------------------------------------------------------------------------------
The Annual Skate Tour is coming to Springfield! It's open to locals only, so
that means only you and your fellow Springfieldians can enter. Everybody in
town is going to have their eyes on that $99 Grand Prize, including, naturally,
the Simpsons.
So grab your skateboard, hit the course, and get ready for the Annual Skate
Tour championship!
-------------------------------------------------------------------------------
1.3 The Skaters
-------------------------------------------------------------------------------
-[Homer]---------------------------------------------------->
The patriarch of the Simpson family. When he's not sleeping during nuclear
meltdowns he likes to knock back a few cold ones at Moe's Tavern.
Speed....4
Turns....1
Jumps....1
Grabs....3
Grinds...4
Alternate costume: Homer in his underwear.
Items collected: Donuts, pizzas, and Duff beers.
-[Bart]----------------------------------------------------->
The little hellion, known as "boy" to Homer. Together they start most of the
Simpson family's adventures. Bart likes to skateboard and make fun of Principal
"Big Butt" Skinner.
Speed....2
Turns....2
Jumps....2
Grabs....2
Grinds...2
Alternate costume: Bart in baggy clothing.
Items collected: Radioactive Man comics, cherry bombs, and Krusty dolls.
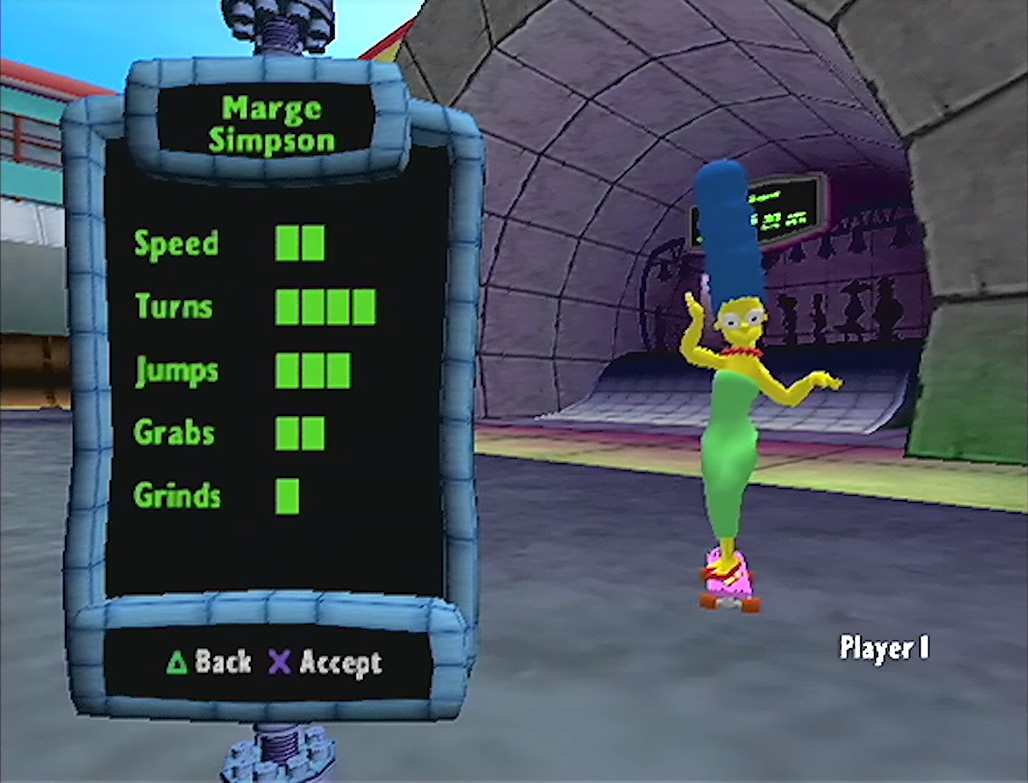
-[Marge]---------------------------------------------------->
The voice of reason and calm within the family. Though Marge is a rational
woman, she often gets caught up in crazy situations. She likes to spend her
time folding.
Speed....2
Turns....4
Jumps....3
Grabs....2
Grinds...1
Alternate costume: Marge as a pale demon.
Items collected: Hair dye bottles, hand vacs, and grocery bags.
-[Lisa]----------------------------------------------------->
Lisa, Springfield's answer to a question no one asked. You'll hear her opinions
whether you like it or not. Lisa likes to do homework and play the saxophone.
Speed....3
Turns....3
Jumps....2
Grabs....4
Grinds...1
Alternate costume: Lisa in baggy clothing.
Items collected: Saxophones, Malibu Stacys, and copies of the US Constitution.
-[Nelson Muntz]--------------------------------------------->
Nelson has a tendency to show up at the worst times, often interjecting with
his famous catch-phrase, "Ha ha!". Nelson likes beating up nerds and shootin'
stuff.
Speed....2
Turns....2
Jumps....1
Grabs....3
Grinds...3
Alternate costume: Nelson as a pink ballerina.
Items collected: Cherry bombs, lighters, and brass knuckles.
-[Otto]----------------------------------------------------->
"Uh, Otto's not here man." Yup, Otto's way out there. He digs 80s speed metal,
he drives a school bus, and he sleeps in abandoned houses.
Speed....3
Turns....1
Jumps....3
Grabs....1
Grinds...3
Alternate costume: Otto as a Man in Black.
Items collected: Eviction notices, electric guitars, and ROCK t-shirts.
-[Professor Frink]------------------------------------------>
The good professor is Springfield's resident genius. Aside from inventing all
kinds of crazy things, Frink is into Xena and other "nerdy" ventures.
Speed....2
Turns....2
Jumps....3
Grabs....2
Grinds...2
Alternate costume: Frink in a groovy skater costume.
Items collected: Calculators, pocket protectors, and ray guns.
-[Krusty the Clown]----------------------------------------->
It's a laugh a minute with this clown, but only on camera. Off the camera he's
a lonely, bitter drunk who enjoys cheap porn and betting.
Speed....2
Turns....3
Jumps....1
Grabs....3
Grinds...2
Alternate costume: Krusty in a business suit.
Items collected: Boxes of cigars, Krusty burgers, and cream pies.
-[Chief Wiggum]--------------------------------------------->
Constable Wiggum, the short and pudgy arm of the law in Springfield. Sitting is
a good thing with this guy. Sitting, and enjoying a large box of donuts.
Speed....4
Turns....1
Jumps....4
Grabs....1
Grinds...3
Alternate costume: Wiggum in a cannibal costume.
Items collected: Walkie talkies, police badges, and speed tickets.
-------------------------------------------------------------------------------
1.4 Navigate the Guide
-------------------------------------------------------------------------------
This guide has a quick-find system in order to help those folks who don't feel
like randomly scrolling through text in search of some small thing. Just look
above in the table of contents to find the section, highlight the reference
number (such as 1.1), and hold ctrl and C to copy it. Then, hold ctrl and F to
open a Find screen, and finally press ctrl and V to paste the number and search
for the section.
===============================================================================
===== 2.0 THE BASICS ==========================================================
-------------------------------------------------------------------------------
2.1 Game Start
-------------------------------------------------------------------------------
-[New Game]------------------------------------------------->
This option will start a new game. WARNING: If you start a new game and save,
it will overwrite any saved game you have.
-[Load Game]------------------------------------------------>
Choose this option to load a saved game.
-------------------------------------------------------------------------------
2.2 Saving/Loading
-------------------------------------------------------------------------------
-[Saving]--------------------------------------------------->
The option to save is sort of hidden. Press Pause at any point in the game,
then go to Options. Save is the third option in there.
-[Loading]-------------------------------------------------->
You can load a saved game at the title screen.
-------------------------------------------------------------------------------
2.3 Status and Menu Screens
-------------------------------------------------------------------------------
-[In-game status]------------------------------------------->
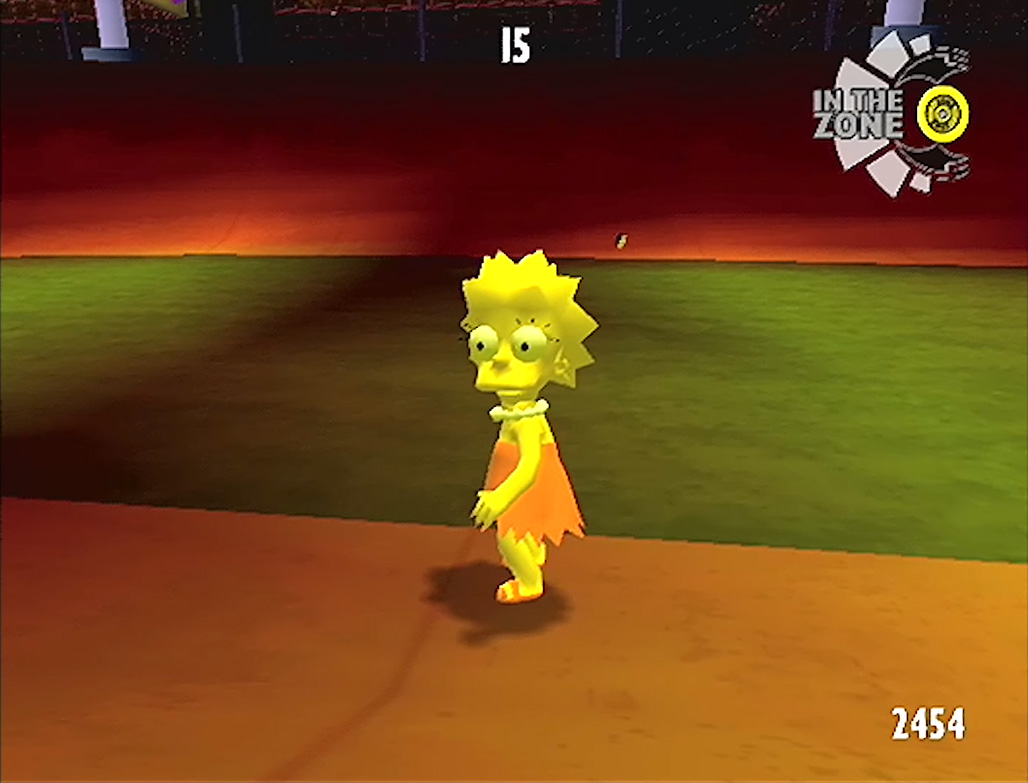
In the Zone: The meter at the top-right corner is the In the Zone meter. If
you do enough tricks and get In the Zone, you can perform special grabs and
inverts.
Score: The number in the bottom-right is the total score for that run. Do
tricks to get more points.
Tricks: Whenever you do a trick or combo, it will show up in the bottom-left
corner.
Manual/Grind balance: If you do a manual or grind, a balance meter will
appear. Use the Left, Right, Up, and Down buttons to remain balanced and get
more points.
-[Pause menu]----------------------------------------------->
The Pause menu is more like the Game Options menu, which does not appear at
the main screen.
Resume: Resume your game.
Set Start: If you are over a blue swirly circle, you can choose Set Start and
that point will be activated.
Restart: Once you have activated a Set Start, choose Restart to return to that
point.
Trick List: View all the tricks in the game.
Mode/Level Select: This is a quick way to change mode, or choose a different
stage.
Options: Look below for the Options menu.
Quit: Quit the Pause menu and return to the game.
-[Options]-------------------------------------------------->
You can access the options by going to the Pause menu and choosing Options.
Play List: Here you can scroll through all of the music in the game and choose
five tracks to make a playlist. These five songs will be the only ones that
play until you go back and choose some different songs.
Volume Levels: Adjust the volume for sound effects, music, and dialogue.
Save: Choose this option to save your game.
High Scores: View the high scores for Timed Trick Contest.
Cheat Codes: Go here to see all of the unlocked codes.
Vibration: Turn the controller vibration On or Off.
Credits: View the game credits.
Grind Arrows: When you grind, a blue arrow will appear. You can move this
arrow around to make your character land where you like.
Commentary: Turn Kent Brockman's commentary On or Off. If you're like me,
you'll be annoyed by his repetitive ranting right away.
Accept: Accept any changes in the Options menu and return to the Pause menu.
-------------------------------------------------------------------------------
2.4 Game Modes
-------------------------------------------------------------------------------
There are two basic modes in the game. Skate the Tour, which is the main part
of the guide below, and Mutliplayer.
Multiplayer is your basic two player mode. Two players can play in Timed Trick
Contest, which is where both players play for points within a time limit.
The other Multiplayer mode is HORSE. In HORSE one player does a move, and the
second player has to copy the move or he'll get a letter. Who ever spells HORSE
first loses.
And like I said, the Skate the Tour section can be found below.
-------------------------------------------------------------------------------
2.5 Controls
-------------------------------------------------------------------------------
Here are the basic controls: (T will mean triangle, and S will mean square)
Command | Action
----------------------------------------------------------------
Up | Speed up, move forward
Left/Right | Turn left and right
Down | Brake, slow down
X button | Ollie (Jump)
T button | Grind any rail or edge
O button | Jump and hold O to do a grab move
S button | Jump and hold S to do a board flip
L3 (analog) | Move skater
R3 (analog) | Move camera angle
Start | Pause the game
===============================================================================
===== 3.0 SKATE THE TOUR ======================================================
-------------------------------------------------------------------------------
3.1 Skillz School
-------------------------------------------------------------------------------
This is quite similar to Timed Trick Contest in that, once you've learned the
moves, it's very simple. I suggest playing through Skatefest and Timed Trick
Contest before playing Skillz School.
Each level will consist of six challenges, the first five not having a time
limit. The sixth challenge will be timed, and also a sort of combination of
everything you did in the previous five challenges. So, I suggest playing them
in order. Ya know, to make it easier.
The first five levels are incredibly easy. Hell, most of them show you how to
do each move right there in the bottom
corner! You can always refer to the Trick List in the pause
menu to check tricks.
Starting at level 4, they get slightly trickier. See, now you have to start
doing combos. Meaning you have to link grabs, board flips, grinds, flips, and
spins to do some crazy tricks.
I'll go through an explanation of a combo.
Ollie (This is the first trick you do)
TO Tailgrab (You do this trick immediately after the previous)
TO Late Shove-it (You do this one after the previous)
WITH Backflip (This is always a spin or flip. You would have to hold the
correct button as you do the moves above)
More important tips:
1. Remember that when it says WITH, you have to hold the correct buttons (L1,
L2, R1, R2) as you do the moves.
2. For the more complicated grabs I suggest using the left stick (L3). Stuff
like the In The Zone grabs are hard to do with the cross.
3. When you're doing a board flip (S button), remember the differences. A
board flip is done by doing the move immediately after releasing X. A LATE
board flip is done after you're in the air.
4. If there is a manual involved, keep in mind that you'll probably have to do
a set of moves, then go to the manual, then have to go back up another vert
ramp and do more moves.
If you're a beginner you can probably do the first three or four levels easily,
but after that I suggest stopping. Play through all of Skatefest and Timed
Trick Contest to get a lot better at the game, then come back to the
challenges.
-------------------------------------------------------------------------------
3.2 Skatefest
-------------------------------------------------------------------------------
Mini table of contents
======================
a. Springfield Elementary
b. Downtown Springfield
c. Burns' Manor
d. Construction Site
e. Sir Putt-a-lot's
f. Krustylu Studios
g. Springfield Mall
h. Itchy & Scratchy Land
i. Power Plant
j. Springfield Gorge
-[Objective Order]------------------------------------------>
Obviously you don't have to follow the order I use, so if you complete certain
objectives before others it's ok. I just go by the order the game uses.
-[Set Start]------------------------------------------------>
You see those swirly blue things on the ground? Those are Set Starts. When you
go over one you can press Start and select Set Start to choose that position as
the Set Start. From now on just pause and choose Restart to go back to that
position.
-[Arrows]--------------------------------------------------->
And finally, the most important thing about Skatefest. Follow the arrow. My
guide is only one way to go, so if you feel like going a different way, the
arrow will lead you to the nearest items.
a. Springfield Elementary
<---=========================--->
Ah, the school. Day prison for kids, and a relief for tired parents. Have fun
grinding the jungle gym and exploring the sewers.
Objectives:
I'll be using the hill across from the school as a starting point for
everything.
-Kid Catcher-
The first objective is pretty easy. You have to go around and catch the truant
kids. Go towards the school and fall into the half pipe right of the entrance.
You'll see Jimbo in there. Tag him to begin the objective.
From there skate out of the pipe and go right, up the hill. You'll notice the
arrow pointing to right, below you. Fall down into the ditch to go into a
sewer, where you'll find Ralph.
From there go up the ditch and turn left. The arrow will be pointing to
Milhouse, who is in front of Skinner's mother's house.
Now go down the hill left of the house. At the cross street make a left, and
go into that little park surrounded by a blue wall. There is a fountain in
there. Go to the right to find Sherri, or Terri.
Finally, exit the park at the other end and. Go straight to the other
sidewalk and turn left while on the sidewalk. There will be a gap between a
yellow and blue building, and the other twin will be in there.
-Collect SKINNER-
You can spell, right? Well, let's put those spellin' skills to good use. Go to
the hill across from Springfield Elementary. You see the two ramps at the
bottom? Ollie off the left ramp to collect the S and start the objective.
From there go to the left side of the school, grind that short red wall and
hop to get the K.
Now go behind the school. You'll see Skinner standing around. Jump to grab the
letter I behind him.
Head straight and jump off that ramp to get the N.
Turn left and skate up the hill, sticking to the right as you do. You'll see
the letter N over a short wall near the end. Just grind and hop to get it.
Now turn into the sewer ditch. Go up the small hill about halfway through and
grind the right rail to grab the E. One more to go!
Go all the way to the bottom of the ditch and enter the hole at the end. Skate
straight through the middle and ollie to grab the R that's high in the air, and
complete the objective.
-Shop-A-Holic-
Time to close down some beezness! Start at the hill across from the school and
make a left, then a right at the next street. You'll see a large yellow place
called Springfield Super-Mart. Go around the side to the parking lot and hit
the sign at the door to start the objective.
Go back up the same street and pull into the Krusty Burger parking lot. Hit
that sign at the entrance to close it up.
Poor Barney, no beer yet? Right next to Krusty Burger is Moe's Tavern. Shut
'er down.
Go around back of Krusty Burger and you'll find The Family Jewels. Hit their
sign.
The last one will be to the right. Head down the street then cut through a
skate park to get to a blue building. It's already closed, but I guess you
have to make sure they stay closed. Objective complete, with a new secret
area.
-Collect the Items-
1. This one'll take some time. Go towards the school and make a right on the
street. Before you hit the next street make another right and fall into a trick
spot to collect the first item.
2. The next one is on a jungle gym. Ok, get on the street next to the trick
spot you were just at. What you have to do is speed towards the jungle gym at
that intersection (it's purple), and grind the left rail of the two rails
facing you. Remember to hop and grind. If you start to lose balance you can
just push Left and Right to stay balanced.
3. Now go to the trick area behind the school. It's easy to spot. There will
be an item on a rail near the end. Just grind that rail to get it.
4. Now go up the big hill, towards the scary house at the top. Go into the
sewer ditch an collect the item at the top.
5. Go down the other side and skate your way to the Springfield Super-Mart. It
has yellow walls and a brown roof. Go behind it to collect the last easy item.
6. Now it's on to the medium stuff. Remember that park with the fountain in it?
Go there. As you approach one of the ramps hold X to start an ollie, then jump
at the BOTTOM of the ramp. It's the perfect spot to land in the center of the
fountain and get the first item.
7. Now head to the hill in front of the school. You have to use the ramp up
there to jump over the wall and land on a blue roof, then jump over to the gray
roof. Once you're on the gray roof just grind the gray rail at the front right
corner and get the item.
8. Go right from the school, to the jungle gym intersection. Turn right and
then make a left into the Springfield Skatepark. The item will be high in the
air on the left side of the park. Just ollie up the ramp to grab it.
9. Finally, the hard items. Go up the big hill, into the sewer ditch. In the
center of the ditch are two small ramps, and two rails. Between the rails
you'll see your goal. Go from the top and do a small ollie to jump and get the
item from the middle.
10. The second one is also a tough one. Go to the hill in front of the school
again and use the ramp to get to the blue roof on the left. Once you're there
you have to grind the red rail in the corner to get to the roof of the Krusty
Burger next door. On this roof go to a corner opposite the gray rail and speed
up. You'll need speed to grind across the very large gap. It may take a few
times, but it's fairly easy eventually.
Once you get to the next roof please use the Set Start. Trust me, you don't
want to fall and have to do it all over again. Grind the next rail and use the
next Set Start. Now you have to use those verts (the vertical ramps) to ollie
and grind to the roof. Use the two sides to gain altitude, then hold T when
you have enough height. You'll catch a grind on the roof. From there just hop
onto the roof and find another Set Start. Don't leave without setting the Set
Start. Even though some characters have a low jump ability, they can all make
it to the top of the roof.
Now find the blue roof and the red rail attached to it. Grind this red rail
(which should be easy with all the room to speed up), and keep going until you
get the second item.
11. Almost done! Go to the trick area behind the school and stick to the back
end, where the grassy hill is. Eventually you'll see a sewer pipe thing with an
open gate. Go in there to find your new board and complete the objective!
-Find the Clocks-
You might have noticed that there are different clocks all over. There are
actually three. Go to the hill in front of the school and make a right. Make a
right before the next street and you'll see a 30 second clock. Grab it and
score 1000 easy points to get $0.10.
Next go to the trick area behind the school. You'll see 60 second clock. Grab
it and pull off 2000 points to get $0.25.
Cut through the trick area behind the school and take a left on the street back
there. If you follow it to the end you'll see a gas station and a trick spot
next to it with a 90 second clock. Score 5000 points to get $0.50 and complete
this level.
b. Downtown Springfield
<---=======================--->
The businesses actually let you skate where ever? Wow, take advantage. Try and
grind the monorail around the whole city, or chill at the Kwik-E-Mart vert
ramp.
Objectives:
I'll use the Kwik-E-Mart as a reference point.
-The Telltale Head Revisited-
Take a right from the Kwik-E-Mart and head straight until you see the town
square to your left. It's the bare spot with a statue in the middle. Go towards
the statue and it'll say to knock over the trash can and distract Skinner. So
knock over the trash can that's on the right side of the path.
Once you do the barrier in front of a ramp will disappear. Get some speed and
use the ramp to jump and knock off Jebediah Springfield's head.
-Collect SQUISHEE-
Time for another spelling lesson. Turn left from the Kwik-E-Mart and you should
see Barney's Bowl-A-Rama. It has a giant bowling ball and pins in front. Find a
vert ramp in the corner and use it to grab the letter S.
Immediately after grabbing the previous letter use the purple ramp to jump over
the giant bowling lane and into the street. Use the next ramp to grab the Q and
land in the Kwik-E-Mart parking lot.
Now keep going in that direction and go over or around the vert ramp. You will
see another purple ramp. Use it to jump into the Stonecutters' yard, then use
that next ramp and grab the letter U.
Make a left and go into the town square. Quickly grab the letter I next to the
Jebediah Springfield statue.
Go towards Krusty Burger (the yellow building), but to the left. There will be
a small path next to the parking lot. Grind the red rail on the left side of
the path to grab the S.
After entering the next street make an immediate right turn. See that small
yellow wall on the left? Follow it and enter the gap at the end. Make a sharp
left and quickly grind the yellow wall on the right to get an H.
Skate along the center of this path and jump and hold T once you're about to go
downhill. You have to do this fast in order to get the E on the red rail.
Go in the sewer ditch and head towards the third half pipe. Use the vert ramp
to get the letter E. Spelling SQUISHEE may take a few tries, but it's simple.
Objective complete, and you have a new level.
-Hydrant Tyrant-
Make a right turn from the Kwik-E-Mart, then a right turn on the first street.
Stick to the right side of the street to find a hydrant. It'll be next to some
vert ramps and a light pole.
Then go back to the intersection you just came from and grab the hydrant on
that corner.
Follow that sidewalk to the left and you'll find the next hydrant on the
opposite corner.
Turn right and cross the street, the side nearest a large blue building. Go
towards the corner and grab the next hydrant.
Keep going up that street until it ends. Make the right turn and locate the
Aztec Theatre (A large purple building). The last hydrant will be in front of
a large sign for the Aztec.
Hey all right, a secret area!
-Collect the Items-
1. Yup, this again. Go to the Kwik-E-Mart. See that huge wall across the
street? You have to go around the block and to the front of that block to get
inside the wall. Once you get to the backyard just fall into the trick spot to
get the first item.
2. Go back out to the front and head down the street to the right. Make a left
at a red building called Smokey Joe's Cigars. Behind the parking lot there
will be a trick spot and the next item.
3. Now go out, on the left side of the Frying Dutchman (the purple building in
front of you). Follow that street past the Town Court and Krusty Burger.
Opposite Krusty Burger there will be a trick area. Go in there to grind a
small rail and get the third easy item.
4. From there go to the end of the street and into the gap between to small
yellow walls. The gap will lead you into a sewer ditch. Go in and you'll find
the fourth item in the third half pipe.
5. Get back out of the sewer ditch and follow the street to a green wall. Turn
left, then make a right at the next street. Immediately to your right will be
a yellow chain link fence and a gap. Go through the gap and into the center of
the trick spot to grab the last easy item.
6. Leave through the gap and cross the street to another green wall. In the
front you'll see a sign that says Springfield State Prison and another open
yellow fence. Go in and use the half pipe to get the first medium item.
7. Turn left from the prison and then a right at the City Hall, going between
City Hall and the town square. Go straight to the end and you'll notice that
the next item is high up on a rail. This one's a bit tricky. Go left, behind
the cigars place. Fall into the half pipe.
From there start going back and forth on the left side nearest the purple
building. Here you have to ollie up to the purple rail nearest the street and
grind onto it. Charge your speed and ollie up, then hold T to grind it. Now,
make sure you're grinding in the direction away from the building and hop onto
the gray rail while still grinding. Carefully hop and grind again if you need
to gain some speed. Follow the gray rail around the curve and jump over to the
blue rail before the gray one turns. Follow this blue rail onto the roof of
the cigar place. Jump onto the roof and use the Set Start, then gain some
speed and jump onto the other blue rail. Follow this one and you'll get the
next item.
8. There is a vert ramp on that street behind the Frying Dutchman (purple
building). Follow the arrow if you have to. Use the ramp to grab the item.
9. Those were medium? Damn, it's on to the hard ones now. Go to the
Kwik-E-Mart and make a left. Follow this street to the end, then make the
right. You should be behind a blue building and a yellow fence. Go into the
fenced area and start going up and down the ramps in there. Now you have to
go high enough to grind the roof of the building next to you. Just hold T when
you think you're high enough. Once you're up there hold Left and hop onto the
roof, and use the vert ramp in the corner to grab the first hard item.
10a. (Contributed by WiSK)
Above the highway (underpass actually, it's below ground level and you restart
if you fall down there), there is a bridge with some half pipes on each side.
In between the half pipes is a ramp.
Jumping off the right side of the ramp there is a grey rail to grind on. It
goes up a little and then a short hop to the left gets you on to another grey
rail (still above the highway). Then a second hop and grind to a blue-green
rail. Stay on this one with brief hopping and grinding and it will slowly go
up and to the left in a wide curve. Eventually you reach the part of the
monorail which is broken. Before the blue-green rail ends, there is a chance
to hop and grind onto the monorail. Do this carefully and then try to hop to
the left-hand monorail.
10b. (Contributed by still sick)
Simply go to the other side of the map where the monorail track has that big
dip, jump down and grind it. Now use it like a bowl - whenever you get to the
top, hold forward, and do very short and quick staccato jump and grinds. It
took me a while to get the timing down just right (it has to be done fairly
quick, but not too quickly). I've done it going both ways, but it's much
easier to just do it going the direction of the completed track. Once you
get the timing right, you should be able to go straight from the bottom
right over the top, no matter how slow you were going.
Keep in mind that you can grind forever if you just hold straight forward and
jump and re-grind whenever you need more speed. It's just like doing that,
except uphill.
11. Finally, the board! Go to the Stonecutters Headquarters next to the
Kwik-E-Mart and pick up the board to finally finish this objective.
-Find the Clocks-
Turn left, then right from the Kwik-E-Mart to pass by the police station. Enter
the yellow fence to the far left. In here you'll find a trick spot and a 30
second clock. Get 2000 points to win $0.10.
Make a left and head straight down until you see Krusty Burger and a trick
area. Find the 60 second clock and score 4000 points and $0.25.
Now head between the courthouse and town square and go to the trick spot
behind the Frying Dutchman. There you'll find the 90 second clock. Score
10000 to get $0.50 and finally be done with this level.
c. Burns' Manor
<---=========================--->
Let's see the hounds catch you while on a skateboard! Try and interrupt the
production of Burns' lightning machine, or crack the safe hidden in his
basement.
Objectives:
I will be using the front of Burns' Manor (where you start), as reference.
-Safe Cracker-
Turn around and enter the door to go into the mansion. Go through the
chandelier room and up the stairs to enter the dining room. In here take the
right path through the lasers. Once you enter the next room you'll notice a
half pipe and a rail across the top. Get to other side by grinding or going
through the half pipe. At this point turn right and you'll see a brown door.
Enter and take the long winding path to Burns' crypt. Notice that kick ass
portrait of Count Burns over the coffin.
Anyway, from the three paths in here take the one to the right. You'll know
it's the right one when you end up in a yellow room that has vert ramps,
Burns, and a safe. Now, skate to the middle and knock over that blue pillar,
then hit the urn that fell down. Burns will now be distracted. Get some speed
and grind that rail over the safe to bust it and get Burns' gold!
-Collect EXCELLENT-
The first E is at the entrance to the mansion.
The X will be at the top of the stairs inside.
The C is on top of the dining room table.
Go through the laser hall and grind the rail in there to get the next E.
Make a left through another laser hall and get the L on the green walkway.
Head straight and grab the L behind Smithers.
Head to the other end of the roof and use the blue pool to get the E.
There should be a Set Start next to the pool. Stand over it and face the dome
in the center of the roof. You now have to use that ramp in front of you to
jump and grind the dome and get the letter N.
While still grinding the dome, hop onto the rail on the right. Grind this rail
and you'll get the T. New level unlocked!
-Missile Strike Out-
Go to the front of the mansion. If you look to your right and left you'll see
two missile launch pads. Quickly go and knock these two launch pads out by
using the wooden ramps, then make your way to the bottom of the property.
You should see three gray half pipes and two launch pads in each corner. Knock
these two pads out then jump in the water outside the wall. Make sure to jump
in or you'll just appear from the spot you were just on.
You will be transported back to the front of the mansion. Go around to back of
the mansion and you'll spot two more launch pads on the right and left. Take
them out. Now just go beyond the hedge maze to find the last two launch pads
on the right and left and complete the objective, for a secret area!
-Collect the Items-
1. From the front of the mansion go into the mansion's dining room. The item
is on the table.
2. Now go through the laser halls to the roof of the mansion. The second item
will be in a blue pool.
3. Now go back to the front of the mansion and head straight into the gray
ramps ahead. One will go left, one to the right. Take the right ramp and
follow the wall to go into a tunnel and get the next item.
4. Go back the way you came in and make a right, toward the three gray half
pipes. The item will be in the half pipe on the left.
5. Now go all the way back to the front of the house, then go around it to
the back. Enter the hedge maze back there. Take a right and follow that path
until you can make another right. The item will be in the center of the maze,
behind a short wall.
6. The first medium item is back inside the mansion. Go to that room with the
wooden half pipe and rail, and use the half pipe to grab it.
7. The second item is in front, on top of a vert ramp. You'll spot it the
moment you get outside.
8. Now it's on to the mandatory grind item. Get to the top of the roof again
and position yourself over the Set Start. You now have to use the ramp next to
the red dome to grind the dome's edge. But, from the dome's edge you then have
to jump to the gray rail and follow the rail. Keep yourself balanced until the
grind nearly ends over a green roof. Once you get to there jump off and grind
the very tip of the roof to get the item.
9. Hard item #1 will be from the mansion roof as well. Get up there and
position yourself at the Set Start again. Except, now you have to grind a rail
that starts between two flags. Just turn left from looking at the ramp and
you'll see the pink flags. Jump over the border and grind the rail between the
two. Now follow this rail all the way to the end, grabbing the item along the
way. You can enter the building to explore an optional area, then use the
teleporter in the entrance to get back to the mansion.
10. This next item requires that you complete the Missile Strike Out objective.
Go to the greenhouse (where the carnivorous plants are). Enter and go through
the secret laboratory (what the hell does Burns do in here?), and enter the
nuclear reactor... place. If you look carefully, there is a purple ramp that
starts at the end of the entrance ramp. If you grind that rail it'll turn right,
then right again over the large pit. Follow this rail and hold Left to jump to
the purple rail that starts near the end. The new purple rail will take you
straight to the final item.
11. Now all you have to do is grab the board in that room and the objective is
over!
-Find the Clocks-
The 30 second clock is located at the gray half pipes at the very front of the
property. Just head straight from the front of the mansion, then use the vert
ramps in there to grab the clock, score 3000 points, and get $0.10.
Next up is the 60 second clock. Go inside the mansion and the room with the
wooden half pipe. Then take the brown door to the basement and enter the path
on the very left. This will take you to a large trick area. Grab the clock
and score 6000 points to get $0.25.
The final clock is back in the greenhouse. Enter it and look for the 90 second
clock in the air between the two half pipes. Use the half pipes to jump the
gap, grab the clock, and score 15000 points for $0.50.
d. Construction Site
<---=========================--->
Oh man, this is a skater's paradise! Weave in and out of girders, half pipes,
full pipes, planks, ditches, cranes, and more!
Objectives:
I will use the glowing green SNPP trailers near the beginning as a reference
point.
-Tanks A Lot-
Head in the direction opposite the line of trailers and go straight until you a
short gray wall. From there make a right. Go straight and eventually you should
see a flaming barrel, and a two army tanks close to it. As soon as you enter
the area a message will tell you to grind the barrels (the long tubes that
shoot things) to activate the tanks. Use the vert ramp behind the green tank to
jump, grind the green tank, then hop quickly to grind the brown tank. A large
gun on the roof of the building right there will blow up the brown tank and
you'll complete the objective.
-Collect MONORAIL-
Ok, remember that ledge you started from? Well, the first letter is up there.
Pause and Restart if you haven't used a Set Start yet. If you have, go to the
far end opposite the ledge, gain some speed, and grind the brown rail that
leads up to the ledge. Once you're up there hop over that gap and collect the
M on the far end.
Next up you have to grind or jump the rail to your left and get the O.
Fall to the ground and head straight to find the N on the right wall.
Quickly hop to the left and grind the left wall to get an O.
Turn left and go straight to find the R at the end of a brown rail.
Go straight and grab the A that's floating in mid air just beyond the Set
Start.
Make an immediate left into a fenced trick area. Grind the short wall to get
an I.
Finally, use the long vert ramp near the entrance to get the L and complete
the objective. New level!
-Coffee Grinds-
Starting at the SNPP trailers, go in the direction of the crates. Follow the
turn then stick to the left of the dirt path. Once you pass a large glass panel
that's overhead you'll see two walls running along the left side, a
construction worker, and a coffee machine. Grind the wall behind the coffee
machine to get the first one and start the objective.
Follow the dirt path again and eventually you'll see a T intersection. Take the
left and grind the left wall to get the second machine.
Just ahead there will be another short wall and the third machine next to some
crates.
Turn back and get back on the dirt path. Follow it until you see another wall
next to a red bungalow. Grind this wall to get the machine.
Go straight and grind the next wall to smash the last machine and get the
secret area!
-Collect the Items-
1. Start from the SNPP trailers. If you look directly out ahead of them, you'll
see a gray bowl with brown girders all around it. Skate along the top of the
bowl to hop and get the first item.
2. Now to the right of the SNPP tanks and in front of the crates is a small
trick area. Go in there to find the next item.
3. Go straight through the trick area, over the gray half pipes, and into the
construction site. You'll know it's the right place because there will be a
large building under construction, and a humming generator under it. Near the
generator, in the corner is the next item.
4. Go back to the SNPP trailers and head to the left of them. If you go
straight you'll find a brown ramp with three steel beams sticking out of it.
Use the ramp to jump onto the roof next to it and grab the fourth item.
5. If you go into the next area (with the army tanks), you'll find the last
easy item over a dirt pile in the corner.
6. Exit through the other end of the tank place and you should be able to spot
a large gray brick building to the right. It'll look half constructed. Go in
there to find two vert ramps and a really high ledge in the corner. Basically
you have to use the vert ramps to ollie as high as possible and grind the
ledge. Just make sure to exit the vert ramps at an angle and press X at the
right time and you'll easily grab the ledge. After perhaps a few tries you'll
find the trick spot on top. Use the vert ramp to grab the first medium item.
OR
There is another way to get the above item. There is a brown rail near the back
of the building. It has to oil cans on either side of it. Get some speed and
grind this rail. If you follow it, it will lead you to a ledge, then another
brown rail around the building, then an air duct around the building, then
another brown rail to the roof. I found the first way to be easier, but it's
up to you.
7. Now go back to the SNPP trailers and head into the trick area on the right.
Where the vents are. Go through and jump into the gray half pipes. You'll get
the second medium item by using the ramps to jump the gap and grab it.
8. You should see the big three story building right next to you, the one
that's still under construction. Go through the gray half pipes and jump into
the first floor of the building. Now use the various vert ramps on each floor
to get to the very top floor. Up there you'll find the second medium item next
to a ramp.
9. Jump across the gap to the next part of the building. In the top right
corner there will be a brown rail that leads to a roof. Grind this rail all the
way to the roof and continue until you get the first hard item in the metal
loop.
An extra tip by Jeff Charity about item #9:
An easy way to get the 1st Hard item on the Contruction Site level incase your
not on the roof where the last medium item was. When you first start the level
your on a small ramp, go down the ramp and jump across the gap, quickly jump to
the left onto the railing and quickly jump slightly over to the left again to
the brown rail (or you can try to jump past the red onto the brown) and jump
and grind the incline to the roof and grind the roof to get the item.
10. The second hard item is in the trick area across from the three story
building and gray brick building. It has a large purple sign in front, if that
helps. Enter this area and use the path on the left to get on the roof. Now,
there is a brown rail here that runs out to the large purple sign. It's
parallel to the roof. What you have to do is go to the opposite corner of the
roof and gain some speed, then jump and grind this rail. Once you get near the
steel girders and sign, jump straight and high to jump onto another rail that
turns left then straight again. Follow this rail until you see the monorail.
You have to grind the left red rail, jump and grind the gray one, then jump
onto the right red rail. The reason for that is because the gray rail will be
in your way, and you have to get over it. Once you get back on the right red
rail just grind all the way to the end, where the final hard item is located.
11. You can find the board in the secret area. The secret area is located in
the sewer tunnels, where the alien ship is located.
-Find the Clocks-
Starting at the SNPP trailers go left until you hit the gray wall. Make a right
and go past the tanks area to reach a fenced trick area. Grab the 30 second
clock in here to score 4000 points and $0.10.
Now start from the corner with yellow panels and go to the opposite corner.
Jump over this vert ramp and you'll be facing a large purple sign that says
"Burns Construction". Enter that area and grab the 60 second clock for 8000
points and $0.25.
Go back to the SNPP trailers and go to the right. You'll pass by the crates,
and on the left side is a small trick area. You'll recognize it by the vents
spewing green gas. Go through this area and you'll reach a point that has a
ramp on the right and left, and a gap to a lower area in the middle. Use one
of the ramps to get onto the first gray half pipe in front of you. Up on the
right you'll see the green 90 second clock. Score 20000 points to get $0.50
and complete the objective.
e. Sir Putt-a-lot's
<---=========================--->
If you thought mini golf was fun, try skateboarding at a mini golf course!
Enjoy skating through a castle, shark, and even a dinosaur!
Objectives:
The reference point will be the pink castle in the center of the level.
-Ball Washer-
Ok, there are four ways to go from inside the castle, and three of them have
signs. Go to the Golf Course sign. Go straight and you'll see a guard standing
next to a ramp. Now make a left onto the dirt path, where there's a Krusty
head. Go toward the Krusty head and along the left side, down a small hill. Now
follow the river and eventually you'll see Ralph. Bump into him to start the
objective.
Go back to the castle and head to the opposite door, the one that says River
Walk. Go out to the path and make a right. You'll see a gray pipe with red
valves on your right, so keep that in mind. Keep going and eventually you'll
find a blue rail. Go all the way to where the red dinosaur is and turn around.
Now you have to gain some speed and grind that blue rail. Follow it all the
way to where the gray pipe starts, and jump to it. You have to grind the gray
pipe and knock off the three valves to complete the objective. It'll take a
while to get the timing for the jump onto the gray pipe, but it's nothing too
hard.
OR
There's one more way to grind the gray pipe. Go to the castle and stand at the
entrance to the Golf Course. Now if you get some speed and go towards the River
Walk entrance and jump at the right moment, you can jump right onto the gray
pipe. This one took me a couple of tries, but it's quicker than grinding that
long blue rail. Remember to turn slightly to the right to grind in the right
direction.
-Collect PUTTER-
From inside the castle go towards the EXIT sign. Moe will be standing next to
it. Right away you should spot the letter P. Grind that blue rail to grab it
and start.
Now, most of this objective involves grinding, so get ready for a long run.
Stay on that blue rail until you get near the end of it. Once you see the U
hold X to power up a long jump. Release at the end of the grind to grab the
letter, then quickly hold T again to grind that next rail.
Once you get to the roof find the gray rail on your right and grind it. You'll
get the T right away.
The next part is a long slanted grind, so just hop and grind constantly to
keep yourself going. After you pass over a hedge it will be a bit straighter,
so speed up and hold X. Jump over the gap in the rail to grab the letter T.
Follow the rail through it's ups and downs and you should spot the next letter
over another gap. Hold X to charge your ollie then jump to grab the E.
The gray rail will turn blue as you pass by a hedge. Follow the new blue rail
to the end and you'll get the letter R from the pink wall. New level unlocked!
-No Holes Parred!-
Start at the castle and go to the Golf Course door. Make a left at the security
guard, then follow the river (or go through it if you've drained it). Stop next
to the large moving Abe Lincoln. He'll have a black suit, top hat, and purple
beard for some reason. Hit the lever next to him to start the objective.
The statue next to Abe is a monkey moving his arms. Hit that lever.
Across from the monkey is a blue and yellow Sphinx, with another lever next to
it.
Across from these a windmill and yup, another lever.
Go up the path and pass a small red house to find a spinning death statue and
another lever.
Near the death statue will be a yellow tiki statue moving up and down and a
lever.
As you go up the next dirt path take the next right. You should see a shark,
Apu, and the seventh lever.
Now for the final one. Skate back onto the path and pass by the large shoe
house and the replica of the power plant. When the path is about to dip down
again, look to the right. There will be some barrels with Itchy and Scratchy
on them. Hit the lever on the other side to complete the objective and unlock
the secret area!
-Collect the Items-
1. All right, from the inside of the castle go towards the River Walk door.
Straight ahead over a vert ramp you should spot the first item.
2. Now back inside the castle and stop at the doorway to the EXIT. If you look
into the distance, off to the right, you should see the next item floating in
the air. Make your way over there and use the vert ramp to grab it.
3. Back to the castle again, and this time go through the Golf Course door.
Once you get outside make a left at the security guard and look to the left of
the giant Krusty head. You should see the item between some trees.
4. Beyond the trees is a blue and yellow sphinx. It's across from the dirt
path. Go to it to find the fourth easy item.
5. If you turn right from the sphinx you'll see a windmill, and beyond the
windmill, in the distance, is a trick area. On the right side is the item. Use
the red and white ramp that's under the item to jump and get it.
6. The first medium item is right in that same trick area. Use that pool or
whatever it is to get it from mid air.
7. Now skate next to the windmill and look behind it, where the hedges are. If
you look in the distance and slightly to the left you'll see the next medium
item. To get there just go back to where the big Krusty head was, and keep
going in that direction. You'll find yourself in a place with really high vert
ramps. Use the low ramp to the left to get the item. To get out of this place
just use the high ramp.
8. Go back towards the trick area where you found the first medium item and
follow the cement path. It will take you up a small hill and past a red house.
If you go towards the death statue straight ahead you'll find a red trick area.
Go in there to find the last medium item.
9. Ok, go back toward the trick area and giant Krusty head (I know, a lot of
back and forth). Then from there go through the trick area with the really
high vert ramps. Make a left. You should find the first hard item on a gray
rail. Follow this gray rail to where it starts, and go a bit further. You have
to get some speed then jump and grind that gray rail. If you hop and grind
continuously you should be able to make it up the rail and get the item.
10. Ok, all the way back to the castle and through the EXIT door. Get into the
parking lot. High up on a blue rail you'll see the second hard item. Go to the
vert ramps all the way to the right. See how the vert ramps have dividing
lines? Stay in the very left section. Now, what you have to do is get some
speed, then hold Up as you ollie on the ramp that faces the blue rails. After
going over the ramp you have to grind the blue rail that's farthest to the
right and running parallel with your direction. It may take some tweaking of
your ollie power and timing, but it's not too hard. This blue rail now goes in
a constant loop, and along the way you'll get the second hard item.
11. Finally, the board! Go to the other end of the parking lot, around the red
building. You'll find an underground trick area and the board.
-Find the Clocks-
These are all very close together, so starting at the castle go through the
EXIT door and follow that path until you find the parking lot. You will find
the 30 second clock at the very right end of the lot, on top of a vert ramp.
Grab the clock and score 5000 points for $0.10.
The 60 second clock can be found in the secret area, all the way to the left.
You'll pass some blue gates on the way in. Grab the clock from the vert ramp
at the far end to score 10000 points and $0.25.
Grind that blue ledge in the middle to get back on the concrete, then head
all the way to the vert ramp where you got the 30 second clock. See how the
vert ramps have dividing lines? Stay in the very left section. Now, what you
have to do is get some speed, then hold Up as you ollie on the ramp that
faces the blue rails. After going over the ramp you have to grind the blue
rail that's farthest to the right and running parallel with your direction.
It may take some tweaking of your ollie power and timing, but it's not too
hard.
After getting on that rail hold X to charge your ollie. Once you're near the
end of the rail release X and grind the next rail ahead of you to keep going
straight. On this start holding X and hold Right, then release to jump and
grind the rail that's to your right. If you got the right one you'll get the
green 90 second clock. Use any of the vert ramps around you to score 25000
points for $0.50.
Yes, all objectives completed!
f. Krustylu Studios
<---=========================--->
Hey, if you skate real well here you might get sponsored. Bust some cool tricks
for the cameras and try finding Krusty himself.
Objectives:
I'll use the front door of Krustylu Studio (where the big Krusty head is) as
the reference point.
-Stuntman Mel-
Starting from the Krustylu entrance go to the left and then make a right in the
small parking lot. You should be headed toward the large red Channel 6 sign.
When you reach the Channel 6 building make a left. Pass between a blue
building and purple building. In the next area you should find a gray wall in
front of you, large Roman pillars to your right, and a red and green trick spot
next to the pillars. Go into this trick spot.
If you look carefully above the pillars you'll see a long ledge that they're
holding up. You have to use the red and green vert ramps to get up there. Just
skate in the direction of the ledge as you go off a vert ramp and you should
be able to make it. Use the Set Start.
All right, now stand at the entrance to this trick spot and face the curve
ahead. To your right and left are two walls, with lights on them. What you
have to do is grind the top of the left wall, then hop to grind the gray rail
that starts about halfway through the wall. The rail has a steep slope, so you
have to keep hopping and grinding to make it up. When you reach the next
building hold Right and T and jump over to the roof.
First of all, use the Set Start. Now, there are three ramps up here. One brown
vert ramp, and two green ramps. The next part of this objective requires you to
go up the brown ramp, then use that speed to go up the left green ramp. After
jumping off the green ramp you have to grind the rail that goes around the
water tower and toward the Krustylu Studio. If you mess up it's all right, just
Restart (you used the Set Start, right?). Once you get the rail just keep
yourself balanced then jump when you reach the roof.
At long last we get to find out what Stuntman Mel means! Sideshow will be
standing in the center of the roof, and it's up to you to force him to the
ground. Very simple. Just follow him slowly and he'll run away. Guide him
around the Krustylu Studio sign and there will be a gap on both sides. Follow
him to the gap and he's outta here.
-Collect POOCHIE-
To the right of the Krustylu Studio you'll find the main entrance. That is
where you can find the letter P and start the objective.
Go up the road and slightly to the right you'll spot the letter O.
Go right through the parking lot, careful not to fall in the trick spot at the
end, and you'll see the next O in front of a purple building.
Make a left and go up the road, passing by a building with fans, and you'll
see the C.
Go under the water tower supports to get the H.
Make a sharp left to go towards some open warehouses. The letter I will be at
the entrance of the left warehouse.
The E can be found inside the warehouse. Just fall in and use the vert ramp
to grab it and complete the objective. Kick ass, a new level unlocked!
-Film Star-
An opening tip:
In Krusty-lu Studies when you have to do Film Star, it can save alot of time
if you charge up your In The Zone meter before starting the objective.
All right, this one is kinda difficult. Starting from the Krustylu entrance go
to the left and then make a right in the small parking lot. You should be
headed toward the large red Channel 6 sign. When you reach the Channel 6
building make a left. Pass between a blue building and purple building. In the
next area you should find a gray wall in front of you, large Roman pillars to
your right, and a red and green trick spot next to the pillars. Go into this
trick spot.
If you look carefully above the pillars you'll see a long ledge that they're
holding up. You have to use the red and green vert ramps to get up there. Just
skate in the direction of the ledge as you go off a vert ramp and you should be
able to make it. Use the Set Start and look up and to the right. There will be
a video camera. Skate in front of the camera to start the objective.
This first camera will require an In The Zone tail grab. First charge up your
In The Zone meter by doing a lot of different tricks, then do the special tail
grab in front of the camera. Be sure to have a lot of air or you may mess up.
Check the Moves section above to learn the special tail grab.
Once you get the trick jump down and go through the narrow alley on the left
side of the building. Eventually you'll see a green building and a brown trick
area next to it. In the corner of this area is the next camera. You'll need an
In The Zone nose grab for this one. Charge your meter if it went down, and do
the move as quickly as possible. Again, check the Moves section above to learn
the move.
From here jump out into the small adjacent parking lot, and head to the
Krustylu Studio entrance. Go straight down the red carpet in the middle and
the camera will spot you on the right. Now you have to bust an In The Zone
back rail grab. You can use the right trick spot. Check the Moves section above
to learn how to do it.
Now go to the small parking lot on the right side of the building. Head all the
way to the wall and make a right through the narrow alley to come out in a
trick area. The camera is on the high vert ramp at the end. Get it and do a
special front rail grab (check above to learn how to do the move), to complete
the objective and unlock the secret area!
-Collect the Items-
1. Start at the Krustylu entrance. You can find the first item on the left
side of the red carpet, over a half pipe.
2. The next item is located on the left side of the studio. Go through the
small parking lot and into a small area with two high vert ramps (the building
next to this has a flaming Krusty head). You have to use one of those high
vert ramps to skate to the top of the adjacent roof and grab the item from
over the two red and yellow ramps. It's similar to the first item.
3. If you look to the buildings opposite of the one you were just on, you'll
see a narrow alley. Go through the alley and turn left to find three open
warehouses. Go to the farthest away from you, it should be purple and red in
there, and use the vert ramp at the end to collect the third easy item.
4. If you look to the left of the building across from the one you were in, you
should see an alley with eerie yellow lights. Go through there. At the end of
the alley you'll find some pillars and a red and green trick spot to their
left. Use that red and green trick spot to get up to the ledge above the
pillars. The next item is above one of the vert ramps on the ledge.
5. Head through the narrow alley to the left of this building and follow it to
the end. You'll find a trick area and the last easy item to the right.
6. You'll find the first medium item is close, but far. It's on the top of the
green building next to you. To get there you have to use the small raised trick
spot and grind the top of it, then as you grind the top of the trick spot you
must hold Left and jump to the ledge that's halfway up the green building.
After all the grinding you've done in the previous levels, this should be no
problem. Now just use one of the vert ramps on this ledge to get to the top,
then use the vert ramp up there to grab the item.
7. Remember the place with the pillars and red and green trick spot? Go back
over there and get up to the ledge again. At the other end of this trick spot
is a wall. Ok, the next part requires you to approach the vert ramps at an
angle, then jump so that you go over that wall. Once you hit the air hold T
and you'll catch one of the green rails that stick out from another building.
On the roof of this next building you can jump down and use the vert ramps to
grab the second medium item.
8. The third item is located towards the far end and to the left. It's on a
lower ledge, and all you have to do is jump up the vert ramp to get it.
9. On to the hard items. Once again get up to the ledge above the pillars. All
right, now stand at the entrance to this trick spot and face the curve ahead.
To your right and left are two walls, with lights on them. What you have to do
is grind the top of the left wall, then hop to grind the gray rail that starts
about halfway through the wall. The rail has a steep slope, so you have to
keep hopping and grinding to make it up. When you reach the next building hold
Right and T and jump over to the roof. First of all, use the Set Start. Now,
there are three ramps up here. One brown vert ramp, and two green ramps. The
next part of this objective requires you to go up the brown ramp, then use
that speed to go up the left green ramp. After jumping off the green ramp you
have to grind the rail that goes around the water tower and toward the
Krustylu Studio. If you mess up it's all right, just Restart (you used the
Set Start, right?). Once you get the rail just keep yourself balanced and
grab the item about halfway through.
10. Remember the green building where you got the first medium item? You had to
grind a vert ramp and a ledge? Go back over there and get up to the roof again.
Use the Set Start. Now you have to position yourself just in front of the curve
in the vert ramp and grind the short vert ramp on the left. Once you've grabbed
the edge, hop and grind the gray rail to the left. If you hop and grind
constantly and have enough speed, you'll reach the second medium item near the
top of a steep incline in the rail.
11. The final item! You can find the board inside the Krustylu Studio. The
entrance is located under the big Krusty head and sign.
-Find the Clocks-
The 30 second clock is located in the half pipe to the right of the Krustylu
Studio entrance. Bust 6000 easy points in 30 seconds to get $0.10.
Go through the small parking lot left of the studio and to the trick area
that's in the far corner of the level. You can find the 60 second clock in
there. 12000 points and 60 seconds later you'll get $0.25.
The 90 second clock in inside the Krustylu Studio. The entrance is under the
big Krusty head, and the clock is next to a large spaceship and the Krusty
Show set. Score 30000 points (I suggest using the vert ramps across the gap),
and you'll get a whopping $0.50!
g. Springfield Mall
<---=========================--->
The mall has it all. And now even skaters are welcome. Skate your way through
the two ground levels, then hit the big time tricks on the roof.
Objectives:
The entrance to the mall will be the reference point here. Find it outside
under a huge SPRINGFIELD MALL sign.
-Lefty Key-
Go inside the mall, then head straight through the fountain and onto the
ground. A bit further ahead you'll see an entrance to the upper floor. Take the
ramp to the right. Once you reach the second floor you should easily spot
Flanders in front of you. Approach him to start the objective.
This one's difficult. I don't usually say what the time limit is because there
haven't been any objectives that hard. You have 60 seconds to find Flanders'
key and bring it back to him. Jump over the railing directly in front of
Flanders' store and there will be a wide door marked NO ACCESS. There will be
a sign the says Broiler Room next to it. Go inside to find a large furnace and
pipes.
Skate to the right side of the room and use the vert ramp to get on top of the
ledge in the far right corner. To the left of this spot will be a ramp leading
to two red pipes. Jump off the ramp and grind the left red pipe and begin
hopping and jumping. In case you haven't done this yet (though a lot of the
previous levels required the technique), just hold X, then release and hold T,
then release and hold X again, then release and hold T, and so on. This keeps
your speed and balance up enough for you to skate inclines in rails. Follow
this left rail, be careful not to jump at the turns, and eventually you'll
reach the key. Jump to grab it, then fall down and quickly exit.
Once you're back in the mall go to the right to find the ramp to the upper
floor and give the key to Flanders. This seems easy, but it will no doubt take
a while to learn the routine and be quick enough to actually do all this in
60 seconds. My suggestion is to use the Set Start on the second floor near
Flanders to save time.
-Collect SHOP-
Only four letters? Kick ass. From the entrance to the mall, start from the
bottom of the stairs and grab the S to start the objective.
Go into the mall and straight through the water in the center to jump and grab
the H at the end.
Once again straight and you'll find the O at the entrance to the upper floor.
Take either ramp and go towards the ends, where there is a vert ramp and lines
of arrows. Follow the center arrows and jump off the edge to fly over a yellow
rail. The letter P will be in the center of this rail. This one also requires
speed, but once you complete this objective you've unlocked the next level!
-Apple Sauce-
Go inside the mall. The objective now is to grind the tops of those red and
white carts that are on the top and bottom floors. They have orange fishes and
purple teddy bears if that helps to locate them. The best way to do it is to
approach the small ramps slowly and jump high, so you won't overshoot.
Start off by going up to the second floor. Go to the left of the walkway and
position yourself so that when you grind the first cart on the left side
you'll be headed for the cart in the center. Grind the first cart, then
quickly make your way to the second cart, then finally skate to the other end
and grind the third one.
Quickly jump down to the first floor and look for the two carts that are
located on both sides of the fountain. Grind those to complete the objective
and unlock the secret area! It may take a few tries because of the time limit,
but it's not too tough.
-Collect the Items-
1. Ah, the items. I ask you to stop in front of the entrance to the mall and
look out to the parking lot. What do you see? Four of the five easy items, all
in one convenient location! I guess we'll start to the left. The first easy
item is above the vert ramp to the left.
2. The next item is across from there to the right, in the middle of a short
rail.
3. Go back to the entrance of the mall and head to the right side of the
parking lot. The next item is over a vert ramp in the right corner of the
lot.
4. If you go to the far right lot you'll see the fourth easy item over the
center rail of some stairs.
5. This is a mall level after all, so let's go inside. Go left from the
fountain and straight through the room with a large NO ACCESS sign over it. Go
through the first room and into the one next to it. You should see the fifth
easy item next to some crates. Go to the far end of this room and use the vert
ramp to get the item.
6. Go back out to the mall area and up to the second floor. On the left side
of the upper floor there will be two open green doors at the end. You unlocked
these when you beat the Apple Sauce objective. Follow the hall to the roof
you'll see the first medium item over a vert ramp straight ahead.
7. Just jump off the roof to get down to the front of the mall, where the
parking lot is located. Stand in front of the mall entrance to look to your
right. There will be a trailer and a medium item next to it. Skate down there
and use the ramp behind the trailer to get on top.
8. Skate to the left parking lot and you'll spot the last medium item over a
vert ramp in the far corner.
9. Get back inside the mall and go to the roof through the doors on the
second floor. I advise you to use the Set Start because like most of the hard
items, these require a lot of grinding.
10. Go towards the right and look for a single brown rail that slopes down in
front of the mall. Grind this rail and get ready for a helluva ride! Follow
this rail about halfway down and hold Left. When you see the next rail
that's slightly to the left jump on it. Shortly after you jump on this rail
you'll see another that's also to the left. Hold Left and jump on it. This
will turn left, then turn again so hop and grind to gain some speed. Once
you're near the end of it's easy to see the hard item in mid air. Remember to
hop to grab it.
Go back to the roof of the mall. Go right again, but this time grind on any
of the three rails that are grouped together. They will all take you to the
next roof. On this roof go towards the right and use the vert ramp to grab
the final hard item.
11. Now for the board! Go back to the roof of the mall and find it to complete
the items!
-Find the Clocks-
Go into the mall and through the center, then when you reach the fountain make
a left. Go under the sign that says NO ACCESS and you'll find the 30 second
clock straight ahead. Score 7000 points for $0.10.
Exit this NO ACCESS room and go towards the fountain, then make a left. Find
the two ramps that lead to the upper floor and take the ramp to the right. Go
into the right side of the upper floor and at the end where there will be a
trick spot and the clock. Score 14000 points in 60 seconds to get $0.25.
Go back to the first floor and go to the NO ACCESS room that's on the right
side. You'll know it's the right place if you see a furnace. Behind the furnace
is the 90 second clock. 35000 points later you'll earn $0.50 and the
completion of this level!
h. Itchy & Scratchy Land
<---========================--->
The violentest place on Earth! Bring the whole family and enjoy the chopped and
bloody sights to see. Squeeze in some skating if you can.
Objectives:
The reference point will be the front gates where you start.
-Cat and Mouse Trap-
Enter the park and take the first cement path to the left. At the point where
the path turns right you'll see a hill and some huge axes on top of the hill.
Go up there and look to left to find the actual Itchy and Scratchy characters.
The goal now is to make Itchy and Scratchy run into the Chop Drop so that you
can chop them up with those axes. To do that you have to run along behind them
as they run away (remember the Stuntman Mel objective in Krustylu Studios?)
The best way to do this is to make sure you're skating slow, then hold X to
lock your speed. Now you can follow them without going ahead of them, and you
can climb up that steep little incline that goes up to the Chop Drop. My
suggestion is that you push in Itchy first since he's slower, then Scratchy
because he takes less time.
Once both of them are inside quickly go to the lever that's on other side and
hit it, then go back to the first lever and hit that one. This is the part that
takes some time, so be as fast as possible with Itchy and Scratchy. Once you
hit both levers Itchy and Scratchy will be sliced and diced and you will have
completed the objective.
-Collect SCREAM-
Start outside of the park entrance and head left. Go beyond the trick area
there and use the Set Start at the end. Now turn around and grab the letter S
that's hovering over two rails on the left side.
Head for the entrance and make sure to enter between the second and third
ticket booths (those black bombs). Grind the leftmost center rail and grab
the letter C at the end.
If you go up the cement path in the middle the very first attraction on the
right side will be three wooden ramps. Go inside and use the center ramp to
grab the letter R.
Now, do you see that red brick wall next to the ramps? To the right of this
wall is a purple road. Follow this road to the trick area, then go through the
small hole on the right. This will lead to a very high vert ramp. Use that vert
ramp to grab the letter E that's above you and to the left.
When you leave the vert ramp area make sure there is a red brick wall on your
left and head to the cement path ahead of you. Go through this path and look
for the letter A that's hovering over two small red rails. It will be on the
right side.
Now go all the way to the end of the cement path and make a right over the
bridge. Here you'll see that the ground is made of glass panels. Skate over
the glass panels and use vert ramp at the end to get the letter M and
complete the objective.
I know this one's a bit tough with the time limit, but after a few tries
you'll get it.
-Balloon Voyage-
From the entrance go inside the park and enter the tall brown ramps on the
right side. The purpose of this objective is to release nine different
balloons that are scattered all over park. Lucky for you there are four right
near you.
Each of the two ramps has two balloons on the inner corners. All you have to
do is skate up to each balloon and it will be released. After you have released
the four balloons in here, go to the tall vert ramp that is next to a building.
Use the vert ramp that is next to the large Pinitchio poster to get on the roof
of the building.
This next part involves a lot of grinding and speed, so it may take some time
to get it right. Start off by grinding the brown rail that has balloons on it.
You will get two balloons on this rail. When you reach the purple roof get
ready to hold Left and jump over to the next rail on the left. This rail will
get you another balloon. After the rail makes a turn hold Left and jump again
to the next rail on the left. Once you're on this rail hold Left yet again and
jump so you can grab the balloon on the right edge of the roof.
If you're good enough you can jump off this roof and grab the rail you were
just on to keep going. Look out for the tiny gap in the rail and jump over it,
then go all the way to the end to release the last balloon. If you weren't
able to make it back on the rail don't worry. They give you way more than
enough time so just go back to the tall ramps and the roof and do it all over
again. Just remember that this time you don't have to jump on the roof. Stay
on the rail.
Once you get 'em all you'll unlock the secret area!
-Collect the Items-
1. From outside the entrance make a left and go toward the small trick area.
You'll find the first easy item in there.
2. Go inside the park and make a left on the first cement path. Go all the way
to the end and climb up the hill where the Chop Drop is. Under the giant axes
you'll find the next easy item.
3. From here go towards the high half pipe that's located right next to the
Chop Drop. You'll see a noose and platform in the middle of the half pipe. Keep
going past this and you'll also pass by an electric... thing. You'll hear the
electricity crackling. If you keep going you'll hit a brick wall that has a
broken gap in it. Go in the gap. Skate to the far end and make a right to find
the next item.
4. Skate in the direction you're going and pass under the little colorful
flags. Follow the cement path to the left and keep going until you see the
bridge. Cross the bridge and immediately make a right. You'll pass behind a
vert ramp and by some swings. The cement ground will make a left turn and go
towards a ramp. Go over the ramp and turn around to get the easy item next to
it.
5. Now follow the purple and red ground to go around the moat of lava. Go
through the trees to find the moat of water. If you follow the edge of the
moat to the left you'll spot a red rail that leads to the island. Cross over
the rail or jump (if you're good enough). Pass through the bush to find the
final easy item.
6. Go to the center of the island and leave by crossing the bridge. Remember
that area with the swings and glass floor? Well go back there by crossing that
bridge over the lava again. The first medium item is over the vert ramp closest
to you.
7. Remember way back when you passed by a half pipe that had a rope and
platform over it? It was right next to the giant axes? Go back over there. The
item is over one of the vert ramps.
8. Go ALL the way back to the entrance of the park. As soon as you exit make a
left to find a trick area. The third medium item is right there.
9. As always the hard items are about three stories above ground and require a
whole lot of grinding. Go inside the park and to the tall brown ramps near the
entrance. Use the vert ramp nearest the building and next to the Pinitchio
poster to get to the red roof. Remember to hit the Set Start! It will help.
From here there are three rails, but you want to grind the small red rail that
passes over the street in the middle. Grind this red rail. Long before you hit
the curve in the rail you have to hold X and jump over the curve and onto a
red rail below. This will take some time to get right. If you caught the
correct rail you'll pass by some gray supports and a blue steel ramp. Try to
grind as slowly as you can and grind one of the gray supports and then jump
onto the steel ramp. The first hard item is located above one of the blue vert
ramps.
10. Oh sweet lord, this next one took me quite a while. Go back to the top of
the red roof and take the red rail again. Follow it all the way until it
reaches another roof. Jump onto the roof. From here I suggest using the Set
Start to save time. Grab the only rail up here and start to follow it. You may
recognize it from the Balloon Voyage objective.
Anyway, follow this red rail all the way to the end. You should see a wide
stone rail continue. Jump off of the rail and grind on the right side of the
stone rail. Almost immediately after getting on there will be another stone
rail to the right. Hold Right and jump to the right to grind that next stone
rail. Once it starts to go up there will be a gap in the stone rail with a
red rail running through the gap. Grind this red rail to the left. Once you're
on the red rail keep going left until you pass one of the castle towers. Jump
onto the wall that follows, and from the wall jump onto another rail that's on
the right. Follow this rail and you will eventually find an area with some
vert ramps and the last hard item.
Man that was long. Some quick pointers I have are to remember to hop and grind
to keep your speed up and to go up steep inclines in the rails. Once you're at
the top of the castle use the upper vert ramps to grab the item from mid air.
11. The board is the only thing left to get! Go to the rear of the castle and
enter that area under the glass panels. Here you'll find some tunnels and a
very elaborate trick area. Take a left from the entrance and find the round
sewer pipe. Go inside to find the board and finish the objective!
-Find the Clocks-
Go inside the park and take the first cement path to the left. Before you reach
the end look to the right for a place called Itchy and Scratchy Gift Shop. Go
through the entrance to find the 30 second clock. Get 8000 points for $0.10.
Go back to the entrance and once you enter the park go through the cement path
in the middle. It will lead straight to the castle. Once you pass through the
castle take a right on the cement path. Go over the bridge at the end and go
to the area with a glass floor to find the 60 second clock. Score 16000 points
to earn $0.25.
Go inside the park and make a left on the first cement path. Go all the way to
the end and climb up the hill where the Chop Drop is. From here go towards the
high half pipe that's located right next to the Chop Drop. You'll see a rope
and platform in the middle of the half pipe. Keep going past this and you'll
also pass by an electric... thing. You'll hear the electricity crackling. If
you keep going you'll hit a brick wall that has a broken gap in it. Go in the
gap. Grab the 90 second clock and score 40000 points to get $0.50.
i. Power Plant
<---========================--->
Yea, have fun here, but not for too long. The puddles of radioactive ooze might
look dangerous, but the pipes and verts are no big deal.
Objectives:
If you look to the right of where you start off you'll see a large glass
building in the distance. I will be using that building as a reference point.
-Springfield Syndrome-
From the entrance of the glass building go straight until you hit the street,
then make a right. When you come across another street make a right there and
go all the way to the end. Make a left at the first cross street. If you look
to the left you'll now see a plant technician over a gray cement area. The
goal is to disturb seven plant technicians and start a meltdown. I'll be using
the word "guy" to refer to them from here on out.
First go a bit further and use the Set Start to the right, then go back and
skate to the guy to start the objective.
After you hit that first guy go behind him to the gray building. Use the ramp
and go up to the top of this building to find the next guy.
Make an immediate right and you should go up a small gray ramp to a higher
area. Make a left here and you'll see a bridge on the right side. Cross the
bridge to get the next guy.
Turn left and go left on this path and you should see a bridge at the end, to
the left. Cross this bridge and jump over the gap in the middle to get the next
guy.
Make a left at the end of the bridge and find the next guy.
Make a sharp left turn from where the last guy was and you'll see another
bridge. Cross the bridge, make a right onto another bridge, then make a right
on the next path to find a guy in the corner.
Fall straight down and go around the right side of the pool and keep going
straight to one of the electrical towers. The last plant technician will be
under there.
Remember to Restart if you mess up, and don't worry. Practice makes perfect.
-Collect MELTDOWN-
Man, that's a long one... Go to the street in front of the glass building and
make a right, then make a left at the first intersection. Once you start to
pass by a large pink building turn right and look for a fence and half pipe.
Use one of the vert ramps to get up to the upper area and use the Set Start.
Now get ready for a whole lot of grinding.
At the opposite end from the Set Start you'll see the letter M. Grind the rail
to grab it and start the objective.
Follow the rail and you'll come across the E.
Using the good ol' hop and grind method make your way up the rail to find
the L.
When you reach the roof jump high to grind the edge. Jump to get the letter T.
Jump over the gap to the next roof, then hop onto the far rail, the one that
curves around the building. Once you grab the rail you'll find the letter D.
Immediately after the rail turns again hold Left and grind the edge of the
roof. You'll get the letter O at the end.
Jump to the next roof and look for a rail that starts parallel to the roof,
then turns to the right. You have to hold Right and jump onto this rail. If you
grabbed the right one you'll find the letter W.
When you reach a gray roof with a Set Start, jump off. Follow that gray path to
the end and jump off the ramp to the next roof. You should see the letter N.
Another way to do it is to hold X and jump really far when you reach the end
of the rail. Hold T in the air because if you jumped far enough you'll get a
rail that will lead you straight to the letter.
Kick ass, you've unlocked the last level!
-Uranium Roundup-
Make a right from the entrance of the glass building and make another right at
the first gap you see. This gap should lead you to a fence. Follow the fence
to the left then turn around to the other side of the fence so it is on your
right. Follow the fence until you see a Set Start.
Use the Set Start and grab the uranium rod next to the red building to start
the objective.
Behind the red buildings are some blue waste tanks. One of the rods is in the
corner.
If you jump over the purple rail that was next to the last rod you'll see a
gray building and the next rod in the corner.
Look for a large yellow building across from the gray one. Go through the
entrance and down to the lower floor to find the next rod in the green
sludge.
Go out of the other end of the building and turn right on the street. The
next rod is under a purple pipe, on top of some dirt.
Turn left from here and go in the gap between the pink and gray buildings. Make
another right and enter the nuclear reactor to find the sixth rod over a pipe.
Go back out through the way you came in and turn to the right. You should be
able to see a gray pool and the seventh rod on the right side.
Next to the pool is are some red girders, green barrels of toxic waste, and
the eighth rod.
Next to that stuff will be two electrical tanks on a cement foundation. Go on
the other side to find the next rod.
One more! Turn toward the pink building and you'll see some giant holes in the
ground. Fall into the hole in the middle to grab the last uranium rod and
unlock the secret area!
-Collect the Items-
1. Look up from the front of the glass building to see the first easy item.
2. Go around to the back of the building and then go left, following the fence.
Beyond the fence will be a brown vert ramp and the next item.
3. Skate your way toward the large gray nuclear towers on the right, but turn
left at the first gray building you see and climb up the ramp (some of you
may remember this from the Springfield Syndrome objective). Make a right at
the roof and then a left once you've climbed onto the elevated section. There
is a bridge on the right side of this section with the next item on it.
4. If you fall down from the bridge you'll see a large old pipe with the top
cut out. Go through this pipe and keep going straight to find a gray pool and
the fourth easy item.
5. Go around the left side of those red girders and turn left to find the last
easy item over a large brown hole.
6. Go to the end of the pink building and make a sharp left to find an open
door. Go through the hall to find the first medium item over a huge red fan.
7. Head straight and pass over some grated floor. Turn onto the second bridge
to the right to find the next medium item.
8. Fall down and head for an area with some yellow machines and a long brown
pool. It's in the corner. The last medium item will be over a vert ramp in the
pool.
9. (The first hard item is on the same path as the Collect MELTDOWN objective,
so if you already know it you don't have to read this). Go to the street in
front of the glass building and make a right, then make a left at the first
intersection. Once you start to pass by a large pink building turn right and
look for a fence and half pipe. Use one of the vert ramps to get up to the
upper area and use the Set Start. Now get ready for a whole lot of grinding.
At the opposite end from the Set Start you'll see a rail. Grind it and follow
it all the way to a roof. Grind the right edge of the roof and jump the gap to
the next roof. Hop onto the far rail, the one that curves around the building.
Immediately after the rail turns again hold Left and grind the edge of the
roof. Jump to the next roof and look for a rail that starts parallel to the
roof, then turns to the right. You have to hold Right and jump onto this rail.
If you grabbed the right one you'll find the first hard item at the end of
this rail. Jump to make sure you grab it.
10. From the entrance of the glass building go straight until you hit the
street, then make a right. When you come across another street make a right
there and go all the way to the end. Make a left at the first cross street. If
you look to the left you'll now see the gray building and ramp from before. Go
up the ramp, to the roof, and onto the elevated section. Make a left on that
section, but don't turn right toward the bridge. Instead grind the rail that
connects to the red tank tower. Go to the other side of the red tank and grind
the ladder that stretches across the gap and to the pink building. Use the vert
ramp at the far end to get the final hard item.
11. Now all ya need is the board! Follow the walls of the pink building until
you find an open door. Enter the building and fall to the bottom floor. The
board will be somewhere down there.
-Find the Clocks-
Go inside the glass building and wait for the elevator in the center to come
down, then ride it all the way to the roof. Once you're at the top look for
the 30 second clock up in the air behind the entrance. Score 9000 points for
$0.10.
Go back to the entrance of the glass building and look out to see the 60
second clock in mid air. Go inside that wooden trick area to score 18000
points and get $0.25.
Go around to the left side of the glass building to find two really high
wooden vert ramps and the 90 second clock. 45000 points later you'll get
$0.50.
Hell yea, just one more level to go!
j. Springfield Gorge
<---=========================--->
The ultimate challenge. None have successfully skated here before, though one
courageous boy tried a few years ago. Good luck... you'll need it.
Objectives:
I'll use the Visitor Center where the level starts as a reference point.
-Sheep Herder-
Stand in front of the Visitor Center and face out, then turn right. Go straight
across the two roads and then go around the right side of that brown pool. If
you see some sheep and a wooden fence you're in the right place. DON'T go near
this fence, at least not yet. Go around to the right side of the nearest
wooden building to find another three sheep. Then if you cross the bridge
that's right there and jump over it to the left, you'll find a final group of
sheep.
The main goal is to herd each group of three sheep into the fenced area. It's
not hard to do, very much like Stuntman Mel from Krustylu Studios, or Cat and
Mouse Trap from Itchy and Scratchy Land. All you have to do is follow them.
The problem is they have a kinda tough time limit, and the three sheep are
often scattered so it takes time to get them into each fence. Here's what I
suggest.
The sheep run away from you whether you're doing the objective or not, so you
can actually herd all three in a row before you actually start the objective.
Just get the three sheep grouped together without going near the fence. Do this
quick because if you're still there some of the sheep might run off. Once you
leave they'll stay in their positions. Go to all three groups and group them,
then once you start the objective all it will take is for you to herd all three
sheep into the fence at the same time. Very easy. Also try to take no longer
than 10-15 seconds on the first group you do, because you'll need more time
just in case the other groups break the formation. And do it slow! Hold X to
lock your speed and approach the sheep slowly because if you get too close the
sheep will scatter.
Once you have all three groups fenced in you'll be done with the first
objective of the last level!
-Collect ROCKY-
Look straight out from the Visitor Center. See that mountain with a face on
it? Well, go straight towards it. You'll eventually hit a fence, but more
importantly you'll find the letter R there. Grind that rail going to the right
to get the letter and start the objective.
Jump off the rail and follow the edge of the cliff. When you reach a narrow
spot between the fence and a rock look next to the rock to find the letter O.
Jump back on the rail and follow it until you see the letter C hovering over
a rock. You have to hop from the rail and grind the edge of that rock to grab
the letter.
Quickly hop back onto the rail and follow it all the way to a pool. Grind the
left edge of the pool to get the K.
Grind all the way around the pool and build up your speed by hopping and
grinding, then when you see a brown rail jump and grind it to get the
letter Y.
Hell yes, another final level objective completed!
-Signs of Vertigo-
Another Jeff Charity tip:
In the Gorge to do Signs of Vertigo, cross the bridge at the far right,
there will be a sheep pen and a set start. knock down the 5 signs on that
side then jump in the gorge, it will land you at where you started the
level. Get the final 5 signs on that side. It'll save you the lengthy time
it takes to cross the bridge.
If you go towards the left side of the parking lot in front of the Visitor
Center, you'll find a Set Start. Use it. Now skate in the direction of the
giant face in the mountain and look for a white sign that says "DANGER.
CLIFF EDGE." Grind the rail so that you knock off the sign to start the
objective.
There are a total of ten signs, and five are on this side so let's get going.
Jump off the rail and go around that rock that's in the way. Immediately
after passing the rock hop back onto the black rail and stay on it to knock
over four more signs.
Now jump off and head for the bridge at the far end of the stage. Cross over
and jump to the left once you're on the other side. Go left and stay on that
black rail to get three signs in a row. Now you can either jump off to the
right, or hold X and charge your jump. If you charged your jump your goal is
to jump over the gap in the rail and grab the last two signs on the rail. If
you jumped off just hop back on the other side and get the last two signs.
Like most of the last level objectives this one requires a bit of practice,
but it's not too tough.
-Collect the Items-
1. Turn left from the front of the Visitor Center to see the first easy item
over a vert ramp.
2. Go back to the visitor center and head to the other side. After you pass
through some trees you'll fall into a trick area that has the second easy item
at the far end.
3. Go into the grass beyond the trick area and turn left. Look for the black
rail and follow it back to find the next easy item.
4. Follow the cliff edge back toward the other end until you see a cave with
the Springfield Gorge sign over it. Approach slowly and lock your speed to go
up the stone path that leads to the top of the cave. Use the Set Start if you
like, then grind the brown rail up there to get the fourth easy item.
5. The last easy item is on the same rail as the previous item.
6. Once you're on the other side turn right and keep going. Jump over the rock
in the way and get back on some grass, then stop at the first Set Start you see.
It'll be right before a wooden light pole. Turn to face the cliff edge and spot
the black rail that leads out over the gorge. Follow this rail by hopping and
grinding, remember to jump left and grab the next rail because the first one
ends, and get the first medium item. Grind all the way to the end.
7. Follow the cliff edge to the left until you see a piece of land that goes
out beyond the fence. It will have two brown rocks jutting out above it. Go
onto this piece of land. If you skate to the left and use the right control
stick (known as R3), you can see a brown rail that leads to a cave in the side
of the cliff. Grind this brown rail to get the next medium item. Follow the
tunnel and grind the next brown rail, then go into the cave to get back on top.
8. Go cross the bridge and go all the way back to the Springfield Gorge cave.
Climb to the top again. Up here you'll find a black rail, so grind it. You'll
have to switch rails to the left, then right, then left again, then stick to
the last rail to get to the top of a huge rock structure. Jump to get the last
medium item.
9. Go back to the Springfield Gorge cave and enter it. Stick to the right side
of the tunnel and jump onto the black rail when you see it. Almost immediately
after getting on you'll have to switch to a rail on the left, then switch to
one on the right. Follow this rail until you see some tracks below. Jump down
and grind the left track. Jump over the gap in the track, then grab the first
hard item along the way.
10. Follow the tracks all the way to the next big gap and jump onto the next
set of tracks. Grind the right side and grab the final hard item along the
way.
11. Just the board and we're done with all the item collecting in this game!
Go to the side with the mountain and no buildings. If you go to the far left
you'll find an open mine shaft. Go inside. Make your way through the tunnel
and into a large cavern, then go through the tunnel on the other side of the
room. The next cavern will hold a very large rock grinding machine, but don't
fall in. Go around the outside of it until you find another steep tunnel. Go
up the long tunnel (any of you ever been on a log flume ride?), and you'll
find the board at the very top.
Yes, finally! No more items to collect, ever!
-Find the Clocks-
If you head straight across from the Visitor Center and turn left you'll find
the Springfield Gorge cave. Climb to the top. Up here you'll find a black rail,
so grind it. You'll have to switch rails to the left, then right, then left
again, then stick to the last rail to get to the top of a huge rock structure.
Use the vert ramp up there to get the 30 second clock. Score 10000 to get
$0.10.
Fall down to the ground and look for two identical buildings that have brown
rails running around them. The one furthest away has the 60 second clock. Just
use the brown rail to hop and grind to the top, then score 20000 points to get
$0.25.
Cross the bridge that's far to the right and then go to the end of the ground on
this side. Look for an opening to a mine shaft and go in. Follow the tunnel all
the way to a cavern that has a wide trick spot and the 90 second clock. Get
50000 points and you'll earn the final $0.50 and complete the final objective.
YES! FINALLY! AT LONG LAST! SKATEFEST COMPLETE!
-------------------------------------------------------------------------------
3.3 Timed Trick Contest
-------------------------------------------------------------------------------
3rd place gets you $0.10.
2nd place gets you $0.25.
1st place gets you $0.50.
Quick tip- If you score a combo of 60 in one trick, they'll double the points!
-[Ollie]---------------------------------------------------->
Learning how to use the ollie effectively is very important. The best time to
release X for high ollie is to release it right when you're about to fly off
the vert ramp. You'll get the most air by doing that. Another good way to ollie
is not to simply let go of the X button, but slide your thumb off. Say you're
about to ollie. When it's the right moment slide your thumb down and the X
button will sort of flick. This will make your ollie slightly higher.
-[Thumb Slide]---------------------------------------------->
Now, on to the tricks. The official way to do tricks is to alternate between
pressing different directions (Up, Down, Left, Right), and pressing S for
board flips and O for grabs.
Here's my much better way. After going off a ramp, and if you have high air,
slide your two thumbs left and right. So, slide your left thumb rapidly between
the Left and Right directions, and slide your right thumb rapidly between S
and O. If you do this rapidly you'll bust all kinds of tricks and get some
pretty good points for it.
-[Flip and Rotate]------------------------------------------>
Something you can add to a trick is to hold L1 or R1 to rotate, or hold L2 and
R2 to flip. For example: if you hold R2 while you're on the ground, and keep
holding it after going off a vert ramp, you'll make a back flip. If you hold
R1, you'll rotate. If you hold both, you'll spin and flip! That's some crazy
stuff. Now, while spinning and flipping, try doing tricks! Slide your thumbs
left and right like crazy. If you combine a flip, a spin, and tricks... damn!
You'll get massive amounts of points.
-[The Manual]----------------------------------------------->
Finally, the ultimate trick for getting insane amounts of points. The manual.
The simple little trick can be used to link tricks together.
For example: you were went up high, did some tricks and landed. You got like
2500 points for it. Now, try this. Do some tricks in the air, and when you're
about to land press Up then Down quickly. That's how you do a manual. This will
actually keep your trick going! If you're in a half pipe you can hold X to
charge your ollie as you balance a manual and do some more tricks! Then do
another manual, and repeat it all again! This can go on forever. Just watch
the points add up in the bottom.
If you get good enough to reach a combo of 60 in one trick, remember it gets
doubled!
Well, this is how I got 259000 as a record in one of the Timed Trick Contests.
Obviously there are other strategies and tricks to get high amounts of points,
so feel free to explore and discover new ways.
===============================================================================
===== 4.0 MULTIPLAYER =========================================================
There are two modes in Multiplayer.
-[Timed Trick Contest]-------------------------------------->
In Timed Trick Contest two players compete at the same time on a split screen.
Both players must perform tricks to get as many points as possible, and the
one with the most points wins.
There is a time limit of 90 seconds.
-[HORSE]---------------------------------------------------->
The first player starts in HORSE. That first player has to get as many points
as possible in ONE trick, meaning if the trick stops the points stop. You can
extend tricks by using manuals (check the moves and tricks in the section
below).
After the first player has completed a trick and gotten the points, the second
player must then perform a trick and get MORE points than the first player. If
he passes the first player, they continue with the same process taking turns.
If any of the players gets less points than the other, then they lose and get
a letter. The first letter is H, and O, R, S, and E will follow. If any of the
players spell HORSE, then it's game over.
===============================================================================
===== 5.0 MOVES & TRICKS ======================================================
-------------------------------------------------------------------------------
5.1 Moves
-------------------------------------------------------------------------------
These moves can also be found in the game by pausing and going to Trick List,
or in the game's instruction manual.
Note that I use the '+' a lot. It means to press those two buttons at the same
time.
-[Basics]--------------------------------------------------->
Ollie.........Press X. Hold X to lock your speed and power up an ollie.
Grind.........Hold T at any rail or edge to grind.
Grab..........Ollie and hold O to do a grab.
Board flip....Ollie and press S.
Invert........Press and hold T at the edge of any halfpipe or vertical jump.
Manual........Press Up then Down quickly.
Nose manual...Press Down then Up quickly.
-[Grinds]--------------------------------------------------->
All grinds can be done on rails, curbs, and practically any edges.
50-50 grind.....Hold T
Nose grind......T + Up
Nose slide......T + Left
5-0 grind.......T + Down
Tail slide......T + Right
Blunt grind.....T + Up/Left
Board slide.....T + Up/Right
Crooked grind...T + Down/Left
Crooked slide...T + Down/Right
-[Nose Grabs]----------------------------------------------->
Nose grab...........Press Up, then hold O.
Friendly ghost......Up, Up, then hold O.
Weinberger..........Up, Down, then hold O.
Jasper..............Up, Up/Right, Right, then hold O.
Casper..............Up, Up/Right, Right, Down/Right, Down, then hold O.
Special nose grab...Up, Up/Right, Right. Down/Right, Down, Down/Left, Left,
Up/Left, Up, then hold O. The move is basically a full
circle, starting from Up.
-[Tail grabs]----------------------------------------------->
Tail grab...........Down, then hold O.
Improbable..........Down, Down, then hold O.
Unlikely............Down, Up, then hold O.
In your dreams......Down, Down/Left, Left, then hold O.
Impossible..........Down, Down/Left, Left, Up/Left, Up, then hold O.
Special tail grab...Down, Down/Left, Left, Up/Left, Up, Up/Right, Right,
Down/Right, Down, then hold O. Again, it's just a full
circle starting with Down.
-[Front rail grabs]----------------------------------------->
Indy.................Right, then hold O.
Gutted...............Right, Right, then hold O.
Spineless............Right, Left, then hold O.
Boneless.............Right, Down/Right, Down, then hold O.
Boned................Right, Down/Right, Down, Down/Left, Left, then hold O.
Special front grab...Right, Down/Right, Down, Down/Left, Left, Up/Left, Up,
Up/Right, Right, then hold O. It's another circle.
-[Back rail grabs]------------------------------------------>
Method..............Left, then hold O.
Mellancollie........Left, Left, then hold O.
Stinkyfish..........Left, Right, then hold O.
Blinkyfish..........Left, Up/Left, Up, then hold O.
Bummed out..........Left, Up/Left, Up, Up/Right, Right, then hold O.
Special back grab...Left, Up/Left, Up, Up/Right, Right, Down/Right, Down,
Down/Left, Left, then hold O. A circle motion once again.
-[Board flips]---------------------------------------------->
360 flip.......S + Up
Kickflip.......S + Down
Shove-it.......S + Left
Shove-it 360...S + Right
-[Spins and flips]------------------------------------------>
(These have to be held down before you jump.)
Spin right...Hold R1
Spin left....Hold L1
Back flip....Hold R2
Front flip...Hold L2
(Note: Holding a grab as you spin or flip will make you spin faster.)
-------------------------------------------------------------------------------
5.2 In the Zone
-------------------------------------------------------------------------------
If you pull off an excellent combination of tricks, the indicator in the
top-right corner of the screen will say you're "In The Zone". You can do
special grabs and inverts with each character when you're In The Zone.
Special nose grab...Up, Up/Right, Right. Down/Right, Down, Down/Left, Left,
Up/Left, Up, then hold O. The move is basically a full circle, starting from
Up.
Special tail grab...Down, Down/Left, Left, Up/Left, Up, Up/Right, Right,
Down/Right, Down, then hold O. Again, it's just a full circle starting with
Down.
Special front grab...Right, Down/Right, Down, Down/Left, Left, Up/Left, Up,
Up/Right, Right, then hold O. It's another circle.
Special back grab...Left, Up/Left, Up, Up/Right, Right, Down/Right, Down,
Down/Left, Left, then hold O. A circle motion once again.
Invert...Press and hold T at the edge of any halfpipe or vertical jump.
-------------------------------------------------------------------------------
5.3 Hop and Grind!
-------------------------------------------------------------------------------
This is a very important strategy when grinding, and quite necessary for some
of the Skatefest objectives.
There are certain rails that will sometimes turn up at an angle, preventing you
from grinding them smoothly. To get over these obstacles just tap X to hop,
then hold T to grind again. Then tap X again, then hold T again. Then tap X
again, then hold T again... See where I'm going with this? By hopping and
grinding you will actually climb up the rail, despite the fact that it's at
an angle.
If you hold Up, you can grind up the inclines. Hopping and grinding can also
increase your speed when grinding a rail.
===============================================================================
===== 6.0 CHARACTER UPGRADE ===================================================
You can earn money in Skillz School, from the clocks in Skatefest, and Timed
Trick Contest. What's this money for? To upgrade a character.
It's up to you who you wish to upgrade, but once you have money just go to Shop
in the Options menu and use the money to boost abilities. Each point you add to
an ability will cost $0.05.
===============================================================================
===== 7.0 UNLOCKABLES =========================================================
-[Skaters]-------------------------------------------------->
To unlock a skater you must play the Timed Trick Contest. For every two levels
where you beat a Contest, you will get one new skater. But, it doesn't count
the combined Contests beaten. You have to stick to one skater and play through
the entire tour to get all the skaters.
You can also unlock codes that give different costumes for each skater. Press
O after choosing a skater to toggle the different costumes.
-[Boards]--------------------------------------------------->
The boards are unlocked in Skatefest. Basically you have to collect the Easy,
Medium, and Hard items to reveal a new board in each level, then you have to
collect the board. The board will always be hidden in a secret area.
-[Secret Areas]--------------------------------------------->
To open the secret area just beat the third objective on Skatefest. Once you
open the area go in and grab the new board. Each character will have their own
unique boards.
-[Levels]--------------------------------------------------->
Levels are next. To get these you have to once again go to Skatefest. Beat the
first and second objectives in a level, and you will get the level that
follows. It works this way for all levels. Once you have unlocked a level, you
can choose it in Multiplayer as well.
-[Codes]---------------------------------------------------->
Codes are unlocked when you complete a Skatefest with Wiggum, or when you
complete the game with a character.
===============================================================================
===== 8.0 CODES & SECRETS =====================================================
You get codes whenever you complete the game with a character, or when you
complete a Skatefest level with Wiggum.
Hold L1, L2, R1, and R2 at the character select screen and press the following
codes:
Big-Head Homer
Press O, X, T, S
Tightie Whitie Homer
Press T, O, X, S
Big-Head Bart
Press X, S, O, T
Gangsta' Bart
Press O, X, S, T
Demon Marge
Press X, S, T, O
Big-Head Lisa
Press S, T, X, O
Gangsta' Lisa
Press S, T, O, X
Big-Head Nelson
Press T, S, O, X
Ballerina Nelson
Press T, S, X, O
Men In Black Otto
Press S, X, O, T
Big-Head Frink
Press S, X, T, O
Groovy Frink
Press X, O, T, S
Business Suit Krusty
Press O, T, S, X
Big-Head Wiggum
Press X, O, S, T
Man-Eater Wiggum
Press T, O, S, X
Unlock All Skaters
Press O, T, X, S
Unlock All Boards
Press X, T, O, S
Unlock All Levels
Press T, X, S, O
Get $99.00
Press T, X, O, S
Fuzzy Skaters
Press X, T, S, O
Gameshark/Action Replay Codes (Tips and Tricks magazine)
-Master Code (Must be on)
0E3C7DF2-1853E59E + EE8C95AA-BCB9569A
-Infinite Cash
CE460C00-BCA9DA82 + CE435684-BCA99B82
-Max speed
CE460C48-BCA9DD4B
-Max turns
CE460C54-BCA9DD4B
-Max jumps
CE460C50-BCA9DD4B
-Max grabs
CE460C5C-BCA9DD4B
-Max grinds
CE460C58-BCA9DD4B
===============================================================================
===== 9.0 GUIDE TO SPRINGFIELD ================================================
Hello, skateboard fanatic! Welcome to our little town of Springfield, home of
this year's Annual Skate Tour!
If all the ollies and board flips become tiresome, feel free to check out the
many great sites here in town. From Moe's Tavern to Springfield Gorge, we got
it all!
(These are all locales from the show. Locales that were not from the show were
not added.)
-[Springfield Elementary]----------------------------------->
Springfield Elementary School
Grandma's World
Krusty Burgers
Moe's Tavern
King Toot's Music Store
Principal Skinner's House
-[Downtown Springfield]------------------------------------->
Kwik-E-Mart
Barney's Bowlarama
Springfield Police Station
Stonecutters' HQ
The Frying Dutchman
Springfield Post Office
Springfield Municipal Court
City Hall
Statue of Jebediah Springfield
Krusty Burger
Aztec Theatre
Springfield State Prison
Springfield Monorail
-[Burns' Mansion]------------------------------------------->
Burns' Mansion
Burns' Crypt
-[Construction Site]---------------------------------------->
Springfield Monorail
-[Sir Putt-a-lot's]----------------------------------------->
Sir Putt-a-Lot's
-[Krustylu Studios]----------------------------------------->
Channel 6 Studios
Smartline Set
The Krusty the Clown Show Set
-[Springfield Mall]----------------------------------------->
Gulp 'N' Blow
Krusty Burger
The Happy Sailor Tattoo Parlor
Cookie Colossus
Leftorium
-[Itchy & Scratchy Land]------------------------------------>
Itchy and Scratchy Land
Parent Island
TGI McScratchy's
Itchy's 70s Disco
Tavern on the Scream
-[Power Plant]---------------------------------------------->
SNPP
Cooling towers
Radioactive gas vent
-[Springfield Gorge]---------------------------------------->
Springfield Gorge
Springfield Dam
Bart the daredevil's final jump
===============================================================================
===== 10.0 LEGAL / MISC. ======================================================
-------------------------------------------------------------------------------
10.1 Version History
-------------------------------------------------------------------------------
August 7, 2004: Version 1.3
- - - - - - - - - - - - - -
Added a trio of tips from Jeff Charity. Thanks man!
January 7, 2004: Version 1.2
- - - - - - - - - - - - - - -
Hey folks, I just moved things around for your reading pleasure. Enjoy!
July 23: Version 1.1
- - - - - - - - - - -
Added a more detailed section for Multiplayer.
June 4: Version 1.0
- - - - - - - - - -
Yes, I completely redesigned the entire FAQ. I believe that warrants a new
start.
-------------------------------------------------------------------------------
10.2 Guide Credits
-------------------------------------------------------------------------------
Thanks to...
1. Matt Groening. The man created 'The Simpsons', which has been on the air for
14 years and is still going strong. Shine on you crazy bearded bastard!
2. If I thank Matt Groening, then I also have to praise the hundreds of
individuals who are involved with the show. To the writers, voice actors,
animators, producers, gofers, and every other person involved... thank you!
3. Wilson Lau gets mad props for his kick ass 'Bart vs. the Space Mutants'
guide. It inspired me to write guides for Simpsons video games.
4. Fox Interactive, Electronic Arts, and Code Monkeys for making the game.
5. TawkNHouse for pointing out that a 60 trick combo doubles the points.
6. Tips and Tricks magazine (February 2003) for discovering the
Gameshark/Action Replay codes. Ya gotta love the folks over there... bloody
great mag.
7. WiSK and still sick for discovering easier ways to get the last hard item
in Downtown Springfield.
8. Jeff Charity for his various tips.
9. Thank YOU for reading. After all, I didn't write this for my own health...
-------------------------------------------------------------------------------
10.3 Contact Information
-------------------------------------------------------------------------------
So, the address is: subsane@gmail.com
The issue of too many e-mails isn't a problem, so I'll most likely respond to
any questions (for now). But, I do delete e-mails without a subject. Put
something like 'Simpsons Skateboarding guide' to be sure I read it.
-------------------------------------------------------------------------------
10.4 Legal Stuff
-------------------------------------------------------------------------------
1. "The Simpsons Skateboarding" is copyright © 2002 Electronic Arts. The
Simpsons and any related Simpsons characters are property of Twentieth Century
Fox Film Corporation.
2. This guide copyright © 2002-2004 SubSane. This guide may be distributed
freely as long as it remains in it's ORIGINAL and UNALTERED form. It is only
for private use and may not be reproduced for commercial purposes.
If I discover that this guide has been altered in any way and is being
displayed publicly, I reserve the right to have the guide removed from that
location.