====================================================================
FAQ/WALKTHROUGH for NIGHT OF THE LIVING TREE HOUSE OF HORROR, v1.1
Written and maintained by SubSane
Last Updated July 5, 2003
====================================================================
TABLE OF CONTENTS
1.0 INTRODUCTION
1.1 Game Details
1.2 Story
2.0 BASICS
2.1 Game Start
2.2 Status Screen
3.0 WALKTHROUGH
3.1 Bad Dream House
3.2 Flying Tonight
3.3 Plan 9 From Outer Springfield
3.4 Vlad All Over
3.5 If I Only Had A Body
3.6 Nightmare Cafeteria
3.7 King Homer
4.0 CODES & SECRETS
5.0 LEGAL / MISC.
5.1 Version History
5.2 Guide Credits
5.3 Contact Information
5.4 Legal Stuff
====================================================================
===== 1.0 INTRODUCTION =============================================
--------------------------------------------------------------------
1.1 Game Details
--------------------------------------------------------------------
Night of the Living Tree House of Horror (what a title), was
released in March of 2001. It was published by THQ and Fox
Interactive, and developed by Software Creations.
--------------------------------------------------------------------
1.2 Story
--------------------------------------------------------------------
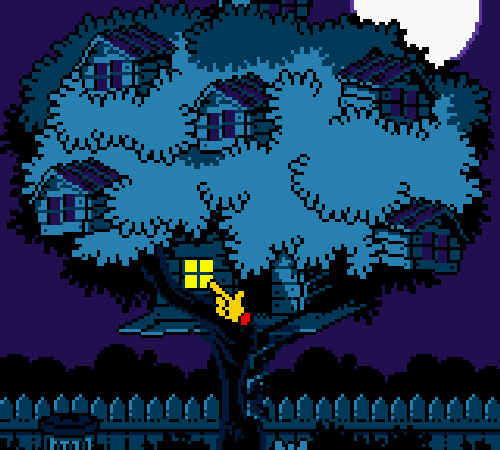
'Twas a dark and stormy night. Halloween night. The spirits were free
from their dark abyss for this night. Enough time to cause havoc...
in Springfield!
The Simpsons' souls have now been trapped in a tree this Halloween,
and each family member must defeat his or her nightmare to escape.
====================================================================
===== 2.0 BASICS ===================================================
--------------------------------------------------------------------
2.1 Game Start
--------------------------------------------------------------------
Start
Choose this option to begin the game.
Options
Here you can toggle the game music, sound effects, and difficulty.
Password
Input a password, obviously.
--------------------------------------------------------------------
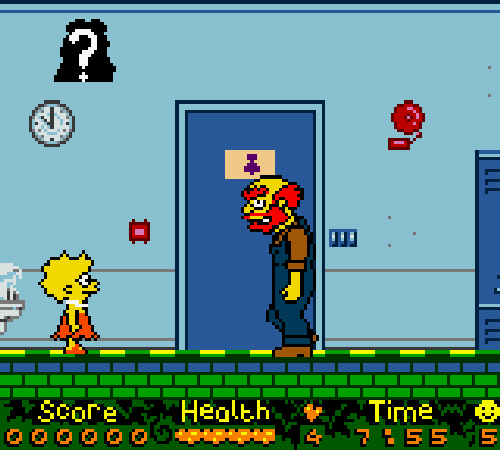
2.2 Status Screen
--------------------------------------------------------------------
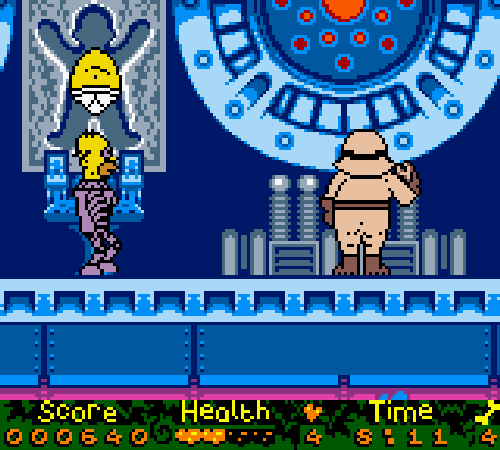
From left to right:
Score
The total number of accumulated points.
Health
The weird yellow bar in the middle is the health meter.
Lives
The number under that heart represents the number of remaining lives.
Time
Uh, the remaining time in a stage.
Objective
Most stages will have an objective, and the picture in the corner
will show what the objective is.
====================================================================
===== 3.0 WALKTHROUGH ==============================================
This guide is based on Difficulty 1, which is the default difficulty.
--------------------------------------------------------------------
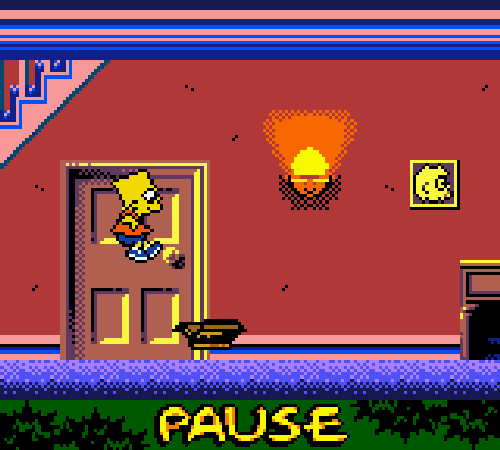
3.1 Bad Dream House
--------------------------------------------------------------------
Based on: 'Bad Dream House' - Tree House of Horrors I.
Objective: The Simpsons' dog is trapped in the attic of a pet hungry
haunted house.
Help Bart rescue Santa's Little Helper before he becomes
Satan's Little Helper! Find fuses to place in the fuse
box so Bart can turn on the lights and find his way up to
the attic. Beware the possessed household objects that
have been sent to destroy you.
Controls:
Left/Right buttons...Move Bart left and right
Up button............Enter doors, go up ladders and stairs
Down button..........Go down ladders
B button.............Jump
A button.............Shoot slingshot
Start button.........Pause
Items:
Donuts......Replenish health
Fuses.......Find four and put them in the fuse box
Blue key....Opens the door on the second floor
Red key.....Opens the door on the second floor
Yellow key..Opens the attic door
Enemies: Vaccuums, books, zombie arms, rats, three-eyed fishes,
spiders, white hands, walking mop
Time limit: 7 minutes
-Fuse #1-
Right, so you have to find Santa's Little Helper in the attic. You
start in the halls. You can shoot the vaccuums twice to kill them.
The flying books stay in one small area, so stand far away and shoot
once.
There are some stairs where you begin, and a door on the left and
right side. Most of the doors are too dark or locked right now, so
go into the door on the right side of the stairs to enter the
basement.
The rats and spiders in the basement only take one hit, so they
shouldn't be a problem. Keep going right until you come across the
gray fuse box. It will have several wires connected to it.
Just to the left and a bit up from the fuse box there will be a
glowing fuse. Pick it up and take it to fuse box to insert the first
fuse.
-Fuse #2-
There is another fuse just to the right of the fuse box, up on a beam
as well. Pick it up and drop it in the fuse box to have two fuses set.
Two more to go.
-Fuse #3-
If you keep going right you'll see a bunch of tombstones and zombie
arms. The zombie arms can't be killed, so don't bother. Above that
stuff will be some pipes and a donut up on the highest pipe. Use the
pipes to jump up there and get the donut if you need health. This
donut always returns if you need health.
Climb down the ladder at the bottom to go into a sewer area. Go to
the left and jump onto the platforms that are over the green sewage,
and avoid the fishes. They only take one hit if you want to kill
them, but there's no point.
So, keep going left. When you reach the brown pipes avoid the drops
and watch our for the rats. Make your way to the bottom and then
start going to the right. Of course you'll want to watch for the
fishes as you make any jumps.
There will be a big gap between two concrete platforms, so I suggest
you take a running start and hold B to make it across. Eventually
you'll reach a platform with a ladder leading up, and a blue key.
Once you grab the blue key the sewage will start to rise, so climb
up the ladder quickly! Use the brown pipes and platforms to get to
the top, then go left. You'll find yourself at the ladder entrance.
Climb back up.
Well, that's about it for the basement. Since you put two fuses in
already and have the blue key, you can go up to the halls and find
that some of the doors have lights.
Now go to the last door on the right of the first floor. Shoot the
two rats on the left immediately, then avoid the white hands. To get
over the stove just jump.
There is a fuse on the left side of the kitchen, so pick it up. Go
back to the entrance and then back into the basement. Drop the fuse in
the fuse box, then go back to the first floor.
-Fuse #4-
Now you can go inside the door on the left. Move to the right and
avoid the hands on the couch. Kill or avoid the vaccuum and grab the
red key. You now have a red key and a blue key.
Go back to the first floor and climb up the stairs to the second
floor. Just so you know, that door near the stairs has a donut. In
case you ever need health.
Enter the last door on the right, then avoid any white hands and
books. You'll find the yellow key on the right. Go back to the second
floor hall.
Enter the first door on the left and go to the right, as always
avoiding any and all enemies. Enter the door on the right. Kill or
ignore the rat and get the final fuse that is next to the toilet.
Go back to the basement and drop the last fuse into the fuse box,
then go up to the second floor. Enter the door that is left of the
stairs (the yellow lock door).
-The Attic-
Now you'll finally be in the attic. But before you can save Santa's
Little Helper you have to destroy the evil walking mop! It's the same
one that was wandering around in the dark rooms.
It's easy enough, just hit the mop four times to kill it off. It
flies around so be careful if it is under or over you. Once that is
done get to a platform on the left side and save Santa's Little
Helper to finish the stage.
--------------------------------------------------------------------
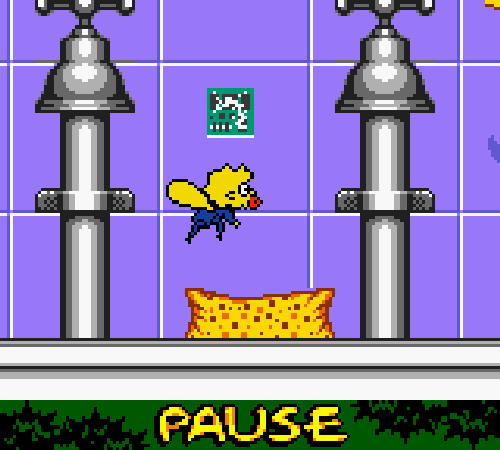
3.2 Flying Tonight
--------------------------------------------------------------------
Based on: 'Fly vs. Fly' - Tree House of Horrors VIII.
Objective: Maggie has wandered into a matter transporter - along with
a fly - and become a tiny Maggie-fly!
Avoid spiders and other dangerous hazards as you guide
Maggie through the kitchen to the other transporter,
re-uniting her with the rest of her body!
Controls:
Left/Right buttons...Move Maggie left and right
B button.............Hold to fly up
Start button.........Pause
Items:
Donuts.....Replenish health
Circuits...Collect three to activate the transporter
Enemies: Spiders, fly-eating plants, wasps, ants
Time limit: 4 minutes
Before I go anywhere, you should know that Maggie does not have any
weapons. So, you will have to avoid any enemies by busting some
fancy flying moves.
All right, so the picture in the bottom-right corner says the
objective is... a happy face? Nah, the objective is to collect three
circuits to use the transporter at the end, then to hit five switches
and shut off the steam at the end.
-Circuit #1-
Fly forward to find the first circuit between two faucets.
-Circuit #2-
Keep going and get the donut on from the top of the plates, then fly
up a bit. You should see a wasp, a fly-eating plant, and the second
circuit. Avoid the wasp and get the circuit.
-Circuit #3-
Keep heading to the right along the bottom and you'll see the last
circuit next to a plate of cherries.
-Switch #1-
Keep going right and fly up as soon as you get out from under the red
cabinet. You should see a dead fish right there. Fly up to find the
white square with blue circles in it. Hit the switch on the right
side. Watch out for the electric bursts that will come out of it.
-Switch #2-
Go back to the bottom and fly under the cabinet, then fly up when you
reach the next open area. Go up over the next cabinet and hit the
next switch.
-Switch #3-
Keep going straight to the right and you'll find the next switch
right away.
-Switch #4-
Fly under the gray pipes and go to the right under the cabinet. When
you see some vertical gray pipes and a white plug, fly straight up
and hit the fourth switch.
-Switch #5-
As always, keep going to the right. Fly under the gray pipes when you
see them and hit the final switch at the end.
-Transporter-
Now that you hit all five switches, the steam from the green goop to
the right will be gone. Fly between the pot and the steam vent and
keep going to find the transporter. Hop into the glowing white ball
to beat the stage.
--------------------------------------------------------------------
3.3 Plan 9 From Outer Springfield
--------------------------------------------------------------------
Based on: 'Dial "Z" For Zombies' - Tree House of Horrors III.
Objective: Everyone in Springfield has become a zombie - except the
Simpsons! Brain-sucking, flesh-loving, murderous zombies
attack Marge as she tries to get home as fast as she can
to save her family.
Help Marge destroy as many zombies as possible before
they turn her family into the "walking dead."
Controls:
Up/Down/Left/Right buttons...Move around the streets
B button.....................Hold B to strafe
A button.....................Shoot weapon
Start button.................Pause
Items:
Donuts....Replenish health
Manure....Ten mid-powered shots
Puddles...Ten high-powered shots
Enemies: Purple zombies, blue zombies, zombie dogs, Apu, Moe,
Principal Skinner, Krusty
Time limit: 6 minutes
Remember Contra? That little game for the NES, came out a few years
back? Well, the reason I mention it is because this stage plays just
like those Contra stages where the characters walk up toward the top
of the screen.
A few basics first. There are three types of ammo: rocks, manure
(don't ask), and water puddles. The rocks are the default, and the
weakest. The manure has medium strength, and the puddles have the
greatest strength.
I recommend that you don't mess with the regular zombies on the
street. Just walk around them. So, always grab the puddles and save
the ten shots for each main zombie.
Finally, don't forget to hold the B button to strafe. Strafing means
the character will face a direction no matter what direction you're
walking. It's a good idea to strafe while facing up, when fighting
the zombies.
-Zombie Apu-
Stick to the right side or left side as soon as you start and you
should see a water puddle. Grab it to have 10 shots. Avoid any
zombies or sewer zombies and just stick to the either side. Keep
going up to eventually see a green Apu.
It's simple enough if you have the puddle shots. Just hold B to
strafe and shoot zombie Apu four or five times. He only shoots four
beams, which are simple to avoid. If you run out of ammo there's a
manure bag on the left side.
-Zombie Moe-
As you keep going up you'll walk through a park. There are several
zombies and some zombie dogs, but they can all be easily avoided by
going up along the left or right side.
When you see a group of five sewers, prepare to fight zombie Moe.
The best spot to be is in the bottom center, at the white line. Stay
just a milimeter to the right of the line, so some of it still shows
on the left of Marge's body. If you stand in the correct spot the
only Moe that will hit you is the one in the bottom-right corner.
Just tap Left to avoid his shots.
Anyway, the easiest way to kill Moe is to stand under the sewer in
the center and shoot up when Moe appears. If a whole group of
puddle shots hits him, it will only take two shots.
Go straight up the middle after beating Moe to get a donut.
-Zombie Skinner-
The zombies in this area are more aggressive, so watch out. As always
stick to one side and keep going up (and pick up a water puddle), and
eventually you'll see zombie Skinner.
Skinner will shoot four books in a row, and very quickly. The best
thing to do is continuously walk left and right, away from Skinner.
If he shoots and you're walking away, the books will just barely
miss.
To kill Skinner just shoot him as you walk left and right. It will
be about four to five shots.
Walk straight up the middle again to get another donut.
-Zombie Krusty-
Avoid any zombies and zombie dogs by sticking to either side, and
keep going. Eventually you'll reach a large puddle, and the Simpsons'
house. But first you have to kill zombie Krusty!
You now have infinite puddle shots, so shoot like crazy! Krusty's
attack pattern is similar to Apu's, except the ice crean cones take
more than Apu's beams.
The only thing I can recommend is that you just do your best to
avoid his shots. If you stand under Krusty it's easy to avoid the
ice cream because there are big gaps. If he shoots the ice cream at
an angle, it's tougher to avoid. So stay directly under him as often
as possible.
Walk through the door after Krusty is dead to end the stage.
--------------------------------------------------------------------
3.4 Vlad All Over
--------------------------------------------------------------------
Based on: 'Bart Simpson's Dracula' - Tree House of Horrors IV.
Objective: Mr. Burns has been bleeding Springfield dry for years,
but now it's not just money he's thirsty for - Mr. Burns
is a vampire!
Help Homer find the coffin in the basement of Burns'
castle before sunset, otherwise it's lights out for Homer.
He will have to find and destroy Burns before Burns
quenches his thirst with Homer's blood!
Controls:
Left/Right buttons...Move left and right
Up/Down buttons......Look above and below
B button.............Jump
A button.............Shoot onions
Start button.........Pause
Items:
Donuts...Replenish health
Enemies: Rats, knights, spiders, guards, bats, white hands, Mr. Burns
Time limit: 7 minutes
Well, we finally reach a Homer stage. It's fairly easy, and there
aren't many enemies. The major obstacles would be the jumps involved.
-Chamber #1-
Walk to the right, but be careful when you're near the end of the
platform because there is a brown statue that will fall from above.
Avoid it and jump onto the small gray platform. Hold Down to look
for the next gray platform and hop down onto it.
Jump onto the brown platform on the left, the one hanging from a
chain. Quickly jump to the left because the brown platforms will
break away. Then jump from the gray platform to the next one on the
left.
Jump onto the chandelier, then get the donut in the left corner. Now
go back to the small platform under the shield, and look Down to see
a series of small platforms. Follow these platforms and jump to the
left when you see the gate.
There will be a rat, so kill or avoid it. Hit the lever near the gate
to enter Chamber #2.
-Chamber #2-
As soon as you hop onto the first platform, some vines will start
rising from the ground. These will kill you instantly, so don't let
them touch you.
This chamber involves speed, so there's not much I can write about
it. Just remember a few things. Don't walk too much, most platforms
can be reached by one jump. Any platform higher than Homer's head can
not be reached with one jump. The brown platforms break away.
It only took two tries for me to make it, so it's no big deal. Go
into the next gate to reach the Castle.
-Castle Roof-
This next part involves several dangers. First, there are guards
patrolling and holding up spears that can cause damage. A simple
jump is all you need to avoid them. There will be also be guards who
stand still and thrust the spears up in the air.
Next there are some swords that will pop up from the pillars. A gray
rock will pop up right before a sword does, so use that to avoid
landing on them.
There will also be arrows flying from the right. These can be avoided
with a jump, or by jumping into the gaps between pillars.
Finally, there will be one or two bats flying around. These just fly
around, so avoiding them should be easy enough.
So, now you know what to avoid and how. Make your way to the right,
and make sure to grab the donuts that appear halfway and at the end.
Once you get to the gate, enter to go back to Chamber #1.
-Chamber #1-
Now you're on the right side of Chamber #1. Avoid the green spider on
this platform and go to the right. Jump down and keep jumping down to
the right. Avoid the knight because it can't be killed. Also watch
out for rats.
Eventually you should see a lever. Hit the lever to hit open the next
gate near the lever.
-Chamber #3-
Go to the right and avoid the white hand. Hop down the stairs to
find a donut and a lever. Grab the donut first if you need it, then
hit the lever.
Now you have to move as quickly as you can. If you're too slow the
gates will close, and you'll have to start over from the first one.
Go back to the top platform, then head to the left. Use the purple
pillar to get over the gap, then go into the gate.
Avoid any rats and white hands as you jump up the several green
pillars. Once you're at the top jump onto the gray platforms, and you
should see the lever. Hit the lever and quickly jump down to leave
this room.
Quickly head to the left again. Enter the next gate. Hop your way to
the bottom by using the platforms. Avoid the brown statue that will
fall and cause damage. Grab the donut when you see it and hit the
lever. Now it's back to the top and out of this room.
Hold Left as soon as you're back in the main room. Keep going and
don't even jump. You'll eventually fall onto a purple pillar, then
next to a gate. Go in the gate.
Jump over the spikes and hop your way up the platforms. As always the
brown platforms break away, and avoid any white hands and rats. So
get to the top and go right to find another lever. Jump down to the
gate and leave.
Hold Right and keep going. Jump over the spikes, then go into the last
gate to reach Burns' Chamber.
-Burns' Chamber-
Go to the left and jump up the chandelier. A bat will appear, but
you no longer have any weapons. Just avoid the bat and keep going
until you reach the far left wall. Fall down the steep steps, but
stop before you reach the ground floor.
You should now see Mr. Burns in full vampire garb, running back and
forth across the floor. One hit will kill you instantly, so don't
get hit!
Wait for him to be on the right and jump onto the purple pillar near
the coffin. Burns can't hit you there. Now, to kill Burns all you
have to do is jump onto the brown shutters to release the sunlight.
Open the first two shutters, then jump onto the other purple pillar
and open the other two shutters. Burns will get trapped and burst
into a puff of old smoke, meaning the stage is completed.
--------------------------------------------------------------------
3.5 If I Only Had A Body
--------------------------------------------------------------------
Based on: 'If I Only Had A Brain' - Tree House of Horrors II.
Objective: Hoping to create the perfect employee - tireless and loyal
with no salary or benefits - Mr. Burns has built a robot
using Homer as its head. To escape notice, Mr. Burns has
hidden the rest of Homer's body parts throughout the
nuclear plant.
Help robot Homer find and re-assemble the real Homer
before angry workers can destroy him!
Controls:
Left/Right buttons...Move left and right
Up/Down buttons......Climb up and down ladders
B button.............Jump
A button.............Search barrels, extinguishers, boxes
Start button.........Pause
Items:
Batteries...Replenish health
Bones.......Body parts
Enemies: SNPP workers, technicians, radioactive rats
Time limit: 10 minutes
Well, a few basics. First, you have no weapons in this stage. So you
have to avoid the enemies and other small obstacles by jumping over
them. Also avoid standing under the steam crushers. They are large
steel columns, and steam will shoot out right before they come down.
An eye will appear above Homer's head when he can search a barrel,
extinguisher, or green box.
I don't point out every green barrel, so remember to search each and
every one. You will always get batteries from them, so if you're full
on health you can skip one or two of them and search them when you
need health.
Right, so you have to search through some extinguishers and green
boxes to find five bones. Each bone represents a body part that has
to be returned to the surgery table at the top, one at a time. Once
you get a bone, you have to walk to the top and drop it off before
you can search through more stuff.
Here's a simple map of the beginning part, and the direction to go
to find each bone:
ST............Surgery table
Bone 1........Direction to bone 1
Bones 2 & 3...Direction to bones 2 and 3
Bone 4........Direction to bone 4
Bone 5........Direction to bone 5
_______________________________________
| | | |
| | ST | |
| |__________________| |
| ___/ |
| |
|<---Bones 2&3 |
|_______ ____________ |
| | \ |
| | \ --->Bone 1 |
| | \___ |
| | |
| | |
| | |
| |__ _____ |
| \ / | |
| \ / | |
| \________________/ | |
| > |
| | Bone 4 |
| | |
| | |
| > |
| Bone 5 |
|_______________________________________|
-Bone 1-
So climb down the ladder on the left, and avoid any enemies of course.
Once you get on the first platform below the beginning, go to the
right. Jump the gap and look out for the steam crushers to enter the
path to bone 1.
There are no branches, so just follow the path. Remember to look out
for drops and the balls on the conveyor belts, in addition to enemies
and steam crushers.
When you get to a large gap that goes to the left, that's probably
the one that leads to the bone. Jump from the very edge and search
the extinguisher at the end to find the bone.
You can fall down into the gap and go left to get back to the main
area and drop the bone at the surgery table to get the right arm.
-Bone 2-
Go to the area on the left, and as always avoid any obstacles and
search barrels to get health batteries. Eventually you should see a
lab technician walking around in a small area. Climb up the ladder
and avoid the technician, then search the long green box on the
right.
Go back to the surgery table and drop it off to have the left arm.
-Bone 3-
Go back to the left area and just follow the path, while also
avoiding all the obstacles in the way. After many lefts and rights
you will end up in the bottom-left corner of the stage. Search the
extinguisher and drop the bone at the surgery table to get the right
leg.
-Bone 4-
Drop down to the bottom of the main area and go all the way to the
right, then climb down the ladder. Head to the right then follow the
path, avoiding any and all obstacles along the way.
Eventually you should see a long green box up on a small platform,
so get the bone and take it back to place in the left leg.
-Bone 5-
Drop to the bottom of the main area and climb down the ladder in the
middle. As always all you have to do is avoid any obstacles and
follow the path until you get to and search an extinguisher. Go back
and drop off this bone to get the torso.
Now Homer will toss his head up to the top, and the stage will be
complete.
--------------------------------------------------------------------
3.6 Nightmare Cafeteria
--------------------------------------------------------------------
Based on: 'Nightmare Cafeteria' - Tree House of Horrors V.
Objective: Something's cooking at Springfield Elementary! Principal
Skinner's got a bone to pick with then students & an
appetite for revenge!
Help Lisa find the keys to free the school kids from
their cages, or else they'll be eaten by the teachers &
staff. Don't get caught or you'll wind up on the menu, too!
Controls:
Left/Right buttons...Move left and right
Up button............Enter doors
B button.............Jump
A button.............Hide, search cabinets
Start button.........Pause
Items:
Keys.....Used to unlock cages
Donuts...Replenish health
Keys.....Used to unlock cages
Enemies: Rats, wasps, Groundskeeper Willy, Ms. Hoover, Ms. Krabappel,
lunch lady Doris, Mr. Largo, Principal Skinner
Time limit: 8 minutes
All right, let me explain a couple of things. First, you'll notice
that there are some silhouettes in the top-left corner. Each of the
five silhouettes represents a kid that you have to save. If there is
a question mark it means you don't have that key yet, and if there
is a key it means you have the key for that cage.
The pictures will get colored in when you have saved each kid. The
kids are Milhouse, Uter, Martin, Sherri, and Bart.
The adults in this stage will all attack by rushing forward when they
see you. To avoid being seen, press the A button when you're against
a flat wall. It will not work if you are next to a chair, table, etc.
Once an adult has seen you, you can't hide. The best chance is to run
for it and hopefully reach a door to escape.
-Hall #1-
Groundskeeper Willy will be right where you start, so press the A
button against the wall to hide. Wait for Willy to walk right, then
hide next to the lockers. Once he's facing away on the left side,
keep going and enter the first blue door.
-Sherri Door-
Search the cabinet on the right by pressing A and you'll get the
Milhouse key. Sherri is in this room, but you don't have her key yet.
Go back to the hall.
-Hall #1-
Head to the right and enter the next blue door.
-Milhouse Door-
Search the cabinet on the left to get the Bart key. Avoid the rat and
go to the right until you see the cage. Press A to open the cage and
free Milhouse.
This is Skinner's office, so after you free Milhouse the bell will go
off and Skinner will come in. He wanders around near his desk, so get
near the desk and find some wall to hide against. Wait for him to
walk by, then leave this room.
-Hall #1-
Hold the Right button as you get to the hall and quickly hide between
the lockers to avoid Ms. Krabappel. Wait for her to pass by, then go
into the next blue door.
-Uter Door-
Search the cabinet next to the door to get the Sherri key. Uter is
caged in this room, but you don't have his key yet. Leave back to
the hall.
-Hall #1-
Since you now have the Sherri key, go back to the first door in this
hall.
-Sherri Door-
Go to the far left and open the cage to free Sherri. Skinner will now
be in the room, so hide against the walls to avoid him and get back
to the hall.
-Hall #1-
Now go all the way to the right, as always avoiding any enemies in
the way. Enter the last door.
-Auditorium-
Easy enough, just go to the left while avoiding the wasps.
-Hall #2-
Hide to avoid Ms. Hoover, then enter the first blue door you come
across.
-Sherri Door-
Go to the left, and avoid Ms. Hoover when you get near her desk.
Don't forget to pick up the donut when you see it, then go into the
next door.
Go to the right side of this room and open the cage to free Bart. Now
go all the way back to the hall.
-Hall #2-
Go to the right and enter the next door.
-Closet-
There is a donut on the left side, and a cabinet on the right. Search
the cabinet to get the Martin key, then go back to the hall.
-Hall #2-
Go to the right and avoid Mr. Largo, then go into the next blue door.
-Martin Door-
Avoid lunch lady Doris, then go into the door on the far right. Now
that you're in the kitchen go all the way to the left and search the
last cabinet, near the door. You will get the Uter key.
Go into the next door. There is a donut on the left side of this room,
and a cage on the right. Open the cage to free Martin. Now go back to
the hall.
-Hall #2-
Go into the door on the far left, that auditorium.
-Auditorium-
Go all the way to the right.
-Hall #1-
Start walking to the left and enter the first blue door you see to
go into the Uter door.
-Uter Door-
Walk to the right, and avoid Krabappel of course. Go into the door on
the right. Once you're in here, walk to the right to find Uter's key.
Unlock the cage to free Uter and beat this stage.
--------------------------------------------------------------------
3.7 King Homer
--------------------------------------------------------------------
Based on: 'King Homer' - Tree House of Horrors III.
Objective: The gargantuan ape, King Homer, is on a rampage through
the streets of Springfield in search of his true love.
Help King Homer find his beloved Marge by destroying
everything in his path. Pummel buildings, punch planes,
and destroy the army that is trying to put an end to his
monkey business!
Controls:
Left/Right buttons...Move left and right
Up button............Aim punches up, climb up buildings
Down button..........Defend against attacks
B button.............Jump, punch up while climbing
A button.............Punch, punch out while climbing
Start button.........Pause
Items:
Donuts...Replenish health
Enemies: Jeeps, tanks, green planes, bombs, red plane
Time limit: 4 minutes
If any of you have ever played Rampage, then you know what this stage
is about. All you have to do is destroy stuff and climb buildings.
Unfortunately this stage is not linear, it's based more on playing
skills. So that means I can't do much to guide you through it. But,
here are my playing tips for this stage.
First of all, holding Down will help block any bullets from the tanks
and jeeps on the ground. You can block the bullets, then attack when
the tanks or jeeps have stopped.
The easiest way to kill ground enemies is to jump on them. There's
no way to punch them, so don't even bother. You can also step on the
small people walking around.
The green planes and floating purple bombs are in the air, but don't
try to fight them. Just wait for the green planes to go into the
background, then pass them. Avoid the floating bombs by waiting for
them to go up.
When climbing buildings, there will often be a parachute bomb that
will drop from above. So I suggest you climb up SLOWLY. If you're
careful you can spot the bomb and press the B button to punch up and
destroy the bomb.
Feel free to jump as far as you can from the tops of buildings. You
won't get damage from high jumps.
There will be a donut about halfway through the stage, so pick it up!
Well, that's about it for the basics. The stage is relatively short,
and keep in mind to HOLD DOWN TO BLOCK BULLETS.
You know what I did? I just held the B button and jumped through the
whole stage. It worked pretty well, actually.
-Red plane-
When you reach the end you will have to climb up a tall building and
fight a red plane. The plane will have three attacks.
The first one is a homing bomb attack. Three blinking red dots will
flash on the side of the building, and there will always be a gap
big enough for Homer to fit in. You have to go into this gap to avoid
the three bombs that will hit where the three red dots were.
The second attack is a bomb drop. The plane will fly in from the left
and drop three bombs onto the side of the building. The best place to
be to avoid these bombs is the very bottom. A bomb might sometimes
hit, but they will miss more often.
The third attack is a simple ramming attack. The place will fly in
from the left and try to crash into Homer. When this happens, press A
to punch left just as the plane approaches.
I found that the best spot is at the bottom of the building. Most
bombs will miss, and the gaps from the homing bombs are often nearby.
From here just punch up or left to hit the plane whenever it is near.
After about eight hits the plane will blow up, and King Homer will
climb up to end the stage.
Enjoy the rather odd (and short) ending.
THANKS FOR PLAYING!!!
====================================================================
===== 4.0 CODES & SECRETS ==========================================
Level passwords:
FWXCKJXGLWN - Flying Tonight
TNSLRYSJGWW - Plan 9 From Outer Springfield
BXPGCFPYJWB - Vlad All Over
WSQJLTQFYWK - If I Only Had A Body
NPKYGBKTFWQ - Nightmare Cafeteria
XQRFJWRBTWP - King Homer
Gameshark Codes:
932b31d0 - Stop Timer
9120a5c2 - Infinite Health
91099cc2 - Infinite Lives
9100c6c1 - No Items To Collect
913903d0 - Max Score
913904d0
913905d0
913906d0
913907d0
913908d0
====================================================================
===== 5.0 LEGAL / MISC. ============================================
--------------------------------------------------------------------
5.1 Version History
--------------------------------------------------------------------
July 5: Version 1.1
- - - - - - - - - -
Nothing major, just fixed a mistake.
June 24: Version 1.0
- - - - - - - - - - -
Since this was yet another complete rewrite of one of my old FAQs,
just consider it a 1.0 again.
--------------------------------------------------------------------
5.2 Guide Credits
--------------------------------------------------------------------
Thanks to...
1. Matt Groening and his brilliant mind for creating The Simpsons.
After 13 years it is still one of the best shows out there.
2. Wilson Lau, whose Bart vs. the Space Mutants guide inspired me
to write guides for Simpsons video games.
3. Gameshark.com for the Gameshark codes.
4. THQ, Fox Interactive, and Software Creations for creating the game.
5. Thank YOU for reading. After all, I didn't write this for my own
health...
--------------------------------------------------------------------
5.3 Contact Information
--------------------------------------------------------------------
The address is: subsane@gmail.com
The issue of too many e-mails isn't a problem, so I'll most likely
respond to any questions (for now). But, I do delete e-mails without
a subject. Put 'Treehouse of Horror' or something similar in the
subject line.
--------------------------------------------------------------------
5.4 Legal Stuff
--------------------------------------------------------------------
1. "The Simpsons: Night of the Living Tree House of Horror" is
copyright © 2001 Fox Interactive/THQ. The Simpsons and any related
Simpsons characters are property of Twentieth Century Fox Film
Corporation.
2. This guide copyright © 2003 SubSane. This guide may be distributed
freely as long as it remains in it's ORIGINAL and UNALTERED form. It
is only for private use and may not be reproduced for commercial
purposes.
If I discover that this guide has been altered in any way and is being
displayed publicly, I reserve the right to have the guide removed
from that location.