Game: The Simpsons Game Release: November 1, 2007 Platforms: PlayStation 2, PlayStation 3, PlayStation Portable, Nintendo DS, Nintendo Wii, Xbox 360 Publisher: Electronic Arts Developer: Electronic Arts Redwood Shores Players: 1 - 2 Play:Amazon
The Simpsons Game (codenamed as project 'XXII', since it was the 22nd Simpsons video game ever released), is an action platformer developed and published by Electronic Arts. The game stars the entire Simpsons family as they jump and fight their way through their first cel-shaded 3D adventure. The entire world of Springfield is rendered to match the animated show's colorful atmosphere, and the game even has the option for a second player to jump in on the action.
===============================================================================
THE SIMPSONS GAME
FAQ/WALKTHROUGH, v1.0
Based on the Nintendo Wii Version
Written and Maintained by SubSane
Last Updated 2013.07.07
===============================================================================
Use Ctrl + F and the section numbers in the Table of Contents below to find
exactly what you need.
TABLE OF CONTENTS
1.0 INTRODUCTION
1.01 About the Game
1.02 About the Guide
2.0 BASICS
2.01 Game Start
2.02 Status and Menu Screens
2.03 Controls
2.04 Items
3.0 HUB EPISODES
3.01 Simpsons' House
3.02 Game Engine
4.0 WALKTHROUGH
4.01 The Land of Chocolate
4.02 Bartman Begins
4.03 Around the World in 80 Bites
4.04 Lisa the Tree Hugger
4.05 Mob Rules
4.06 Enter the Cheatrix
4.07 The Day of the Dolphin
4.08 Shadow of the Colossal Donut
4.09 Invasion of the Yokel-Snatchers
4.10 Bargain Bin
4.11 NeverQuest
4.12 Grand Theft Scratchy
4.13 Medal of Homer
4.14 Big Super Happy Fun Fun Game
4.15 Five Characters in Search of an Author
4.16 Game Over
5.0 WII MOMENTS
5.01 Bite Night
5.02 Bart Wings
6.0 EXTRAS
6.01 Best Time Tips
6.02 Collectibles
6.03 Clichés
6.04 Trophies
6.05 Upgrades
7.0 CODES & SECRETS
8.0 LEGAL / MISC.
8.01 Version History
8.02 Guide Credits
8.03 Contact Information
8.04 Legal Stuff
===============================================================================
===== 1.0 INTRODUCTION ========================================================
-------------------------------------------------------------------------------
1.01 About the Game
-------------------------------------------------------------------------------
In The Simpsons Game, Homer, Marge, Bart, and Lisa use exciting, all-new powers
to defend their home town from rising chaos. While the Simpsons have general
abilities that can be used to fight opponents, interact with environments, and
finish puzzles; each one has been imbued with special abilities that are unique
to their personalities. These abilities grow and change as they progress
through the story to battle tougher and tougher enemies in their quest to save
Springfield!
To help the Simpsons, gamers must journey through their home town (as well as
vast worlds beyond!), vanquish an amazing array of villains, and fight their
way through parodies of multiple popular games. 100% original script from the
writers of the show with 4 distinct acts divided into 16 episodes and over
8,000 lines of dialogue. The open-world Springfield was designed as a central
locale to jump into episodes with iconic locations to visit, characters to be
visited and interact with, and hundreds of collectibles to be found. With
parodies of the video game industry, pop culture and current events, the game
has the same gut wrenching hilarity as the show.
The game was developed by EA Redwood Shores and Rebellion Developments, and
published by EA Games. All versions were released on October 31, 2007.
-------------------------------------------------------------------------------
1.01 About the Guide
-------------------------------------------------------------------------------
This guide is for The Simpsons Game on Nintendo Wii. It will provide some help
for the PS2 and PSP versions of the game, but differences such as controls and
Wii Moments will not be found on those platforms. Owners of the Xbox 360
or PS3 versions can find my guide for those platforms here:
http://www.gamefaqs.com/xbox360/939416-the-simpsons-game/faqs
===============================================================================
===== 2.0 BASICS ==============================================================
-------------------------------------------------------------------------------
2.01 Game Start
-------------------------------------------------------------------------------
Storage Device
================
First and foremost, you'll need to create a new game or load an existing game.
Episode Replay
================
Here you can replay completed episodes.
Wii Moments
=============
This lets you pet pretty, pretty ponies.
I kid. Wii Moments are actually exclusive mini games for the Wii version of
the game. They are unlocked are you progress through the story mode.
Options
=========
Adjust the audio levels, subtitles, controls, and toggle the autosave option.
Extras
========
View the (long) list of developer credits, the game's clichés, and all movies
unlocked so far.
Exit Game
===========
Return to the front end.
-------------------------------------------------------------------------------
2.02 Status and Menu Screens
-------------------------------------------------------------------------------
Status Screen
===============
Health: You can check the characters' health via the health bars in the
top-left corner of the screen.
Special Power: In case you forget how to activate the characters' powers, you
can check in the lower-left corner for an icon and button.
Power Meter: As you collect power-ups you'll see the power meter in the
lower-left corner increase. Perform the gesture to use the powers.
Homer Ball Meter: This meter is red and only appears while Homer Ball is
activated.
Gummi Homer Meter: This meter is green and only appears while the Gummi Homer
power is activated.
Boss Health: The boss's health is displayed as a large green bar in the center
of the screen.
Objectives: A notepad will appear in the top-right side of the screen to
indicate when an objective has appeared or been completed.
Pause Screen
==============
Resume Game: Resume your game.
Options: Adjust the audio levels, controls,
Quit Episode: Return to the main menu.
Exit Game: Return to the front end screen.
Things To Do
==============
Objectives: The first page of this menu lists your objectives in the level.
Collectibles Found: Stating the obvious.
Player Deaths: Don't die.
Clichés: Shows you how many there are in the level, and how many you've found.
-------------------------------------------------------------------------------
2.03 Controls
-------------------------------------------------------------------------------
Homer Controls
================
Command | Action
---------------------------------------------------------------------------
D-pad | Move camera
A button | Jump
B button | Attack, fire Gummi balls
B, B, A | Combo attack (uses power meter)
1 button | View objectives, level goals
2 button | Pause the game
- button | Turn into Homer Ball
+ button | Turn into Gummi Homer
Nunchuk Stick | Move characters
C button | Switch characters
Z button | Reset camera
Waggle Wiimote | Homer Ball dash/air slam, helium dash, Gummi blast
Waggle Wiimote + Nunchuk | Use burp power
Bart Controls
===============
Command | Action
---------------------------------------------------------------------------
D-pad | Move camera
A button | Jump, hold to glide
B button | Attack, shoot slingshot
B, B, A | Combo attack (uses power meter)
1 button | View objectives, level goals
2 button | Pause the game
Nunchuk Stick | Move characters
C button | Switch characters
Z button | Reset camera, target things/enemies
Waggle Wiimote | Bartman grapple
Waggle Wiimote + Nunchuk | Release a swarm of attack bats
Lisa Controls
===============
Command | Action
---------------------------------------------------------------------------
D-pad | Move camera
A button | Jump, use Hand of Buddha
B button | Attack, exit Hand of Buddha
B, B, A | Combo attack (uses power meter)
1 button | View objectives, level goals
2 button | Pause the game
Nunchuk Stick | Move characters
C button | Switch characters
Z button | Reset camera
Waggle Wiimote | Use saxophone stun, use Buddha Smash
Waggle Wiimote + Nunchuk | Saxophone Spin attack
Marge Controls
================
Command | Action
---------------------------------------------------------------------------
D-pad | Move camera
A button | Jump, use Hand of Buddha
B button | Attack, exit Hand of Buddha
B, B, A | Combo attack (uses power meter)
1 button | View objectives, level goals
2 button | Pause the game
Nunchuk Stick | Move characters
C button | Switch characters
Z button | Reset camera
Waggle Wiimote | Recruit characters to Marge's mob
Z + waggle Wiimote | Target objects and send mob to destroy it
Waggle Wiimote + Nunchuk | Mega-Megaphone attack
-------------------------------------------------------------------------------
2.04 Items
-------------------------------------------------------------------------------
Item | Purpose of item
------------------------------------------------------------------
Power-up | Power-ups are blue orbs used to fill the power meter.
Food | All food items serve as fuel for Homer Ball.
Gummi | Eat the Gummi statue to gain Gummi powers.
Bart Ammo | These give Bart stronger ammo for the slingshot.
Gold Shield | Temporary invincibility.
Collectibles | Collect these items to unlock the trophies.
===============================================================================
===== 3.0 HUB EPISODES ========================================================
-------------------------------------------------------------------------------
3.01 Simpsons' House
-------------------------------------------------------------------------------
Places to See
===============
- Homer's Garage
Go in here and check the tool bench to see the Duff bottle collection.
- Bart's Room
Check the book case to see the Krusty poster collection
- Lisa's Room
The Malibu Stacy collection is found in Lisa's room.
- Marge's Room
The makeup dresser contains Marge's hair spray can collection.
- The Backyard
You can access the backyard via the door in the TV room.
- The Rift Portal
This computer in the living room takes you to the Game Engine hub.
Guide
=======
- Objective #1: Go to the front door.
You heard the notepad. Levels 2, 3, and 4 will be available at the front door.
- Objective #2: Take the side gate to Frink's house.
Go to the backyard and exit through wooden gate at the side of the house. This
leads to level 5.
-Objective #3: Stop Lard Lad's rampage through Springfield.
Exit through the hole in the fence facing toward Lard Lad.
-Objective #4: Fight off the Dolphin invasion.
Exit through the hole in the fence leading to the rampaging dolphins.
-Objective #5: Prevent the aliens pillaging the mall.
Exit through the hole in the backyard fence leading to the Springfield Mall.
-Objective #6: Return to the house.
Go back inside after you've completed levels 7, 8, and 9.
-Objective #7: Use the TV portal to the Game Engine Hub.
Levels 11 and up are all found through the Game Engine. You can wander around
in the house if you'd like to check for clichés or the trophy collections.
-------------------------------------------------------------------------------
3.02 Game Engine
-------------------------------------------------------------------------------
Places to See
===============
- Invasion Springfield
This door in the center will lead you back to the Simpsons' house.
- Mansion Gate
The golden gate at the top of the stairs can only be unlocked after you
complete the other four levels in the Game Engine.
Guide
=======
- Objective #1: Learn how to use the upgrades from Professor Frink.
Talk to Professor Frink at the booth. The first upgrade will be the Gummi
Homer ability for Homer. Next up is Lisa and her Lightning ability. Bart's and
Marge's upgrades will be automatically applied after Lisa's.
Once you get all the upgrades you're free to roam around and complete the next
four episodes in any order.
- Objective #2: Retrieve the key card from NeverQuest.
Enter the first door on the left.
- Objective #3: Retrieve the key card from Medal of Homer.
Enter the second door from the left.
- Objective #4: Retrieve the key card from Big Super Happy Fun Fun Game.
Enter the second door from the right.
- Objective #5: Retrieve the key card from Grand Theft Scratchy.
Enter the first door on the right.
- Objective #6: Go to the mansion gate.
Take all four keycards to the golden gate at the top of the stairs.
===============================================================================
===== 4.0 WALKTHROUGH =========================================================
NOTE: Please search section 6.0 of the guide for collectibles, clichés,
trophies, and upgrades.
-------------------------------------------------------------------------------
4.01 The Land of Chocolate
-------------------------------------------------------------------------------
- Enemies: Chocolate rabbits, the white chocolate rabbit
- Objective #1: Follow the White Rabbit through the village.
Quick, that sweet piece of white chocolate tail is getting away! As Homer you
can only punch your way through this level, but it's all you'll really need.
Punch that nearby lamp post for good measure then get after that rabbit. Hop
across the platforms and marshmallow trampolines to get across the river and
into the village.
The village will have a few more obstacles such as chocolate candy carts and
more rabbits, but they're certainly no match for the man with the bottomless
stomach. Punch your way through and continue along the path until it turns to
the right. Don't forget to scoop up the candy from the lollipop poles as well
as the delicious decapitated rabbit heads. What other game lets you do THAT!?
The first Wii Moment of the game is unlocked in the first part of the village.
Look for two red gloves floating in the air and a yellow circle of light to
unlock and play Bite Night. You can return to the village when you're finished
playing.
Just around the corner you'll find a familiar sight: an enemy spawner. In this
case it's a chocolate fountain with a picture of Marge above it. Ignore as
many rabbits as possible and go straight for that fountain to ensure the
rabbits stop appearing. Run to that gate at the end of the path to continue.
- Objective #2: Climb the cake and eat the White Rabbit.
Like before, you may want to concentrate on the enemy spawners before
proceeding. Once you're clear you can go ahead and hit the red button in the
middle of the clearing to reveal two cookie platforms that lead up to the
first layer of the cake. From there you'll have to jump on some marshmallows
to get past layers two and three, then climb up to layer four. Double jump and
grab the edge of the sliced part of the cake to pull yourself up to layer five,
then finally climb up to the very top where the sweet, sweet candy sits idly
by. Well, not idly. He will attack if you allow him, but otherwise a few
punches will put him in his place... Homer's gut.
Once you've eaten the white rabbit's head you'll crash into the cake.
- Objective #3: Use Homer Ball to defeat the chocolate bunnies.
In here you'll find an arena of pain and destruction unlike any you've ever
seen. Oh, wait, I meant unlike anything the RABBITS have ever seen. Waggle the
Wiimote to tear through the poor bastards until all that remains is piles and
piles and chocolate rabbit parts. It's almost sickeningly enjoyable, ain't it?
Continue rolling around until the white fade to reality sets in.
-------------------------------------------------------------------------------
4.02 Bartman Begins
-------------------------------------------------------------------------------
- Enemies: Museum guards, Sideshow Mel guards, Dolph, Kearney, Jimbo
- Objective #1: Use Bart to find a way across the chasm.
Run forward and over the gap ahead to reach a ledge and a wooden crate blocking
your way. One shot from Bart's slingshot should take care of that. From there
it's a straight shot to the inside of the temple that for, for some reason,
is hidden in the Springfield sewers.
This puzzle's a bit trickier than shooting a crate, but dagnabbit we'll figure
it out! Switch to Homer and place him on the first pressure pad to the left.
This will activate some platforms that Bart can use to reach a wooden platform.
Once Bart is on that platform, switch back to Homer and place him on the other
pressure pad. That will activate the next set of platforms giving Bart access
to the very well-endowed statue on the right side of the temple. Now simply
jump and hold A to glide down to the pressure pad in the center of the
chasm to activate the bridge.
Get across the bridge to reveal the dastardly fiends behind... well, behind
something. They're up to no good, that's for sure.
- Objective #2: Find the secret entrance to the museum.
Use Bart to climb the vines on the right and get on the ledge above the glass
window. Hit the lever to give Homer access to the ledge, reuniting the
puzzle-solving duo in the process. After some mad pressure pad action from Bart
and Homer you'll get your precious secret entrance and enter the museum.
Fight off the few guards and make your way to the ladder next to the T-rex
skeleton. Homer will need to climb up first and stand on the skull, then Bart
can use the tail to get to the other end of the room.
- Objective #3: Drop the dinosaur bones on Dolph.
Glide into the second museum room and pull the lever near the volcano to
activate the steam updraft, then use that updraft to hop onto the pterodactyls
above. From here it should be smooth sailing across the zipline above those
pterodactyl displays and onto the trees at the end.
Hmm... Bart has a slingshot, there's a big target above Dolph...
Before you leave, wait around in the trees to collect more geode ammo.
- Objective #4: Frighten Kearney through the diorama.
Once you figure it out you'll have access to the History of Man exhibit just
ahead. Enter inside to get free reign over the rest of the museum. Yay,
more senseless destruction of precious relics!
Move Homer onto the pressure pad to activate the exhibit, then start shootin'
them targets. You'll want to shoot the target that is nearest to Kearney in
this first diorama display. Then shoot target 3 to lower the monolith.
Finally, shoot target 2 and Kearney will move on to the next diorama.
The order of the second display is 2, 1, 3, since you need to lower the bridge
first to allow Kearney to get across.
The final diorama is also straightforward. Shoot the settler with the shotgun,
the donkey, the cavalry guy, and finally the dude with the cannon to force
Kearney all the way through to the museum room.
- Objective #5: Defeat Kearney.
From there he's open to all your attacks and shouldn't be that tough to defeat.
Move into the planetarium exhibit hallway to continue.
- Objective #6: Scare Jimbo off the UFO.
Get to the left side of the chamber and climb the brown moon rock. You'll
need to get across those jet updrafts, but first you gotta get by with a
little help from your fat friend. Switch to Homer and activate the updraft
in the center then glide your way across as Bart. Get to the top of the
space shuttle and use the pole from that shuttle claw display to reach the
planets and their circling moons. Run to the red platform and press the button
to lower a ladder so that Homer can reach the satellite and hold it down for
Bart.
Now you simply jump onto the elevator platforms and get up to the top of the
space ship.
- Objective #7: Defeat Jimbo.
Once you're on the ground with Jimbo it's best to lock onto him and keep moving
left and right to avoid getting hit. Keep unleashing the geode fury until Jimbo
falls ass backwards onto the ground.
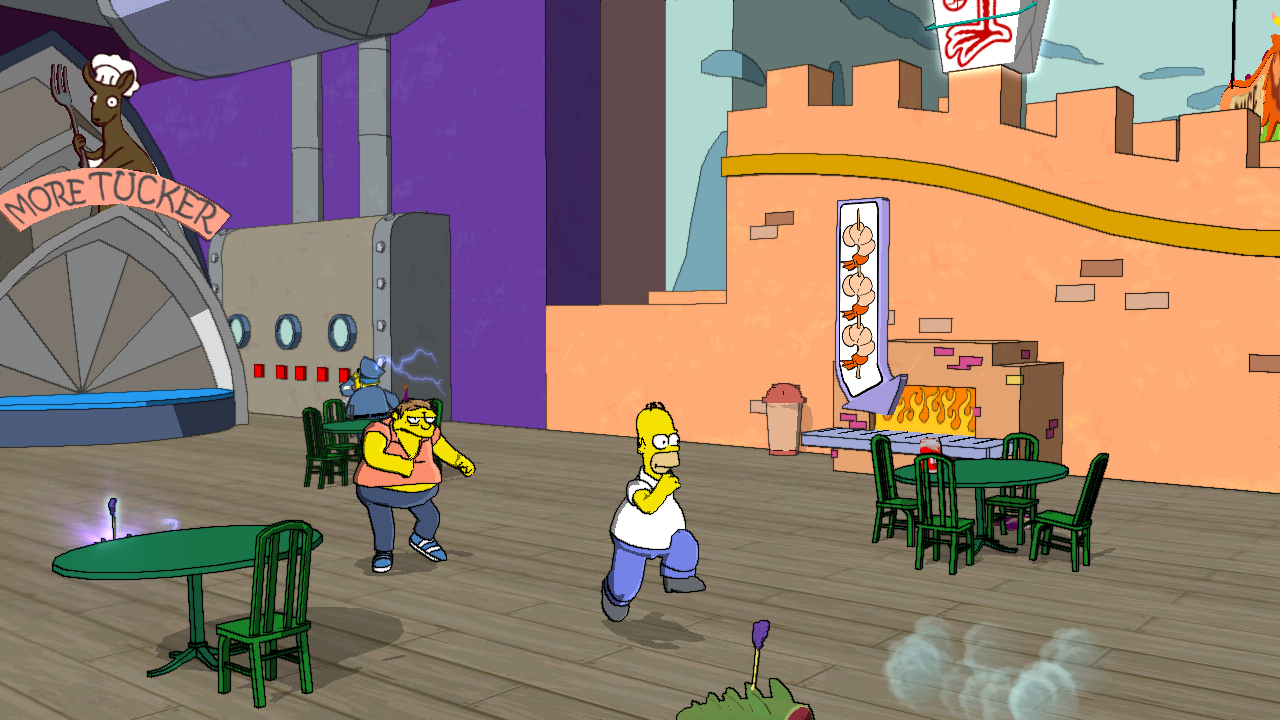
-------------------------------------------------------------------------------
4.03 Around the World in 80 Bites
-------------------------------------------------------------------------------
- Enemies: Comic Book Guy, Groundskeeper Willie, Bumblebee Man, Kearney, Otto,
Police Chief Wiggum, Barney Gumble, Statue of Liberty
- Objective #1: Use Homer Ball to get into Australia.
Start by doing what you're supposed to be doing and grab some of the food lying
around in the first area (China, it seems). You can also enter another Bite
Night Wii Moment by walking to the food stand.
Once the power meter is full you're good to go up the ramp and Homer Ball dash
over the wall and into Australia.
Simply roll through the archway underneath the brick wall to continue.
- Objective #2: Find and smash the super taco.
Activate Homer Ball and slam into the large taco in front of the billboard
with the smiling woman on it. This will open the way to Germany.
- Objective #3: Get Bart to the top of the Eiffel Tower.
Progress through Germany and enter the small France area on the left. Switch
to Bart and jump onto the wooden platform at the end of the path, then use the
umbrellas to get to the updraft coming out of the large beer barrel tap. Glide
to the roof of the beige building and zipline across to the Eiffel Tower.
- Objective #4: Reach the lever to open the gate to Scotland.
Stand on the platform at the front end of the tower and push the red button
(always a red button) to get to the top. Now you can jump off and glide all
the way to the Scottish flag on the wall below. Pull the nearby lever to lower
the gate for Homer.
- Objective #5: Find a way to open the gate to Italy.
Another day, another gate to open. Use Homer Ball and slam into the Stonehenge
boulders near the first gate. Use them to reach the large bagpipe at the end,
which is just sitting there waiting to get slammed on. Once you do, updrafts
will appear from the pipes. As Bartman might say (well, he might've back in
the 90s), it's glidin' time, man! Glide to the next wall and pull another lever
to open the gate to Italy.
- Objective #6: Smash the super meatball.
Switch back to Homer and use Homer Ball to destroy the large meatball at the
top of the pizza pan handle ramp.
- Objective #7: Get Homer into America.
Take Bart over the coliseum and onto the bridge. You should see some green
vines growing up along the last bridge support on the right. Climb those vines
to get to the top with a clear view of America just ahead. Glide inside there
and use the ladder to reach the lever next to the gate. Pull 'er down to
finally get Homer to his greatest challenge yet... in this eating contest.
- Objective #8: Destroy the Statue of Liberty and smash the super burger.
The Statue of Liberty doesn't really fight back since she's on defense the
whole time. Use Homer Ball to smash the coin platform and lower the shield of
dancing girls from around the Statue. That'll be the chance you need to smash
into the crack in her mid section. After the first hit she'll start to rotate,
but all that means is you'll need to time your smash for the right moment.
After three smashes the Statue will collapse and drop the super burger. Time
to do what gigantic fat men do... No, smartass, I didn't mean have heart
attacks.
Go smash the burger already!
-------------------------------------------------------------------------------
4.04 Lisa the Tree Hugger
-------------------------------------------------------------------------------
- Enemies: Melee loggers, projectile loggers
- Objective #1: Enter the Auntie Nature logging operation.
Time to take the fight to the loggers and clear cut them into oblivion! Eh, eh?
Anyway, run forward and kick their asses. Lisa has a nifty stun attack with her
sax that leaves enemies paralyzed, which should be useful. Once the first few
loggers are destroyed you can move on to the next area with even more loggers
and the game's first Hand of Buddha port.
Press A at the port to activate it and use the Hand. Lift the sections of trees
at the opposite corner of the area and place them on the stumps surrounded by
a green glow. This will create a series of platforms that Bart can use to reach
the lever near the gate and open it. If the loggers start to bother you make
sure you take out the port-o-potty (AKA enemy spawner) to prevent any more
loggers from appearing.
- Objective #2: Dismantle the logging machinery.
In the next area you'll face more loggers and a steam pipe. Man, those loggers
sure like to clog up their steam pipes...
Uh, take Bart and destroy the port-o-potty then switch back to Lisa. Use her
Hand of Buddha to lift the cover off that steam pipe in the corner, creating
one of those convenient updrafts for Bart to use. Get to the top of the
conveyor belt and kick down the trampoline so that Lisa can also get to the
top. From there you simply place Bart and Lisa on the red buttons at the end
and voila: the path is clear.
Run ahead as Bart and clear out those loggers on the high branches before
proceeding into the saw blade area. Before going too far into this place
you should remember to steer clear of the one giant saw blade moving in and
out of the middle section. Once it has moved you'll need to quickly get to
the ladder at the other end and climb to the top of the platform. Shoot the
red target on the left side of the machine to shut down the saw blades and
clear the logs from the path ahead.
- Objective #3: Ride the conveyor.
Run along the conveyor belt, dodging the chainsaws as you go. Hit the lever
at the end to shut them down and open the path.
- Objective #4: Find a way to the river.
Onward, further into the belly of this nature-hating beast! Use Lisa and get
to the Hand of Buddha port at the top of the grassy rock. You'll now have to
lift the section of conveyor belt that's across the green sludge and use that
to build a bridge over the sludge. Once the conveyor belt is placed you can
run into the next area to find another Hand of Buddha and several loggers.
Destroy the port-o-potty then use the Hand of Buddha to lift all of the
radioactive containers onto the moving conveyor belt. That will destroy the
log conveyor system and give you access to the next area.
- Objective #5: Open the floodgates.
Switch to Bart and use the zipline to cross the river. You may as well use
Bart to clear out all the enemies and the enemy spawner on this side of the
river, and once the coast is clear go ahead and pull the lever on the dock.
This will release a flow of logs, crocodiles, and turtles from both sides of
the river. If you get the reference then you, my friend, are old.
- Objective #6: Reconfigure the factory pipes.
Back to Lisa once again. Wait for the logs and creatures to populate the
area then start hopping your way across. Use Lisa's shadow as a guide for
your jumps and you'll get across without a problem.
With both characters on the other side of the river it's nearly time to end
this heinous operation once and for all. Use Lisa to activate the nearby
Hand of Buddha and lift the pipes on the right side. The one you want to move
is the T-pipe with the blue top. Place it on the steam vent farthest to the
right. This will extend the steam updraft so that Bart can use it to get inside
the gated area far to the right.
- Objective #7: Save Lenny and Carl.
Quickly pull the lever and rush Lisa in there to activate the Hand of Buddha.
Use it to lift the branch and save the day! Now if they could only remember
their heroes' names...
-------------------------------------------------------------------------------
4.05 Mob Rules
-------------------------------------------------------------------------------
- Enemies: Cops, GTS fans
- Objective #1: Destroy 3 Grand Theft Scratchy floats.
Start building up your mob by coercing Flanders to join. Once you have him
lock onto the nearby float and send him to destroy it. One down, two to go!
Recruit Apu in the alley on your way to the next float.
Once you get to the next street you'll be attacked by some GTS fans and find
Mrs. Krabappel to build your mob up to three. Beat up the GTS fans and then
destroy that third float to get the next objective.
- Objective #2: Clear a path for the mob.
Use Lisa and activate the Hand of Buddha atop the Sequel Stop roof. Use that
to pick up cars and kill off enemies until the cars are all removed.
- Objective #3: Destroy 2 Grand Theft Scratchy floats.
At this point you should keep in mind that your mob will get smaller if any
of them are beaten up. Stay nearby to revive them.
Beat up all the cops then send the mob to destroy those two GTS floats at the
other end of the parking lot.
- Objective #4: Build a bridge.
Use Lisa's Hand of Buddha to lift the two destroyed floats and use them to
create a bridge across the gap in the path.
- Objective #5: Find and destroy 2 billboards.
Get rid of those pesky law enforcement officers (pffft, the law) then have two
of Marge's mob members attack the crack in the wall. This will take you into
the parking garage area.
Here you'll find Mr. Smithers to bring your mob total up to four members. Get
rid of the cops then take Lisa up to the top level using that tire trampoline.
Lift the cars so that the mob can join Lisa up on the top level, then direct
them to destroy the first billboard. And now to the roofs we go...
Approach the second billboard (don't touch it!) and get Grampa to join your
mob. Now turn left to find a small vent hole. Press A in front of it to send
Maggie inside. You'll control Maggie from a first person view and all you can
really do is move forward, backward, and turn from side to side. Take Maggie to
the end of the vent and press the button to shut down the electricity
protecting the billboard. Now you're clear to show that flat advertisement
who's boss!
- Objective #6: Destroy 3 Grand Theft Scratchy floats.
Get your mob to the elevator and direct them all to stand on it. Then, use
Lisa and her handy Hand of Buddha to lift the power generator and lower the
elevator to the ground floor. From here it's as simple as destroying the
three floats one at a time or by splitting your mob into three groups.
- Objective #7: Get the mob to the Town Square.
Get Lisa to the Hand of Buddha on the roof of a building on the left side
then use it to lift the three construction sets and place them into their
appropriate spots. Now switch back to Marge and do something constructive
(for once) by directing the mob to build the three sets into a ramp.
The next area will yield one mob member and a couple of annoying hydrants. Have
the mob build up the pile of wood below the Hand of Buddha port then use Lisa
to lift one of the black crates and block the hydrant next to the port. This
will open the path to a small alley behind the Springfield Police Station. Be a
pal and spring Snake from the jail cell by sending the mob to the crack in the
wall. Recruit Snake to add another mob member to your bloodthirsty numbers.
- Objective #8: Destroy the Grand Theft Scratchy statue.
This part can get a little nuts, but you should be okay if you just focus on
running around and collecting as many mob members as possible. As you're
running the mob will split off and start taking out the cops on their own
which leaves you with plenty of breathing room. Once you've gathered up all
of the mob you'll have a cool eight mob members on your side!
Finish off the cops then set them all loose on the statue. You'll have more
cops appear so make sure to keep your thumb on the megaphone at all times. Once
the statue has been destroyed it'll be time for the End Game.
- Objective #9: Flush out Mayor Quimby.
Get to the roof of Town Hall and place Maggie inside the vent. Make your way
past the turns and steam to get to the first cutscene. After watching Quimby
accept a "charitable donation," turn that first steam wheel. Turn right to
find another steam wheel straight ahead.
Make another left and follow the path to the end where you'll find the third
and final steam wheel. Give 'er a turn to bring on the heat and end the
mob madness... for now.
-------------------------------------------------------------------------------
4.06 Enter the Cheatrix
-------------------------------------------------------------------------------
- Enemies: Street fighters, football players, Stubborn Ape
- Objective #1: Follow the Ape.
Run forward as Bart and pick up the Bartman Grapple cheat upgrade. This gives
Bartman the ability to grapple onto specific hook points and pull himself in
that direction.
Use the grapple to get across the three hook points ahead and onto the platform
with the large green pipe at the end. Pull the lever to open the pipe at Lisa's
end of the area and switch to her to jump inside the pipe. Use both characters
to stand on the red pressure pads and enter the next area.
This next area seems to be a manufacturing line for crates, barrels, and health
packs (oh yea, keepin' it ol school). Run forward as Bart and grapple to the
platform with the lever on it. Give 'er a pull to shut down the first machine.
Here you'll be attacked by football players, but before you defeat them make
sure you push the button next to the door that they spawn from to prevent them
from continually spawning. Hop on the trampoline as Bart and pull the next
lever to shut down the second machine.
Continue along and destroy the next few football players until the conveyor
line is clear. Now use Bart and grapple up to the coin machine on the right
side of the room. Pull the lever to activate the coin platform and give Lisa
access to the coin machine as well.
Use the Hand of Buddha to lift the stacked blue gears and place them on the
pegs sticking up out of the sludge. Stack them along the right so that you
can get the rotations from the engine gear at the bottom to the other engine
gear at the top. Jump down as Bart and get up to the green pipe to continue.
- Objective #2: Activate the exit pipe.
Get Bart and Lisa across the ledge and onto the next set of pressure pads to
open the pipe and proceed to the next room.
- Objective #3: Find the exit pipe.
Hey hey, it's the blood room! So this is where the gory magic comes from...
Progress along and destroy any street fighters that get in your way. Bart's
slingshot is good for keeping them stunned. Get Lisa to the Hand of Buddha
on the machine next to the conveyor. Use her to lift the broken walkway and
place it back on the path. Once that's done cross the bridge to the other side.
Climb the pole and fight off the enemies until you get to a lever. Pull it to
shut down the next machine and continue along. Hop up to the next level and
pull the lever to shut off the sword machine, which will clear the way to the
exit pipe.
- Objective #4: Get to the next warp pipe.
Jump on the trampoline as Bart and shoot the blue hedgehog operating the
conveyor belt. This will cut off the stream of sludge blocking your way across
the bridge. Get to the next pipe to continue.
- Objective #5: Cross the marketing slime.
Run forward and get across the conveyor to the black/yellow poles. Climb up and
then shimmy across the ledge to the trampoline, which should get you up to the
top of the contraption. Run across the bridge.
- Objective #6: Catch Stubborn Ape.
Hop down to face an army of street fighters and football players. Focus on
destroying the spawners before you spend time beating up enemies.
When the enemies are all cleared out you're free to move Bart onto trampolines
on the left. Jump on the red ones to get to the top. Clear out the enemies then
get across the conveyor belt. Pull the lever to lower a platform for Lisa.
Back on the ground, get Lisa onto the trampoline near the Hand of Buddha. Lift
the first pipe from the right and place it between pink and orange. Place the
second pipe between orange and yellow. Then place the final pipe between yellow
and green.
Back to Bart and his super amazing Bartman Grapple, but this time you're
headed for the top of the pink pipe. Get onto it and then follow the pipe
madness to the final platform. Jump into the exit pipe.
Hop onto the trampoline and zip across to the rim of the large sludge tank.
Pull that lever so Lisa can join Bart on this side of the dizzying fall. Get
her to the Hand of Buddha to get a new upgrade and a puzzle as well.
- Objective #7: Use Lisa's new Buddha Powers to defeat Stubborn Ape.
Pull the sink stopper from the sludge to drain the sludge and reveal the pipe
to finally get the darned Stubborn Ape.
Start by defeating all of the football players and street fighters that appear
from the doors beneath the platform. Once it's clear you can go ahead and
hop on the Hand of Buddha to attack Stubborn Ape with the Buddha Smash attack.
Try not to waste any of the power meter attacks as the enemies start to stream
out after you hit the ape, but if you should happen to need it you can always
hop off the Hand and collect some power-ups from the enemies.
Continue defeating waves of enemies and hitting Stubborn Ape until he is sent
past the barrels and into the vat of sludge.
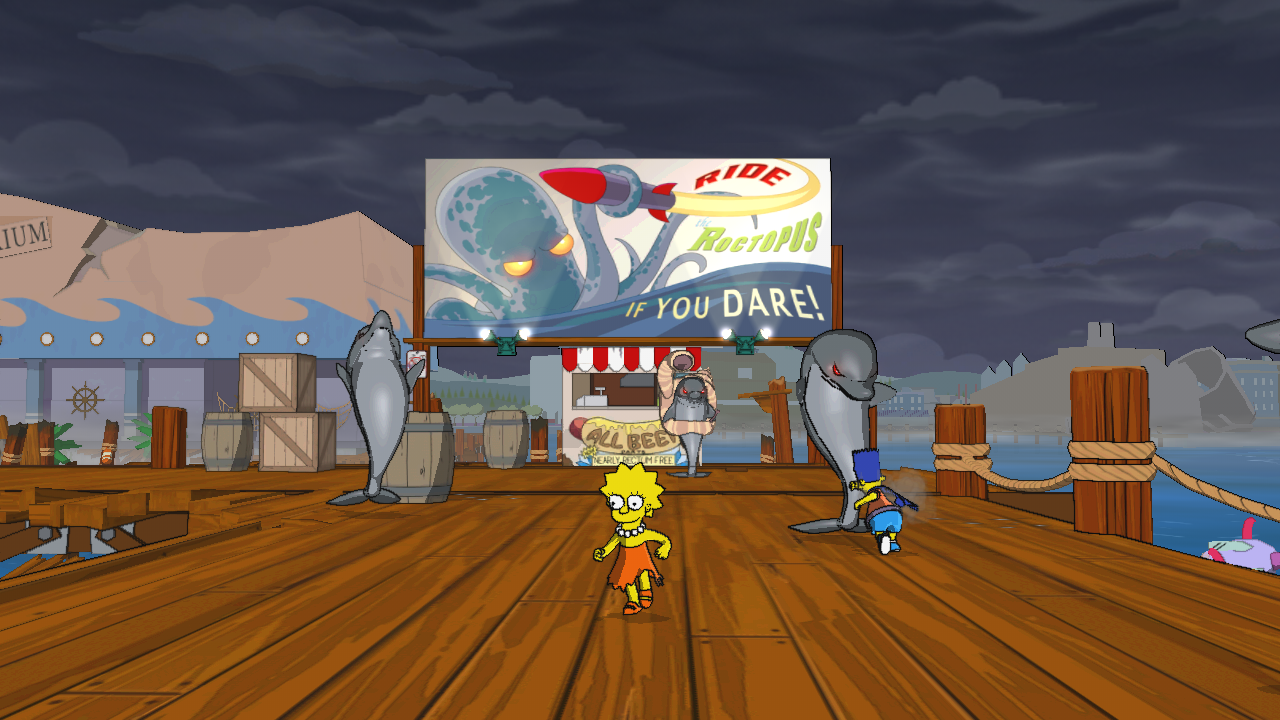
-------------------------------------------------------------------------------
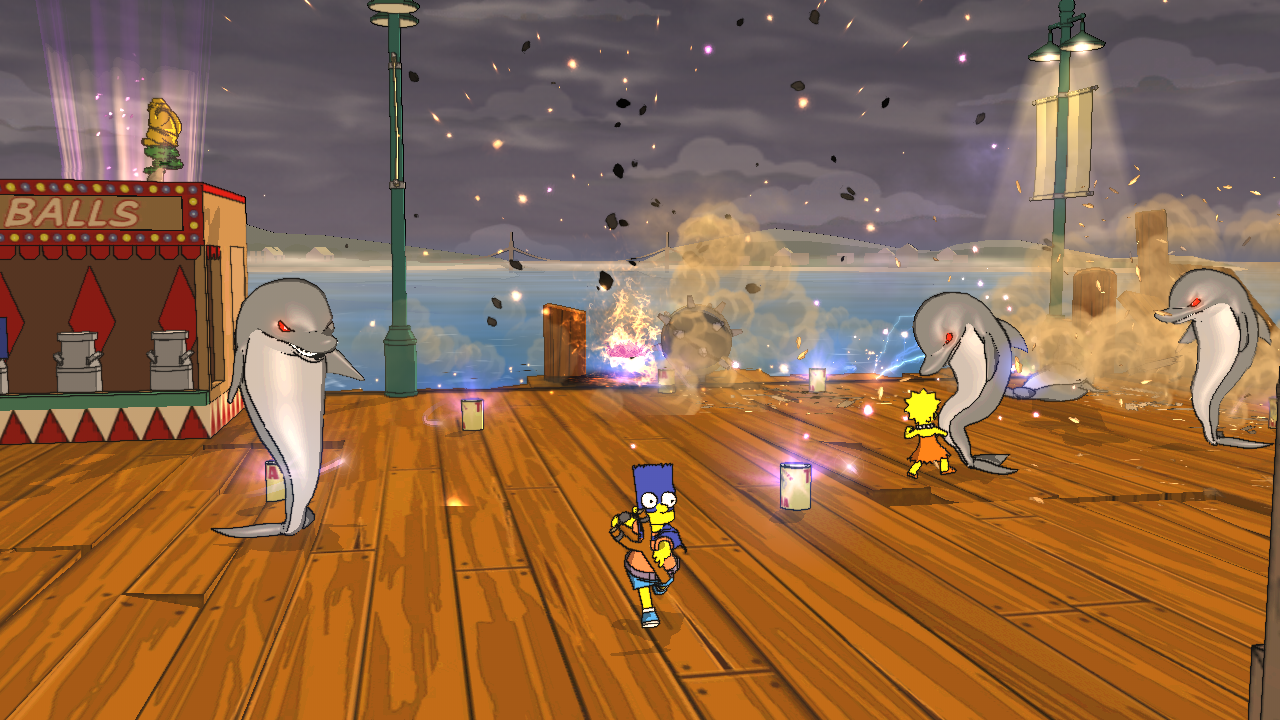
4.07 The Day of the Dolphin
-------------------------------------------------------------------------------
- Enemies: Dolphins, dolphins, and more dolphins!
- Objective #1: Get past the boathouse.
You'll start at one end of the pier whereas your goal is all the way at the
other end. Attack the dolphin horde head-on. Once the path is clear you're
free to continue.
Enter the boathouse and slide down the rope on the right side to find dingy.
On the far end of these sections of the pier you'll see a red target just
ripe for the shooting, so take a shot as Bart to bring down the other dingy.
Jump across to continue onto the main part of the pier.
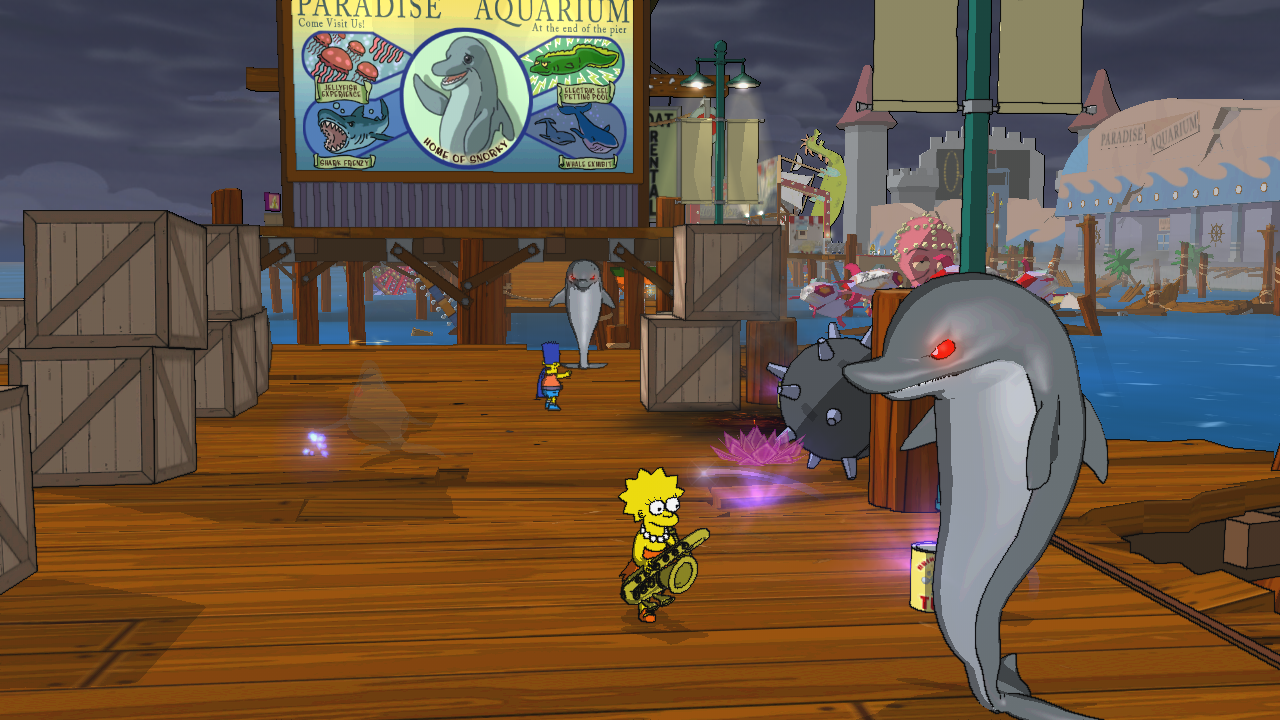
- Objective #2: Cross the dolphin-infested pier.
Hop on the Hand of Buddha and place the rowboats on the pylons nearby to create
a bridge to the button. Hit the button to open the gate.
Continue forward through the dolphin horde until you reach the spinning
octopus. Defeat the waves of dolphins as they appear until the scene with the
Sea Captain and King Snorky.
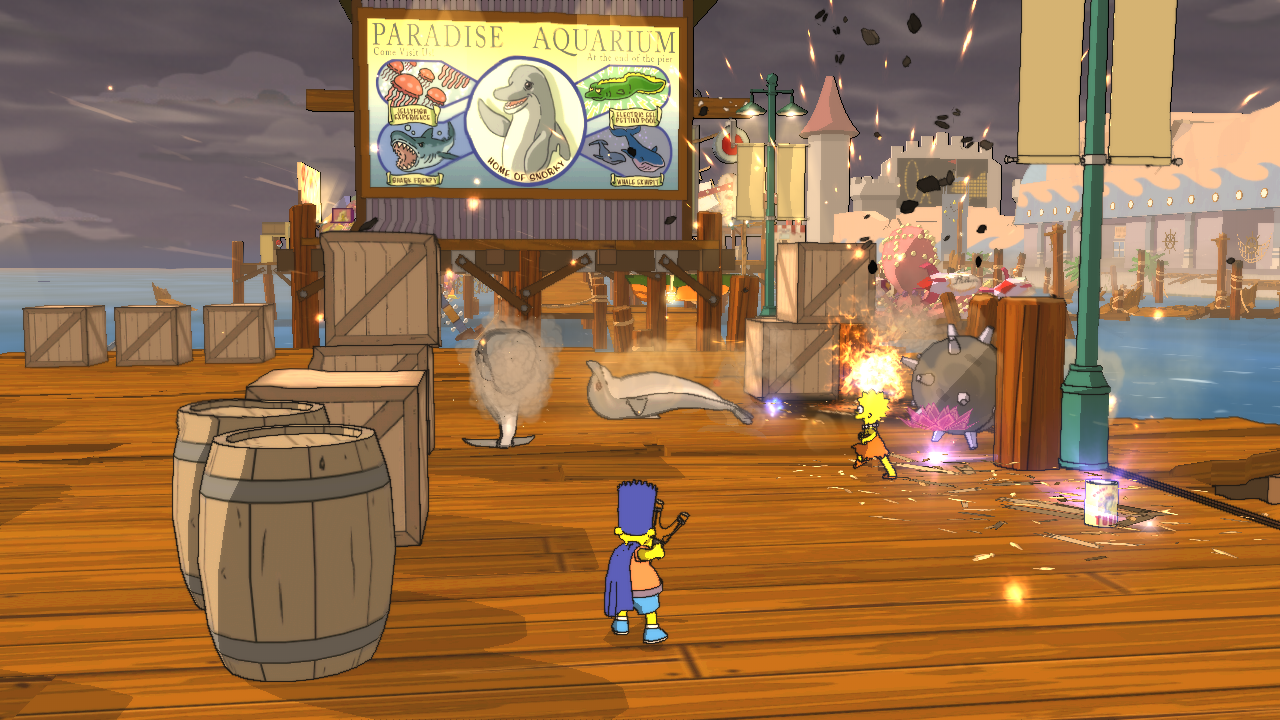
- Objective #3: Find a way to enter the aquarium.
Run to the rowboats and use them to cross to the fishing boat. Hop into the
hatch from there.
- Objective #4: Defeat King Snorky!
Use the Hand of Buddha in the middle to place the jellyfish models on the
platforms along the right side. Run down and hit the lever in front of the
tank on the right to reveal a platform. Take Lisa and jump on the jellyfish
to get to a Hand of Buddha on a high ledge.
Use this Hand of Buddha to move the electric eel from the small tank in the
center to the tank underneath King Snorky.
Finally, switch to Bart and shoot the target underneath King Snorky to dunk
him in the electrified water. It'll be boiled dolphin tonight!
-------------------------------------------------------------------------------
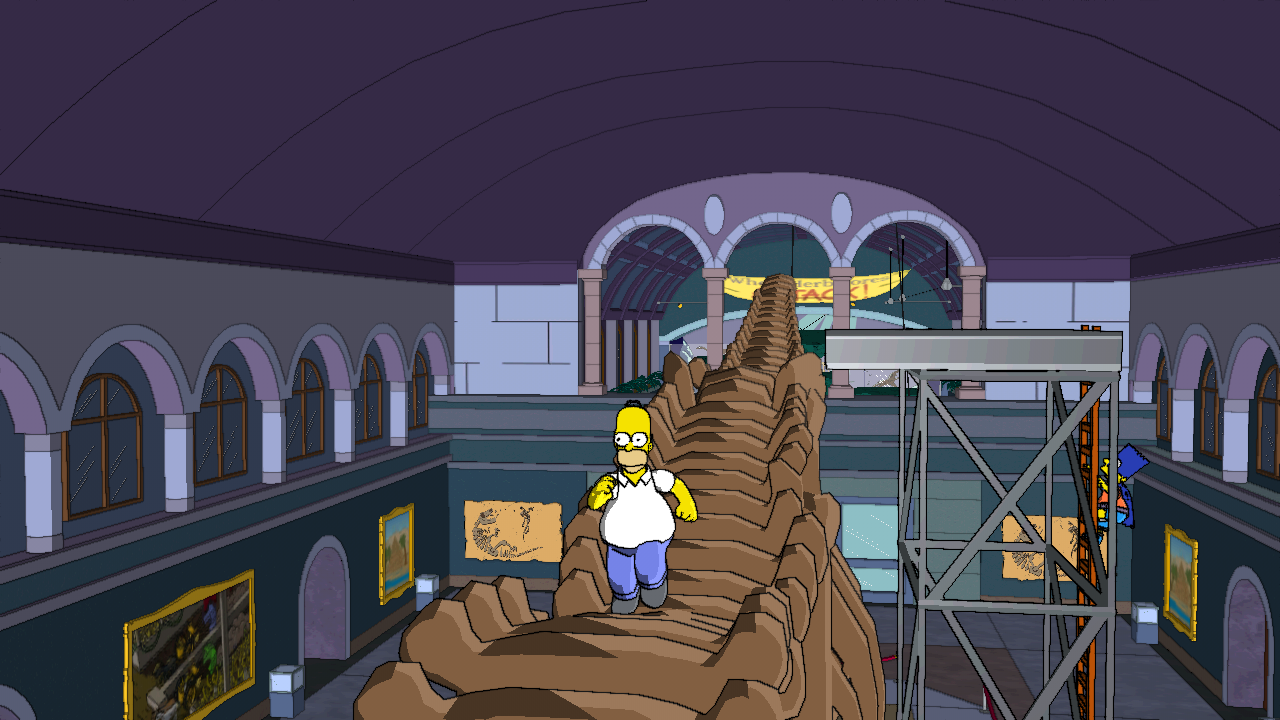
4.08 Shadow of the Colossal Donut
-------------------------------------------------------------------------------
- Enemies: Lard Lad, miniature Krustys, aliens
And we're off! This entire level revolves around opening the three hatches
along Lard Lad's rather bulbous rear end in order to pull the wiring and defeat
him. You'll find that each hatch becomes progressively harder to reach and will
require some more precise jumps from the few tall structures in the level.
First things first, let's see who you're fighting other than Lard Lad and his
barrage of lasers, stomps, and metallic roars. The miniature Krustys come from
the billboard and will merely serve as a nuisance while you run from one area
to the next looking for Lard Lad's sweet spot. The Krustys are beaten with a
few simple attacks.
The main event, at quite a few tons and what looks to be two or three stories:
Lard Lad! Unlike his first appearance in which the citizens of Springfield
played the smrt card and killed him by simply turning away their attention,
Bart and Homer are going to go mano a mano with the obese steel mascot.
- Objective #1: Open Lard Lad's first hatch and disable his wiring.
Honestly, you'll really only need Bart to take down lardo. Run around behind
Lard Lad and stay far enough away to avoid the stomp attack's area of effect.
Once that first hatch is in plain view, give it a tap with the slingshot. That
hatch'll fly open like a... well, like a hatch. Hop on and pull the wiring to
complete the first objective.
- Objective #2: Open Lard Lad's second hatch and disable his wiring.
Now the second one won't be so easy. Wait for Lard Lad to run off like a scared
little girl and make your way to the construction site. Chances are Lard Lad
will walk by the site eventually, giving you a good chance at shooting the
panel when he's close enough to jump onto. You can also try to reach him from
the roofs of the tall buildings near the pier if he happens to take a stroll
down the street in that area. Either way you don't need too much height to
reach the second panel.
- Objective #3: Open Lard Lad's third hatch and disable his wiring.
If you managed to open the second hatch then you probably won't have much
trouble here. I highly recommend using the really high platform in the
construction site or the destroyed building across the street to reach the
panel on Lard Lad's head, but you're free to try from lower platforms if you
want to be all "challenged" and feel like you've "accomplished" something.
-------------------------------------------------------------------------------
4.09 Invasion of the Yokel-Snatchers
-------------------------------------------------------------------------------
- Enemies: Aliens
- Objective #1: Get to the tractor beam.
Collect the radioactive ammo and use Bart's slingshot to kill off the horde of
approaching aliens as quickly as possible. Once they're cleared you can proceed
to the tractor trailer with the black net on the side. Climb the net as Bart
and use the helium tank next to the trailer as Homer.
Kill more aliens and continue along to the next helium tank and obstacle. Use
Homer's dash as Helium Homer to cross the chasm, then pull the lever to
activate an updraft. This is Bartman's time to shine! Float across then shoot
even more of those rambunctious aliens to clear the area.
The third Bite Night Wii Moment is on top of the red trailer at the end. Climb
the black net on the other side to reach it.
Turn left from there to find yet another chasm, but this time it's up to
Helium Homer to get across.
Use the helium tank and dash onto the lower ledge on the other side, and from
there pull the lever that will release the next steam updraft. Now Bart can
simply glide across to join Homer. Have both of them step on the pressure pads
in front of the doors to enter inside and beam up to the spaceship.
- Objective #2: Rescue Cletus.
Pull the lever near the giant probing machine to free everyone's favorite
yokel.
- Objective #3: Disable the alien portals.
This task is entirely up to Homer Ball and his powers of... being a big fat
ball. All you have to do is Homer Ball dash at the alien spawners lined up
around the room. The aliens will keep spawning until you destroy those
spawners, so don't worry about killing individual aliens. Dash at each of the
spawners and collect food by pulling levers attached to food spawners on the
ground.
- Objective #4: Turn off the tractor beam.
Approach the newly emerged button and press it. What's next? A boss fight? A
labyrinth of doom and despair? SOME UNGODLY EVIL THAT CANNOT POSSIBLY BE
DEFEATED!?
... no, just a video clip and something Hollywood types call a "cameo."
-------------------------------------------------------------------------------
4.10 Bargain Bin
-------------------------------------------------------------------------------
- Enemies: Will Wright
- Objective #1: Shut down the cartridge incinerator.
This is what's called a timed mission, folks. That means no lollygagging, no
dragging your feet, and DEFINITELY no belly aching!
Move Bart to the edge closest to Wright and grapple the hook across the gap to
get across, then pull the lever to extend a bridge. Now switch to Homer Ball
and use him to break through the door along the walkway. Get down to the next
walkway and turn left to find a target for Bart to shoot, and guess which gap
you can then cross?
Get up the spiral walkway and use Bartman's grapple to get him across, while
Homer Ball's dash should get him through the wall of crates. Cross this
platform and get onto the next smaller platform to find some trampolines. Use
them to bounce up to another walkway on top. Follow that walkway to the end and
then use grapple or a dash yet again to reach a door and two large, red
pressure pads. You know what to do, young video game nerd. And after that
there's a lever, so yea, you know what to do again. YOU DAMN WELL BETTER KNOW!
-------------------------------------------------------------------------------
4.11 NeverQuest
-------------------------------------------------------------------------------
- Enemies: Selmatty Dragon, Morcs, Otto Ghosts
- Objective #1: Stop the Dragon before she burns down 3 buildings.
Simple enough, provided you've gathered enough Mobbits. First of all, you
don't need to save all three houses. You can get by with just one, so all you
have to do is gather all the Mobbits and wait on the center island as Marge.
Once you've set up Marge, it's Homer's turn. There are several spots (mainly
next to bridges) where Homer Ball can dash directly into Selmatty to attack
her.
Do this to damage her and then use Marge and the Mobbits to fix the houses
she incinerates. Repeat this pattern to make her flee to her lair in the
mountains. The chase is on!
- Objective #2: Find a way through the great hall.
Run forward to enter a large stone hall and meet many Morcs and Otto Ghosts.
The first thing you want to do, as usual, is destroy the spawner from which the
Morcs or any enemy appears. You can use the Mobbits trapped in the crates to
easily destroy the spawners. Make sure to collect all Mobbits as you go along
or you may find yourself in need of help later in the episode.
Those Otto Ghosts blow themselves up when they get near so it's best to avoid
them or use Mobbits as shields when you're around them. Get rid of the spawners
as quickly as possible.
Fight your way through the Morcs and use the Mobbits (as well as Homer Ball if
you need to) until you can get to the elevated area in front of the large
wooden door. Use Marge's megaphone to place two Mobbits on the platform on the
right side. Place Homer on the left platform. Then, move Marge onto the right
platform to make the left platform rise up to the area above. Kill the Morc.
Use the helium and float Homer up to the lever with the arrow on it. Hit it
from below to open the door.
- Objective #3: Collect the keys to open the gold doors.
Getting through the "maze" should be simple enough, since the path is linear.
You'll face the usual enemies as well although the overhead POV makes it easier
to use Homer Ball and his dash over Marge and the Mobbits. Your first goal is
to get the key required to open the gold gate on the right side. You'll find
this key on the right side in a small room with a bunch of Morcs. Homer Ball
through the spawner and dash the horde of Morcs to kill them. After that
you're free to take the key to the gold door. You should also stop to open food
chests for Homer as well as collect Mobbits from wooden crates.
The next area starts you off amid many Morcs. Move in and destroy the spawner
then head to the top-right corner. Destroy the cracked wall using Homer Ball
to find the second key. The second gate is to the left.
The final key and final gate are straightforward. Grab the key then move on
to the final stretch.
- Objective #4: Cross the chasm.
Do yourself a favor and open the ammo box on the right side of the entry hall.
Use Gummi Homer to destroy every enemy and spawner, then switch to Marge and
collect the Mobbit from crate. Use the Mobbits to knock down the pillar on the
left side.
Switch to Homer and use his Homer Ball dash and the destroyed bridge ramp to
cross over the chasm. Quickly run to the ammo box on the right side and use
Gummi Homer again to destroy every enemy and spawner on this side of the chasm.
Collect food from the other ammo box and bring down the other pillar to
complete the bridge for Marge and the Mobbits.
- Objective #5: Open the Dragon Gate and enter the lair.
Use Marge's Mobbits to construct the trampoline near the Dragon Gate. Use it to
jump onto the dragon's muzzle, then place Maggie into the hole in the dragon's
left eye. Crawl into the tunnel on the right to find a small bridge engulfed
in flames. Wait for the flames to subside before you cross over and press the
button.
Return to Marge and enter the dragon's maw.
- Objective #6: Slay the Dragon.
Collect the Mobbit and then send them to destroy all nearby spawners. You can
also direct the Mobbits to kill the Morc on a platform across the lava. Once
it's clear, send the Mobbits to the stone with green leaks in it. They will
eventually reveal some Gummi power-ups for Homer. Collect them and use Gummi
Homer to destroy the stone pillar on the left. Use the new bridge to cross over
to the other side.
You can now do two things. First, use Homer to clear the stones from the path
that leads up to an altar. You can place a Mobbit there to stop Selmatty in
place. Then take Homer up to third stone in the lava that gets pushed up by
a lava vent. Stand there as Gummi Homer and fire gummi shots at the dragon as
it stops near Homer. Keep Selmatty targeted and you should be able to take her
down, or very nearly. If you run out of gummi ammo you can return to the ground
for more.
Keep shooting her with gummi shots to defeat the dragon.
-------------------------------------------------------------------------------
4.12 Grand Theft Scratchy
-------------------------------------------------------------------------------
- Enemies: Itchy gangstas, Scratchy gangstas, Itchy pimps, Scratchy hos
- Objective #1: Clean up 7 buildings.
Here you'll need to gather the dogs as mob members to accomplish various
tasks, and of course Lisa will be good for any areas requiring some Hand of
Buddha action. Destroy the pet carriers you see along the way to gather more
mob members, since you'll need them to fight off the gangstas that appear
after every building you repair. Once you've cleaned up seven buildings along
this first street you'll get a Hand of Buddha near the elevator at the end of
the street.
- Objective #2: Destroy support wires on the suspended highway.
Target the elevator and place the mob members inside, then move Marge inside
as well. Switch to Lisa and activate the Hand of Buddha. You now have to take
one of the batteries (one on the roof of Happy Times, one in the alley behind
it) and place it into one of the generators to lift Marge and her mob up to
the middle level of the highway. Run to the end and destroy the wires to bring
down a section of the highway, then return to the elevator and use Lisa to
bring Marge back down.
- Objective #3: Clean up the next 9 structures.
The next nine structures are all lined up along the next couple of streets,
and most require more of the same ol' mob fixing to clean them up. There
are, however, a few buildings that will need special attention. One is the
WUUF radio station. Jump on the trampoline behind the station and then place
Maggie in the vent. Crawl through and navigate to the main floor, then press
the button inside the control room to change the music and clean up the
building. The other special case is the Clip Joint building. Start by using
Lisa's Hand of Buddha to lift the building out of the water and place it on
its base. After that you're free to use the mob to fix the place and any other
buildings you may have missed.
- Objective #4: Build a bridge to connect the islands.
Send Marge's mob to the Poochie billboard next to the sandy beach, then direct
them to construct the rubble on the beach. Switch to Lisa and use the Hand of
Buddha to place the billboard next to the wooden side of the bridge. Now move
the hand to the freeway at the far end of the water. Lift it and place it
between the billboard and the wooden bridge.
- Objective #5: Clean up the store and the two trucks.
Once the bridge is set take your mob across and destroy all spawners like you
did in the previous areas. The final things to clean up are the Kwikki Shoppe
and those two gray trucks.
- Objective #6: Protect the ice cream trucks.
Now it's you versus wave after wave of kamikaze hos. Use the Hand of Buddha
and explosive barrels to take out the hos as they appear, and remember to drop
the barrels well ahead of the hos along their path. You can also use the
Buddha Lightning if you find yourself far from the barrels.
Poochie's hos give up after only three waves.
- Objective #7: Destroy Poochie's stage.
Gather up Marge's mob and attack the stage to defeat Poochie and bring some
wholesome sickly goodness to this raunch-filled game. Just take the keycard
and slink away...
-------------------------------------------------------------------------------
4.13 Medal of Homer
-------------------------------------------------------------------------------
- Enemies: Frenchies, tanks, turret guns, Sailor Smithers, Private Burns
- Objective #1: Rendezvous with Grampa Simpson and Private Burns.
Land and run ahead to see a short video of le French and their capitulatin'
ways, then you'll meet up with Grampa and Burns.
- Objective #2: Collect all of the surrender flags.
The most important thing to do while collecting flags is press 1 and the
2 button to open the map and check your position and the location of the
flags. This will be the easiest way of finding them all. I suggest you start
as Bart and collect any flags you can along the left, then turn around and
collect all the roof flags on the right side of the village. If it seems like
a flag should be in a certain spot but you don't see it, try looking up. You
will be able to collect 15/20 flags inside the village as Bart.
The remaining five flags are at the church on the east side or require Homer
Ball to smash through barriers. Use Homer Ball to destroy the barriers on the
west side of the map.
That'll leave you with two flags left. One is beside the waterwheel, and the
other is on top of the church.
- Objective #3: Reach Private Burns.
The objective is simple, but getting to Burns will not be an easy task. You
will need to make your way from the deck of the ship to the crow's nest
where Burns is hiding out. Start by using Bartman's grapple to get to the
lever, BUT make sure Homer is on the orange boat before you pull the lever.
Use Homer to plant C4 on all locked steel doors. The next bit with the white
poles will require somewhat precise jumping with your back to the spot you
want to jump to. The final part of this low section of the ship will be Homer
planting C4 on the pipe and Bart gliding up to the deck.
Pull the lever to lower a ladder for Homer, then plant C4 on that nearby
turret gun to get it out of the way. Run to the other end of the ship and
jump on the crashed airplane to reach level D-1.
Plant C4 on the turret gun to blow it up, then use that updraft to get Bart
to level D-2. Kick down the life preservers to give Homer access to D-2. Return
to the updraft and glide to D-3.
Climb the black net up to level D-4 and fight your way through the sailors up
to level D-5. Run across and jump down to level D-3. Kick down the life
preservers to give Homer access to D-3.
Now it's back to Homer for a bit. Blow the steel door on D-3 and run around to
the other side to find a pipe. Blow that pipe and use the updraft to get Bart
up to the lever to the ladder. Lower the ladder down for Homer then get both
characters around to the turret gun on the other side. Blow it up then get Bart
up there using the updraft and Homer with the helium tank. Blow open the door
on level D-5 to get around to another turret gun. Blow up this last one and
clear the area to get both characters ready for the final stretch.
You will also find the Bart Wings Wii Moment on level D-5, before you fly up
to the top level of the ship. Look for a yellow light and a green icon.
Use the helium tank to get Homer up to the smoke stacks at the top, while
Bart will have to use the updraft from the destroyed turret gun. Once on the
smoke stack level you'll have to use the helium tank to get Homer up to the
crow's nest with another helium tank on it. Float across the smoke to the
spot where Private Burns is hiding to end the level.
-------------------------------------------------------------------------------
4.14 Big Super Happy Fun Fun Game
-------------------------------------------------------------------------------
- Enemies: Dirt sumos, fire sumos, ice sumos, sky sumos
- Objective #1: Reach the village.
Proceed up the path and jump along the bamboo poles in the river to find
Mr. Sparkle trapped inside a giant toilet.
- Objective #2: Find and place the three lanterns to free Mr. Sparkle.
There are three Hand of Buddha ports located around the giant toilet, and
likewise there are three lanterns, one for each Hand of Buddha. Stick with Lisa
and make your way from one port to the next, killing sumos if they get too
near and dropping lanterns into their spot near the toilet. Make sure to lift
all houses around the Hand of Buddha in case they are hiding a lantern or
other important items. Once you place the third lantern you'll meet the most
honorable Mr. Sparkle.
- Objective #3: Find the Well of Fire.
Knock down the stone columns using Homer Ball and then climb up. Use Gummi
Homer to shoot down the dead tree and split it into two beams. Hop onto the
nearby Hand of Buddha to move the beams into place on the right and create a
bridge over the lava.
- Objective #4: Capture Jimbo's Sparklemon.
Run into the Well of Fire at the end to fight Jimbo.
- Objective #5: Find the Well of Ice
Get to the Hand of Buddha ledge as Homer and switch to Homer Ball. Aim toward a
stalactite near the ramp. Dash into the stalactite to bring it down. Do the
same to the ice column in the center of the area.
Switch to Lisa and hop on the Hand of Buddha. Place the pointed stalactite into
the first hole in the north section and then place the ice column into the
second hole nearest to the ice cliff. This'll create some platforms you can use
to climb up.
- Objective #6: Defeat and capture Ralph's Sparklemon.
Jump inside the well of ice.
- Objective #7: Board the airship.
Watch Homer and Lisa board the airship.
- Objective #8: Prevent Sky Sumos from shutting down the airship.
The easiest way to prevent the sky sumos from advancing is to use Lisa's
saxophone stun or saxophone spin on them and continue moving to any area that
either has a engine shut down or a new batch of unstunned sky sumos. Never stay
still and I would suggest waiting by one of the levers if you've used up all of
Lisa's power so you can recover and protect the lever until you can head out
and attack again. Keep it up until the third wave is defeated.
- Objective #9: Defeat and capture Sherri and Terri's Sparklemon.
Jump inside the sky well at the stern of the ship.
-------------------------------------------------------------------------------
4.15 Five Characters in Search of An Author
-------------------------------------------------------------------------------
- Enemies: Lawyers, Zoidbergs, Benders, Matt Groening
- Objective #1: Find the mansion's front door.
Use the Gummi Homer power-ups and gold bar ammo for Bart to defeat the lawyers
and destroy the limousines. Move forward to find a courtyard with more lawyers
and some columns. Defeat the lawyers and then use the trampoline to jump up
onto the columns. Glide to the lever on the left and pull it to open the gate
to the shark pool. Shoot the Wiggum piñatas to get more ammo and power-ups for
Homer.
Grapple to the hook across the pool and pull the lever to electrocute the
sharks. Homer can then jump across. Use Homer Ball to bring down the pillar
and cross to the next part. Defeat the lawyers there and knock down the next
pillar across the pool. Turn left to find the front door.
- Objective #2: Ring the 'front door bell'.
You'll find a series of buttons on the floor in this pattern:
45
3 6
2 7
1 8
Hit the buttons in the following orders:
4, 5, 6, 8, 7
5, 4, 3, 1, 1, 1, 2
This will open the door to the inner sanctum of the Creator himself.
- Objective #3: Find Matt Groening's office.
Defeat the waves of lawyers until the door on the second floor opens up. Enter
the next room and wait for the pencil spikes to push in. Run in as they
retract and jump onto the pencils blocking the way. Wait for the spikes to
push out again and jump on top of the cluster, then onto the blue wire on the
right side. Wait for the pencils to appear again and quickly run to the end.
Step on the button to shut down the spikes and open the next door.
Defeat all of the lawyers and then step on the red button next to the gold
mirror. This will reflect the light to a mirror higher up. Hop on the bookcases
to get to the second mirror and press the button.
Jump back down and run to the other side. Use Homer Ball to knock down the
pillar and create a bridge to the newly revealed platforms. Jump across and
activate the third mirror.
Use the first chandelier to get to a ledge next to some vines, then use the
vines to get to the fourth mirror. Use the next chandelier to get across to
some small pillars. Use them to glide to the fifth mirror on a nearby ledge.
Press that button to open the exit door. Ride the last chandelier to get there
and defeat a few lawyers before you enter.
- Objective #4: Defeat Matt Groening.
At last, the createe faces the creator! Er... the creation faces the creator...
Groening's something of a wuss (okay, he's a huge wuss) so he'll never fight
you directly. He'll just send his minions from the future to attack you. Defeat
each wave of enemies using Bart's gold ammo until Groening stands on a walkway
above a ramp made of gold. Use Homer Ball to dash up to the walkway and knock
him down.
-------------------------------------------------------------------------------
4.16 Game Over
-------------------------------------------------------------------------------
- Enemies: William Shakespeare, alien, logger, dolphin, Benjamin Franklin, God
- Objective #1: Defeat William Shakespeare.
Shakespeare's a relative push-over. Use Bart's slingshot to easily take him
out.
- Objective #2: Cross the clouds.
So now the front gate is wide open, but apparently God is somewhat protective
of the hallowed grounds of Heaven. WAY too much security. Enter inside and
approach the two buildings to reveal aliens and loggers. There are various
power-ups scattered around the two buildings that will aid in getting rid of
all the enemies if you feel inclined to do so.
You'll find a Bite Night Wii Moment in front of the 'Flying Heavenfish' shack
on the right side (near the arcade).
Now then, the first thing to do is take Lisa to the roof of the 'House of
Hendrix' shack. Use the Hand of Buddha to lift the golf holes next to Elvis's
place and place them on the clouds in the middle that aren't solid. Take both
Bart and Lisa to the Hand of Buddha on the cloud in the middle.
Now use the Hand of Buddha to place one of the golf platforms into the next
cloud with a gap in it. Take Bart along the new cloud trail, all the way to a
golf platform at the very top. Glide down to the lever in front of the large
building...
- Objective #3: Open the side gates.
... and pull the lever to open all the golden gates.
- Objective #4: Find a way through the steam baths.
Grapple to the tent trampoline and then pull the lever to open the gate for
Lisa. Use her Hand of Buddha to place the hot rock in the middle pool and
create an updraft. Bart can use this to glide onto the roof on the right and
get into the next area. Jump in there and pull the lever next to the gate so
that Lisa can enter.
- Objective #5: Build a coffee shop.
Use the Hand of Buddha to pick up and drop pieces of the coffee shop until
it's fully constructed.
- Objective #6: Defeat Benjamin Franklin.
Easy peezy. Shoot him with Bart's slingshot until he goes poof.
- Objective #7: Enter God's apartment.
Run inside the final gate and approach the escalator.
- Objective #8: Win a Dance Dance Revelation dance-off with God.
So, after all that, the final battle will be decided by a rousing game of DDR.
Unlike DDR, however, rhythm is not required. Simply watch the dancers approach
and press the appropriate button on the D-Pad when the dancer reaches the
square. Make sure you look out for the closest dancers to you, and not the ones
further away.
The number of dancers will increase, as well as the speed, with each subsequent
round. There will also be a few instances where it appears as if two of the
dancers are approaching at the same time, however they are not. Pay close
attention and you'll see that one dancer is always slightly ahead of the other.
You may have to press two buttons quickly, but never at the same time. The
patterns are ultimately the same every time, so a couple of lost rounds will
only improve your chance of beating God.
Once you complete round 3 you'll be done with the match and God will finally
have to explain himself and the meaning of existence. Well, the Simpsons'
existence. You'll have to wait until you meet your own maker, buddy.
---
That'll do it! Enjoy the ending and make sure to go back for the challenges,
collectibles, Wii Moment exploration, or whatever freaky stuff you like to do
with your video games.
===============================================================================
===== 5.0 WII MOMENTS =========================================================
-------------------------------------------------------------------------------
5.01 Bite Night
-------------------------------------------------------------------------------
Appearances
=============
Level 1 - Land of Chocolate
In the first section of the village. Unlock the White Rabbit.
Level 3 - Around the World in 80 Bites
Next to the food stand in the starting area. Unlock Barney Gumble.
Level 9 - Invasion of the Yokel-snatchers:
On the red trailer at the end of the lot. Unlock Comic Book Guy.
Level 15 - Game Over
In front of the Flying Heavenfish shack. Unlock Akira.
Modes
=======
One or Two Player: This can be played alone or with a human opponent.
The Quick and the Starved
Controls
Waggle Nunchuk: Eat food item on the left.
Waggle Wiimote: Eat food item on the right.
Strategy
The gameplay here is straightforward. Your only variables are your reaction
time and whether you're able to avoid the healthy foods. Generally, the
healthy foods are green (or white/pink in case of the turnip), so you can
train yourself to watch for colors. Unhealthy foods will be brown, white,
yellow, and red. Watch for those colors.
You can also waggle both controllers at the same time if you see two food
items on the table. Homer will reach out for one of them and then the other,
which might ensure that you get at least one of them if the opponent beats
you to the first food item.
The Fat and the Furious
Controls
Waggle Nunchuk + Wiimote: Eat food by waggling both controllers quickly.
Waggle Wiimote + B button: Push away healthy food.
A button: Burp on opponents to stun them.
Strategy
This time you simply need to eat as much as possible, but like before you
can't eat healthy foods or they'll dock you points. Watch for the greens and
avoid them like the plague. You can get into a good pattern of furious
eating and pushing away. There's a cadence to it. When you are eating, do
not slow down at all. You should be waggling those controllers as quickly
as possible.
-------------------------------------------------------------------------------
5.02 Bart Wings
-------------------------------------------------------------------------------
Appearances
=============
Level 13 - Medal of Homer: Deck D-5, before you fly up to the top level of the
ship. Look for a yellow light and a green icon.
Modes
=======
Difficulty: You can play on Normal, Hard, or Insane
One or Two Player: Play alone or in split screen.
Gameplay
Controls
Tilt Wiimote: Move Bart around the screen.
Flick Nunchuk: Use air boost.
Strategy
Start by playing through in Normal difficulty. The most challenging aspect
of this mini game is, frankly, the terrible response. It is at times too
sensitive and sometimes not responsive at all. You'll need to learn to
tweak the your own movements so that you can accurately hit the cloud rings.
Once you do, use that boost as much as possible for a straight shot into
each cloud.
The higher difficulties add more clouds to the mix. If you learn to adjust
for the terrible controls the harder difficulties are surprisingly simple
to get through.
===============================================================================
===== 6.0 EXTRAS ==============================================================
-------------------------------------------------------------------------------
6.01 Best Time Tips
-------------------------------------------------------------------------------
- Needless to say (though I'll say it anyway), DO NOT stop for collectibles
or sightseeing. Just stick to your goals and complete the level.
- Play through the entire game before going back for best times. It will be
easier for you to complete levels once you have the experience of every
level completed.
- Use the cheat code for the Infinite Power upgrade. This will make it possible
to easily run through enemies in any level.
- Practice makes perfect, so keep playing levels until you have the quickest
possible path memorized.
-------------------------------------------------------------------------------
6.02 Collectibles
-------------------------------------------------------------------------------
The Land of Chocolate
=======================
#1 As you progress along the first path in the village, you'll notice a
marshmallow trampoline on the right side. Hop on it to get blasted up to
the roof of the adjacent building where you'll find the bottlecap.
#2 You'll see another marshmallow trampoline next to the first Marge
fountain. Jump on it to get to the roof and the precious collectible.
#3 Jump onto the platforms on the right side of the cake area. Follow this
path to the end to find the bottlecap.
#4 Follow the ground path around the left side of the chocolate moat that
surrounds the giant cake. Use the white frosted platforms to get to the
bottlecap at the end.
#5 It's sitting on top of the chocolate mound right in the middle of the
giant cake. Roll up to the mound to get it.
Bartman Begins
================
Homer
=======
#1 Run to the left as soon as you enter the temple to find a statue of a
Trojan guy. The collectible is next to his left foot.
#2 Place Bart on the lone pressure pad after crossing the chasm in the
museum. A secret door will open in the left wall. Run inside as Homer
to the bottlecap.
#3 After entering the museum, turn left and down the stairs that lead
back towards the temple. You'll find the room where Jimbo and his
cronies discussed their plans along with the bottlecap.
#4 At the end of the diorama display hallway, inside the reception desk.
#5 Climb the shuttle claw pole in the Planetarium to reach the bottlecap on
top of the space shuttle.
Bart
======
#1 Once you cross the chasm in the temple, look to the left to find a wall
of vines leading into a hole in the wall. Climb the vines to reach the
Koupon.
#2 As Bart, run to the right after crossing the chasm in the temple. You'll
have to climb some vines to find the collectible on top of a broken
pillar.
#3 This one's next to the dinosaurs in the second museum room.
#4 Inside the Planetarium, climb onto the brown moon rock next to the wall.
The Koupon is sitting on top of the highest part of the rock.
#5 Reach the ring around the earth globe in the Planetarium. Bart's
collectible is next to the satellite.
Around the World in 80 Bites
==============================
Homer
=======
#1 On the ramp in China.
#2 Smash the piñata in Mexico and use that ramp to jump onto the orange
umbrellas. These will lead you to a large bowl of beans and the
shield power-up. This will make you invincible, which is just
what you need to roll into the barbed wire area near that bowl of
of beans. You'll find the collectible inside.
#3 Enter Germany and look on the left side for a red/black/yellow pole.
Climb the pole and search the red roof for the bottlecap.
#4 Once you get to France you'll see a large beige building on the right
side. Stand near that building and turn to face back towards Germany.
You'll see the bottlecap on a ledge.
#5 Inside the large tower in Scotland.
Bart
======
#1 On the wall between Australia and Mexico. Use the red rock on the
Australia side to get on the wall.
#2 On the wall between China and Australia. You'll need to get onto
the brick wall where you found the first collectible then jump onto
the orange umbrellas.
#3 Use the updraft from the large fan in Mexico to get to the nearby
roofs. From there you simply use the zipline to cross over the barbed
wire and reach the collectible on a roof at the far end.
#4 Enter Scotland and look for a blue/white pole. Use it to reach the
nearby vines and climb your way across the wall (but look out for those
nasty flames from the furnaces). You'll find the collectible on a ledge
at the other end of the wall.
#5 Get to the top of the coliseum in Italy and look for a ladder that
leads to the top of the ruined arches. Jump along the arches to reach
the collectible at the end.
#6 Climb to the top of the bridge just before you enter America. Look to
your right near several large beer tanks to find a lonely walkway with
a collectible sitting at the end of it.
Lisa the Tree Hugger
======================
Lisa
=======
#1 Use the Hand of Buddha to lift all the tree stumps and place them where
they are supposed to go. The collectible will appear from underneath one
of the stumps.
#2 Once you get past the two red buttons and spinning spiked cylinders,
you'll be on a conveyor belt. Jump down and look underneath the conveyor
belt for the collectible.
#3 Look on the left side between some trees in the area with the radioactive
containers.
#4 This last one is on the right side of the Frogger river, near the end of
the level. Use the slow-moving logs to reach the platform on the right
side that contains the collectible.
Bart
======
#1 Use Lisa's Hand of Buddha to lift the boulder from the bulldozer in the
first part of the level. Bart can use the bulldozer scoop to reach the
Koupon in the tree.
#2 Shoot the target in the giant saw blade area. Once the giant saw has
stopped you can use it to get to the collectible hovering over the
middle of the machine.
#3 Use the Hand of Buddha in the area near the green sludge to lift the
giant saw blade lying flat on the ground. Place that saw blade in the
wedge cut into the nearby tree. That will complete the platforms that
Bart needs to get to the collectible on the highest saw blade.
#4 Use the Hand of Buddha to lift the three radioactive containers. Bart's
collectible is in the space where the third container used to be.
#5 This one's on the island in the center of the Frogger river.
#6 Lift the pipes at the end of the level and place them so that the T-pipe
is the first one on the left and the small curved pipes are placed above
it. Then, simply use Bart and the updraft from the curved pipes to reach
the collectible on the left.
Mob Rules
===========
Lisa
=======
#1 Drop onto the ledge near the first Hand of Buddha and scoot over to the
collectible on the right side. On the Sequel Stop building roof.
#2 Use Hand of Buddha to pick up the green ladder on the roof of the building
near the spot where you build a bridge. Drop the ladder near the
collectible to create a walkway.
#3 This one is located on a ledge above the first Maggie vent hole.
#4 Proceed to the courtyard area where you're required to build a ramp
to get out. This collectible is on a ledge near the start of the area
where you need to use the green poles to get to the ledge.
#5 On top of a SWAT police van in the final area.
Marge
======
#1 Take the mob down into the bottom level of the parking garage and make
them attack the cracked wall.
#2 Inside Maggie's first vent hole near the electric billboard.
#3 Use Hand of Buddha to place the panels from the roof in the courtyard
in the slots near the collectible adjacent to the red building.
#4 Get to the spot blocked off by fire hydrants on two sides. Lift the
black crate and use that to stop the hydrant and get the collectible.
#5 Inside the Maggie vent in Town Hall. You'll find it in a side vent on the
left near the start.
Enter the Cheatrix
====================
Lisa
=======
#1 Move from the golden coin machine in the first factory room along the
clear pipe filled with health packs. This pipe leads to a lower platform
with a collectible sitting in the corner.
#2 Cross the bridge in the blood room. Climb onto the next pipe and look for
a "BFG" sign. Hop the trampoline next to it to reach the collectible on
the slanted roof.
#3 You'll find a bunch of pink platforms floating in the sludge in the
marketing room. Hop along the platforms to get to the collectible.
#4 In the marketing room, on a high ledge after crossing the yellow/black
poles.
#5 On the left side of the walkway in the final room.
#6 Inside a crate on the right side during the Stubborn Ape battle.
Bart
======
#1 Use Lisa's Hand of Buddha in the barrel/crate/health room and stack the
blue gears on the right side, so that they lower the Bartman zipline.
This will give Bart access to a collectible floating above one of the
blue gears.
#2 Climb the first gray pole and look for a collectible near a Bite Night
poster.
#3 Look for a trampoline in the area where you're blocked by a flowing
stream of green goo. Jump up to the top to find the collectible near a
blue hedgehog.
#4 Look for the QA room off to the side in the marketing room. You'll need
to grapple up to a nearby platform to get the collectible.
#5 Jump up the trampolines in the marketing room and look to the left
to find this one.
#6 Inside a crate on the left side during the Stubborn Ape battle.
The Day of the Dolphin
========================
Bart
======
#1 On a ledge behind the boathouse. Use Bartman's grapple to get up there.
#2 Look for a "Twirling for Timeshares" booth during the second dolphin
encounter. The collectible is next to that, on the ground.
#3 Pull the lever in front of the fish tank on the left and use that platform
to climb up to the high ledge. Climb across the ropes to reach the
collectible at the end.
#4 On the right side of the King Snorky tank use Bartman's glide to float up
on an updraft. The collectible's on a ledge above.
Lisa
======
#1 On top of an umbrella near the rowboats. Use the boats to create a bridge
to the umbrella.
#2 Next to the gate at the end of the enclosed section of the pier. Just
before the spinning octopus ride.
#3 On the ground in the entrance hallway of the King Snorky fight.
#4 Hop on the pink jellyfish along the wall in the King Snorky fight and
get to the top of the large blue whale.
Shadow of the Colossal Donut
==============================
Bart
======
#1 Look for three stacked gray pipes and jump inside the top one to find it.
#2 Run into the alley behind the orange Home of the Colossal Donut building,
then look for a wall where the paint is chipped away exposing the wooden
slats underneath. Climb up along the slats to find the koupon.
#3 Stand in front of the Home of the Colossal Donut building and look across
the street for a dumpster. Hop onto the dumpster to get to the second
level of the construction site. Run to the end and look for an open vent.
Use the updraft to get to a high perch and the collectible.
#4 Look for the brown Ritz Hotel for Transients building near Krusty Burger.
Jump onto the roof of the adjacent low building and then onto the updraft
from the vent on the Ritz building. From the roof, hop down onto the blue
marquee sign in front of the building to reach the koupon on the awning.
#5 Get to the brown Youth Center building next to the pier, then stand near
the radioactive tanks on one side to find a grapple hook. Use it to reach
the ledge of the building and the koupon.
#6 You'll find a huge green factory at the pier. Use the dumpster and old
mattresses on one side to get to the top and find the koupon at the rear
section of the roof.
#7 This koupon is located on the roof of the Grease Recycling Plant at the
pier. You'll need to jump onto the roof of the adjacent building to get
to the Grease Recycling Plant.
#8 You'll find this one on a portion of the wooden pier next to the
Grease Recycling Plant.
Homer
=======
#1 Turn left from the start and look for a Krustylu Studios sign. The
collectible is above the sign.
#2 Approach the crane nearest to the start of the level and search around
it for a helium tank. Use the helium and float to the pipe being held
by the crane. The bottlecap is inside.
#3 Run into the alley behind the orange Home of the Colossal Donut building.
There's another small alley on the left side above a ledge where you'll
find this bottlecap.
#4 Use the dumpster behind the Home of the Colossal Donut building to reach
the bottlecap on the roof.
#5 Use an upside down blue car to get onto the crane in the middle of the
construction site. You can then use that as a ramp to get to the second
level of the construction site and access a helium tank. Use it to float
to the platform above the tank and find the bottlecap.
#6 Look for The Frying Dutchman at the pier, then approach the bright blue
three-story building across the street. The collectible is on the roof
of that building.
#7 Get to The Frying Dutchman at the pier and look for the large pink
fish sign next to it. Use the helium tank below it to float to the top
and grab the collectible.
#8 Behind the Krusty Burger restaurant.
#9 You'll find a Grease Recycling Plant near the Krusty Burger in the corner
of the area. The bottlecap is on a section of the pier near the building.
The easiest way to get to it is from the roof.
Invasion of the Yokel-Snatchers
=================================
Bart
======
#1 Jump on the brown trucks at the starting area to get to a collectible.
#2 Jump on top of the first trailer as Bart, then turn left and float down
onto an island surround by chasms. The collectible is sitting right in
the middle.
#3 Have Homer activate the steam updraft directly across from the ruins
at the end of the parking lot. Use Bartman to float across the steam
and onto the lonely light pole out in the middle of the lava. From
there you can float directly to the nearby platform and collectible.
Homer
=======
#1 Inside the first trailer barricade. Use the helium tank to get over it.
#2 There will be a trailer that's open in the middle with a helium tank
inside. Use the helium to float to the top and find the bottlecap.
#3 Get to the red trailer with the split in the middle in the parking lot.
Look for a trampoline near the trailer. Use that to jump up onto a
yellow ledge and get the bottlecap.
#4 Destroy all of the alien spawners inside the spaceship to reveal a red
button. The bottlecap is inside a hole in the ground behind the button.
Bargain Bin
=============
Bart
======
#1 After the door broken down by Homer Ball, look for a grapple hook onto a
higher walkway.
#2 On a walkway to the right of the target Bart must shoot to extend a
bridge.
#3 On the large platform with the forklift, tucked behind some crates in a
corner.
#4 On the small platform where the first trampoline is located.
Homer
=======
#1 After the door broken down by Homer Ball, fall down onto the lower walkway
and turn right to find the Duff bottlecap behind some crates.
#2 Use the helium tank on the large forklift platform to reach a high
platform and the collectible.
#3 On the small platform where the first trampoline is located.
NeverQuest
============
Marge
=======
#1 Approach the first house on the right side of the waterfall in the
open area at the beginning. The collectible is in a corner in the rock
cliff behind the house.
#2 Use Mobbits to build a trampoline on the right side of the great hall.
That leads up to a ledge with the collectible on it.
#3 Use Homer Ball to break open a crack in the wall on the left side of the
great hall, near the invincibility shield. There's a collectible inside.
#4 Move to the top-right corner of the maze. The second key is located there.
The chest to the left of the key contains Marge's collectible.
#5 Use Marge's Mobbits to construct the trampoline near the Dragon Gate. Use
it to jump onto the dragon's muzzle, then place Maggie into the hole in
the dragon's left eye. Crawl into the tunnel on the left to find a
collectible behind the dragon's other eye.
#6 Use Gummi Homer to knock down the pillar and make a bridge across the
lava in the Selmatty boss fight. Cross over and look for the collectible
near the stone ammo box.
Homer
=======
#1 On top of a picnic table in the open area at the beginning. It's to the
right of the two large statues.
#2 Get Homer to the top platform next to the large wooden door in the great
hall. Use the helium to float to the right side to find the bottlecap.
#3 On the left side near the beginning of the maze. Look for a cracked wall
near the first gold key. The bottlecap's inside.
#4 Enter the chasm area and turn back toward the gate. Look up at the top-
left corner to find a floating bottlecap. Use the nearby helium tank to
float to the collectible.
#5 Use Marge's Mobbits to construct the trampoline near the Dragon Gate. Use
it to jump onto the dragon's muzzle and grab the bottlecap.
#6 Use Gummi Homer to knock down the pillar and make a bridge across the
lava in the Selmatty boss fight. Cross over and look for the collectible
on some stones floating in the middle of the lava.
Grand Theft Scratchy
======================
Lisa
======
#1 Inside the garage of the building near the starting point.
#2 Face the blue house and look left to the second dilapidated house. Run
behind the house and climb the pole to get the collectible.
#3 Jump onto the scaffolding immediately to the left after crossing under
freeway underpass.
#4 Enter the second area and follow the street to the left, past the Tom
Jackson billboard. Stand on the hydraulic car jack as Lisa and press the
nearby button as Marge. Jump onto the roof to see the collectible.
#5 Jump onto the poles behind the Tom Jackson billboard and use them to cross
to the left side. The collectible is on a small platform.
#6 On the left side of the sandy beach near the destroyed bridge.
#7 Go to the left side of the sandy beach near the destroyed bridge, then
look for some gray stones in the water. Jump on the stones to find the
collectible on a drainage pipe cover.
#8 Sitting on a pipe on the right side of Poochie's island. You have to run
up to it and cross over on the narrow pipe's surface.
Marge
=======
#1 Have the dogs destroy the cracked wall next to the newly repaired yellow
factory building in the cul-de-sac. The collectible is inside.
#2 Use Lisa's Hand of Buddha to place two batteries in the two generators
near the elevator at the end of the first street. This will lift Marge
and her mob to the top level and the collectible.
#3 Enter the second area and follow the street to the left, past the Tom
Jackson billboard. Stand on the hydraulic car jack as Marge and press the
nearby button as Lisa. Jump onto the roof and climb the ladder to find
a collectible on the freeway.
#4 On a ledge adjacent to the water between the Tea Cozy Corner building and
the destroyed building at the end of the street.
#5 Send Maggie into the WUUF radio station building. Crawl to the ground
floor and turn left into the cubicles. The collectible is sitting
between a desk and a cubicle wall.
Medal of Homer
================
Bart
======
#1 In the south-west corner of the map. Look for three wooden barrels stacked
up on a ledge. They're sitting just below a balcony. Destroy the barrels
to expose the collectible.
#2 Look for the zipline over the plaza in the north-central part of the
village map. Climb onto the building at the south end of the zipline. The
collectible is on the roof.
#3 Look for the wooden cart set up as a ramp in the central plaza. Use Homer
Ball to dash over the ramp and destroy the roof of the building across
from it. Switch to Bart and glide to the roof from a building across the
plaza.
#4 Look for some floating cows in the water. Find the path to the cows at
the east end of the map. Hop on the first one to jump along and get to
an island with the collectible on it.
#5 Go behind the church and open the door to a dungeon area. Press A at
the orange CASTLE DUFFENSTEIN tapestry to find the collectible.
#6 On the roof of the church.
#7 Plant C4 on the first gun turret to the left after you reach the deck of
the aircraft carrier. Use the updraft from it to reach a collectible.
#8 Get Homer to level D-3. You'll blow up one door and then run around to
find a pipe that also needs a C4 charge. Hop down into the gap to the
right to find yourself on D-2. Follow the path to the collectible.
#9 Get to deck D-7, next to the smoke stacks. Use the updraft and take Bart
up to a crow's nest just above it. You'll see three red barrels and a
lever. Pull the lever to activate the third smoke stack updraft. Glide
across the smoke stacks to the other side. The collectible is out on a
steel beam to the right.
Homer
=======
#1 On a balcony in the south-central part of the map. Climb a gray pole to
reach it.
#2 On a balcony of the building in the north-east corner of the village. Use
the nearby awning trampoline to get to it.
#3 Use the ramp near the church to Homer Ball dash over the water. The
bottlecap is sitting on the patch of land after the second ramp.
#4 Go behind the church and open the door to a dungeon area. Press A at
the orange CASTLE DUFFENSTEIN tapestry to find the collectible.
#5 Head toward the stern of the ship (away from the crashed airplane). Look
left to find a red barrel and a collectible stacked on top of some crates.
#6 Use the helium on deck D-5 to reach a rotating radio transmitter just
above it. The bottlecap is sitting next to it.
#7 Get to deck D-7, next to the smoke stacks. Use the updraft and take Bart
up to a crow's nest just above it. You'll see three red barrels and a
lever. Shoot the barrels to reveal the collectible. Switch to Homer and
use helium to get to the collectible.
Big Super Happy Fun Fun Game
==============================
Lisa
======
#1 Get past the river from the starting path. Look for some wooden flag poles
on the right. Climb the nearest one to reach the collectible.
#2 Use the second Hand of Buddha to the left of the starting path. Move it
to the far right to find a couple of outlying village houses. Lift both
of them to reveal the collectible.
#3 Lift all the houses around the Hand of Buddha to the right of the starting
area. The collectible will be beneath one of them.
#4 Jump onto the elevator platform on the right side of the first room in the
land of fire. The collectible is on the platform above next to a sushi
vending machine.
#5 Get to the upper level where Gummi Homer splits a tree in half. Get onto
the ledge with the Hand of Buddha on the left. Use the elevators next to
that to get higher up onto a sushi vending machine. Jump up to the
topmost ledge to find the collectible.
#6 Get to the stern of the ship and look down below its rear end. You'll see
a platform. Jump down to find some Gummi ammo and Lisa's collectible.
Homer
=======
#1 Look to the left of the first Hand of Buddha in the village. Use Homer
Ball to reach the bottlecap on the edge of a cliff.
#2 This one's floating in the air near the Hand of Buddha to the right of the
starting area. Use Homer Ball to get to it.
#3 Look behind the stone columns in the first room of the land of fire.
#4 Enter the land of ice. Get to the Hand of Buddha ledge as Homer and switch
to Homer Ball. Aim toward a distant platform to the left of the stalactite
and dash over to it. The collectible is sitting on the ground.
#5 Approach the bow of the ship and run out onto the narrow bowsprit.
#6 Homer Ball dash into the steep ramp at the foot of the mast in the middle
of the airship.
Five Characters in Search of An Author
========================================
Homer
=======
#1 Use Gummi Homer to destroy the limousines in the starting area. The
bottlecap is inside one of them.
#2 Take Bart into the pool room on the right of the starting area after all
the lawyers have been defeated. Use the trampoline to get to the ziplines
and cross over the water. Pull the lever to open the door for Homer to
get in there and collect the bottlecap.
#3 Knock down the pillar on the left side of the mirror room. Use it to
take Homer up to a platform with some pipes running into it. Use Homer
Ball dash to get to the collectible on the farthest platform.
#4 Once you get to the third mirror in the mirror room, use the elevator
platform to get Homer to the mirror. Go to the right side of it and look
down toward a narrow ledge. Jump down to get the collectible.
#5 Run to the left side of the ground floor. Look for the bottlecap to the
left of the staircase.
Bart
======
#1 Climb the vines on the left side of the starting area. Glide from there
to the nearby column for the collectible.
#2 Floating in front of the Barney fountain after you defeat the lawyers in
the beginning.
#3 Climb up the stairs in the mansion foyer and look left to find a tapestry
with pale vines on it. Climb the vines and glide to the balcony on the
left. Glide to the ledge over the front door and climb the next set of
vines. Jump to the next balcony on the left and then to the collectible
on the orange pipe.
#4 Hop on the bookcases to get to the second mirror. Turn right from that
high platform to find some gold bar ammo and a collectible down on a lower
platform. Glide down to get it.
#5 Run up the right staircase in Matt Groening's office. Jump up to the
balcony there to find the collectible next to a painting.
Game Over
===========
Bart
======
#1 Use Bart's grapple to get to the roof of the arcade in the alien area.
The collectible is inside the building's steeple.
#2 Look for the last shack in the row on the left side (the logger area).
Jump up to the roof to get it.
#3 Get to the roof of the shack 'Reserved for Elvis' on the right side (near
the aliens).
#4 First place the green golf holes as platforms in the clouds that aren't
solid. Jump across those platform to the cloud in the middle with the
Hand of Buddha and collectibles.
#5 Face the long staircase after you've opened all the gates. Turn left and
head toward a building in the left corner. Jump on the cloud trampoline
to get to the collectible on the roof.
#6 Place the hot rock in the middle pool in the steam bath building. Take
Bart to the updraft. Glide onto the roof on the right (closest to the
next area with the Skybucks). Run along the roof toward the steam bath
entrance. The collectible is in the small steeple.
Lisa
======
#1 Enter the arcade building on the right side. The collectible is hidden
amongst the arcade machines.
#2 Cross over to the left side (with all the loggers). Look for a small
shack. There's a collectible sitting behind it.
#3 Run from the small shacks on the logger side toward the hole in the
clouds. Look for a collectible on a green terrace near the golden gate.
#4 First place the green golf holes as platforms in the clouds that aren't
solid. Jump across those platform to the cloud in the middle with the
Hand of Buddha and collectibles.
#5 Face the long staircase after you've opened all the gates. Turn left and
head toward a building in the left corner. Jump on the cloud trampoline
to get to the collectible on the roof.
#6 Behind the 'Skybucks Coffee' sign.
-------------------------------------------------------------------------------
6.03 Clichés
-------------------------------------------------------------------------------
#1 Double Jump - Land of Chocolate
Simply press jump and then jump again in the air. Perform this move at the
tall wall to unlock it.
#2 Switches and Levers - Land of Chocolate
Push the red button near the cake.
#3 The Doors - Simpsons' House
Approach the master bathroom door.
#4 Pressure Pads - Bartman Begins
Get to the high ledge at the end of the temple.
#5 Collectible Placement - Bartman Begins
Collect the bottlecap from the secret room in the second part of the
temple. Use Bart to step on the nearby pressure pad and open the door.
#6 Time Trial - Around the World in 80 Bites
Start the episode.
#7 Giant Saw Blades - Lisa the Tree Hugger
Enter the saw blade area.
#8 Invisible Barrier - Mob Rules
Jump towards the police barricades at the beginning of the episode.
#9 Cracked Up - Mob Rules
Take the mob down into the bottom level of the parking garage and have
them attack the cracked wall.
#10 Red Ones Go Faster - Enter the Cheatrix
Defeat the first red street fighter in the marketing room.
#11 Trampolines - Enter the Cheatrix
Approach the trampolines in the marketing room.
#12 AI Running into Walls - Simpsons' House
Look at Ralph running into a corner of a house beyond the backyard fence.
#13 Water Warp - The Day of the Dolphin
Fall into the ocean.
#14 Obvious Weakness - Shadow of the Colossal Donut
Open Lard Lad's first hatch and pull the wiring.
#15 Temporary Power Up - Invasion of the Yokel-snatchers
Get the invincibility shield inside the red trailer in the parking lot.
#16 Chasm Death - Bargain Bin
Fall into the chasm below the level and die.
#17 Lame Tutorials - Game Engine
Complete all of Professor Frink's tutorials.
#18 Key Card - Game Engine
Approach the golden gate in the Game Engine.
#19 Rift Portal - Simpsons' House
Travel from the Game Engine to the Simpsons' house through the theater
door in the middle, then use the computer in the living room to travel
back to the Game Engine.
#20 Lava - NeverQuest
Fall into the lava during the dragon boss fight.
#21 Ammo Box - NeverQuest
Open the stone box on the right side of the entry hall to the dragon
chamber. A bunch of Gummi power-ups will appear.
#22 Enemy Spawners - Grand Theft Scratchy
Destroy one of the red spawner vans in the beginning of the level.
#23 The Road to Nowhere - Grand Theft Scratchy
Run toward the destroyed road beneath the freeway overpass in the first
section of the level.
#24 Wooden Crate - Medal of Homer
Destroy the wooden crate on the left at the start of the level.
#25 Explosive Barrel - Medal of Homer
Shoot the explosive barrels on the deck of the aircraft carrier.
#26 Flying Boat - Big Super Happy Fun Fun Game
Reach the airship at the end of the episode.
#27 Elemental Enemies - Big Super Happy Fun Fun Game
Open the gate to the land of fire.
#28 Evil Genius - Five Characters in Search of An Author
Enter Matt Groening's office.
#29 Timing Puzzle - Five Characters in Search of An Author
Approach the moving bookcases in the mirror room.
#30 Re-Used Enemies - Game Over
Fight the enemies.
#31 Collecting Every Collectible
Collect all other clichés in the game.
-------------------------------------------------------------------------------
6.04 Trophies
-------------------------------------------------------------------------------
Trophies can be viewed inside the Simpsons' house. They are obtained when all
of the collectibles in an episode have been found.
- Homer's Duff bottles are in the garage... er, car hole.
- Bart's Krusty posters are in his room.
- Lisa's Malibu Stacy dolls are in her room.
- Marge's cans of hair spray are in the master bedroom.
Homer
=======
#1 Choco Duff Dark - The Land of Chocolate
#2 Dino Duff - Bartman Begins
#3 Hi-Cal Duff - Around the World in 80 Bites
#4 Deep Fried Duff - Shadow of the Colossal Donut
#5 Gloxnar Duff - Invasion of the Yokel-Snatchers
#6 8-Bit Duff - Bargain Bin
#7 Ye Olde Duff - NeverQuest
#8 Star Spangled Duff - Medal of Homer
#9 Turn Based Duff - Big Super Happy Fun Fun Game
#10 Pearly Duff - Five Characters in Search of An Author
Bart
======
#1 Krusty Begins - Bartman Begins
#2 Krusty Burger - Around the World in 80 Bites
#3 Krusty Toothpick - Lisa the Tree Hugger
#4 Krusty's Stop & Go - Enter the Cheatrix
#5 Marine World - The Day of the Dolphin
#6 Krusty Meal - Shadow of the Colossal Donut
#7 Attack of the 50 ft. Klown - Invasion of the Yokel-Snatchers
#8 Krusty Krappy Kartridge Klassics - Bargain Bin
#9 Saving Krusty's Privates - Medal of Homer
#10 Krusty Klownface - Five Characters in Search of An Author
#11 The Passion of the Krust - Game Over
Lisa
======
#1 Tree Hugger Stacy - Lisa the Tree Hugger
#2 Political Scandal Stacy - Mob Rules
#3 Next Gen Stacy - Enter the Cheatrix
#4 Marine Biology Stacy - The Day of the Dolphin
#5 Teen Pregnancy Stacy - Grand Theft Scratchy
#6 Anime Stacy - Big Super Happy Fun Fun Game
#7 Heavenly Stacy - Game Over
Marge
=======
#1 Hair Street Blues - Mob Rules
#2 Lord of the Ringlets - NeverQuest
#3 Gangsta Clean - Grand Theft Scratchy
-------------------------------------------------------------------------------
6.05 Upgrades
-------------------------------------------------------------------------------
Homer
=======
- Helium Homer
Complete Enter the Cheatrix.
- Gummi Homer - Game Engine
Talk to Professor Frink.
Bart
======
- Bartman Grapple - Enter the Cheatrix
At the start of the episode.
- Bartman Bat Swarm - Game Engine
Talk to Professor Frink.
- Bartman Super Cape - Game Engine
Talk to Professor Frink.
Lisa
======
- Lisa's Super Saxophone - Enter the Cheatrix
Near the first Hand of Buddha in the blood room.
- Lisa's Buddha Smash - Enter the Cheatrix
On the Hand of Buddha along the outer rim of the large sludge tank in the
final area.
- Lisa's Lightning - Game Engine
Talk to Professor Frink.
Marge
=======
- Marge's Mega-Megaphone - Game Engine
Talk to Professor Frink.
===============================================================================
===== 7.0 CODES & SECRETS =====================================================
Enter these codes at the Extras menu. You'll hear Bart laugh if you enter them
correctly.
- Infinite Power
+, Left, Right, +, -, Z
- Unlock All Clichés
Left, -, Right, +, Right, Z
- Unlock All Movies
-, Left, -, Right, +, C
===============================================================================
===== 8.0 LEGAL / MISC. =======================================================
-------------------------------------------------------------------------------
8.01 Version History
-------------------------------------------------------------------------------
2013.07.07 - Version 1.0: Guide completed.
-------------------------------------------------------------------------------
8.02 Guide Credits
-------------------------------------------------------------------------------
Thanks to these folks...
1. The people who made the game, including EA Redwood Shores and Rebellion
Developments.
2. Wilson Lau for his excellent guide to 'Bart vs. the Space Mutants'. It
inspired the more than 60 game guides I've written to date.
3. The folks at GameFAQs for those cheats.
4. You for reading.
-------------------------------------------------------------------------------
8.03 Contact Information
-------------------------------------------------------------------------------
subsane at gmail dot com
-------------------------------------------------------------------------------
8.04 Legal Stuff
-------------------------------------------------------------------------------
1. The Simpsons Game software TM and (C) 2007 Electronic Arts Inc. All rights
reserved.
2. This guide copyright (C) 2013 SubSane. This guide may be distributed freely
as long as it remains in its ORIGINAL and UNALTERED form. It is only for
private use and may not be reproduced for commercial purposes.
If I discover that this guide has been altered in any way and is being
displayed publicly, I reserve the right to have the guide removed from that
location.
===============================================================================
                               THE SIMPSONS GAME
                             FAQ/WALKTHROUGH, v1.0

                       Based on the Nintendo DS Platform
                       Written and Maintained by SubSane
                            Last Updated 2013.10.02

===============================================================================


Use Ctrl + F and the section numbers in the Table of Contents below to find
exactly what you need.


TABLE OF CONTENTS

1.0 INTRODUCTION
    1.01 About the Game
    1.02 About the Guide

2.0 BASICS
    2.01 Game Start
    2.02 Status and Menu Screens
    2.03 Controls
    2.04 Items

3.0 SPRINGFIELD MAP

4.0 PET HOMER

5.0 WALKTHROUGH
    5.01 The Land of Chocolate
    5.02 Bartman Begins
    5.03 Around the World in 80 Bites
    5.04 The Tree Hugger
    5.05 Mob Rules
    5.06 Enter the Cheatrix
    5.07 Treehouse of Horror
    5.08 Bargain Bin
    5.09 The Mythos of Marge
    5.10 Big Super Happy Fun Fun Game
    5.11 Five Characters in Search of an Author
    5.12 Game Over

6.0 LEVEL CHALLENGES

7.0 MULTIPLAYER

8.0 EXTRAS
    8.01 Collectibles
    8.02 Clichés
    8.03 Trophies
    8.04 Upgrades
    8.05 Pet Homer Items

9.0 CODES & SECRETS

10.0 LEGAL / MISC.
     10.01 Version History
     10.02 Guide Credits
     10.03 Contact Information
     10.04 Legal Stuff


===============================================================================

===== 1.0 INTRODUCTION ========================================================


-------------------------------------------------------------------------------
                              1.01  About the Game
-------------------------------------------------------------------------------

In The Simpsons Game, Homer, Marge, Bart, and Lisa use exciting, all-new powers
to defend their home town from rising chaos. While the Simpsons have general
abilities that can be used to fight opponents, interact with environments, and
finish puzzles; each one has been imbued with special abilities that are unique
to their personalities. These abilities grow and change as they progress
through the story to battle tougher and tougher enemies in their quest to save
Springfield!

To help the Simpsons, gamers must journey through their home town (as well as
vast worlds beyond!), vanquish an amazing array of villains, and fight their
way through parodies of multiple popular games. 100% original script from the
writers of the show with 4 distinct acts divided into many episodes and over
8,000 lines of dialogue. The open-world Springfield was designed as a central
locale to jump into episodes with iconic locations to visit, characters to be
visited and interact with, and hundreds of collectibles to be found. With
parodies of the video game industry, pop culture and current events, the game
has the same gut wrenching hilarity as the show.

The game was developed by EA Redwood Shores and Amaze Entertainment, and
published by EA Games. All versions were released on October 31, 2007.


-------------------------------------------------------------------------------
                              1.01  About the Guide
-------------------------------------------------------------------------------

This guide is for The Simpsons Game on Nintendo DS. It will not help if you are
searching for information about The Simpsons Game for Xbox 360, PS3, PS2, PSP,
or Nintendo Wii.


===============================================================================

===== 2.0 BASICS ==============================================================


-------------------------------------------------------------------------------
                                2.01  Game Start
-------------------------------------------------------------------------------

New Game
==========

Select a save slot and begin a new game.


Load Game
===========

Load a game from an existing save slot.


Options
=========

Adjust the music, SFX, and voice volumes, and view the game's credits.


Multiplayer
=============

Play a multiplayer game with up to three other players. You can use one cart
for all devices or each device with its own cart.


-------------------------------------------------------------------------------
                          2.02  Status and Menu Screens
-------------------------------------------------------------------------------

Pet Homer
===========

Energy: Energy determines how active Pet Homer gets.

Mood: If Pet Homer gets unhappy, his energy drops.

Items: The items bar on the right shows which items are available for the
       player to use on Pet Homer.


Story Mode
============

Health: You can check the characters' health via the health bars in the
        bottom-left corner.

Ammo: The slingshot ammo counter appears in the lower-right corner.

Calories: Homer Ball's calorie meter appears in the lower-right corner.


Pause Screen
==============

Resume: Resume your game.

Options: Adjust the audio levels.

Exit Episode: Return to the Springfield map.

Exit Game: Return to the front end screen.


-------------------------------------------------------------------------------
                                 2.03  Controls
-------------------------------------------------------------------------------

General Controls
==================

Command                  | Action
---------------------------------------------------
D-pad                    | Move character
B button                 | Jump
Y button                 | Primary attack
X button                 | Action
Start button             | Pause


Homer Controls
================

Command                  | Action
---------------------------------------------------
A button                 | Active Homer Ball
X button                 | Active Helium Homer
B button                 | Gain altitude as Helium Homer
Y button                 | Homer Ball dash
B, then Y                | Homer Ball slam


Bart Controls
===============

Command                  | Action
---------------------------------------------------
D-pad                    | Climb on vines
A button                 | Shoot slingshot
B button (hold)          | Float in the air
X button                 | Grappling hook
Up on D-pad              | Hook onto zipline


Lisa Controls
===============

Command                       | Action
---------------------------------------------------
X button                      | Use Maggie in tight spots
Stylus                        | Lift and drop objects
L or R button (hold) + stylus | Lightning attacks


Marge Controls
================

Command                  | Action
---------------------------------------------------
X button                 | Enter or exit the Hand of Buddha
Stylus tap               | Select mob member, select mob attack target
A button                 | Use loud speaker to gather mob.


-------------------------------------------------------------------------------
                                   2.04  Items
-------------------------------------------------------------------------------

  Item               |  Purpose of item
 ------------------------------------------------------------------
  Collectibles       |  Collect these items to unlock the trophies.
  Hearts             |  Restore health.
  Food               |  All food items serve as fuel for Homer Ball.
  Bart Ammo          |  These give Bart stronger ammo for the slingshot.
  Insanity Pepper    |  Turn into Fireball Homer for a short while, which gives
                        invincibility and a speed boost.


===============================================================================

===== 3.0 SPRINGFIELD MAP =====================================================


Chocolate Dream
=================

This thought bubble over the Simpsons' house leads to The Land of Chocolate.


Museum of Natural History
===========================

The building next to the town square leads to the Bartman Begins level.


Duff Brewery
==============

Near the north corner of the map. It leads to the Around the World in
80 Bites level.


Logging Factory
=================

Located in the north corner of town. It leads to the The Tree Hugger episode.


Town Hall
===========

This is next to the town square. Select the building to start the Mob Rules
episode.


Frink's House
===============

This one's next to the Logging Factory sign. It leads to the following
episodes:

- Enter the Cheatrix
- Bargain Bin
- The Mythos of Marge
- Big Super Happy Fun Fun Game
- Five Characters in Search of an Author


Marine Park
=============

In the south corner of town, and it leads to the Day of the Dolphin battle.


Lard Lad
==========

Next to The Android's Dungeon. It'll take you to the Shadow of the Colossal
Donut battle.


Springfield Mall
==================

There's a big sign for it to the left of The Android's Dungeon. The Invasion of
the Yokel-Snatchers battle is in that direction.


Heavenly Gates
================

This appears in the middle of town when you've completed all other levels. It
leads to the Game Over level.


Noiseland Video Arcade
========================

Go here to play the level challenges.


The Simpsons' House
=====================

Access the Pet Homer mini-game.


Aztec Theatre
===============

Go here to watch the movies you've unlocked in Story Mode. There are 23 movies
in all.


Android's Dungeon
===================

This is the spot where you can check out the collectibles and video game
clichés you've unlocked in Story Mode.


Moe's Tavern
==============

View the game's credits and the number of Springfield citizens you've
collected. You unlock one new citizen for each level completed.


===============================================================================

===== 4.0 PET HOMER ===========================================================


Status
========

Homer's Energy and Mood are affected by how well you manage to take care of
him. His Energy goes up when he eats food or gets tickled, but only unhealthy
delicious items will increase his Mood. Lame items like broccoli will decrease
his Mood.

If he eats too much bad food he'll have a heart attack, which decreases both
his Energy and Mood. You need to use the defibrillator to revive him.

Visitors help to increase his Mood.

If Homer's Energy and Mood drop to zero, he'll fall asleep to recover. You can
wake him up by tapping him.


Items
=======

Items are unlocked as you complete episodes in the Story Mode.

- Chocolate
- Pizza
- Hot Dog
- Broccoli
- Defibrillator
- Razor
- Shaving Cream
- Tennis Ball
- Carrot
- Pretzel
- Chicken Leg
- Target
- Handheld Game
- Shrimp on the barbie
- Taco
- Haggis
- Pink Book
- Steak
- Burger
- Buzz Cola
- Soap
- Hair Brush
- Donut
- Chili Pepper
- Bowling Ball
- Sunglasses


Visitors
==========

Use the phone to call for a visitor. You unlock additional visitors as you
progress through the game's Story Mode.


===============================================================================

===== 5.0 WALKTHROUGH =========================================================


NOTE: Please search section 8.0 of the guide for collectibles, clichés,
      trophies, and upgrades.


-------------------------------------------------------------------------------
                           5.01  The Land of Chocolate
-------------------------------------------------------------------------------

(If it's your first time playing, feed the chocolate to Pet Homer to begin
 this level.)


- Chocolate Outskirts

Move to the right to get the hang of the controls. Y to punch, B to jump, and
hit B twice to double jump. Go to the right and smash up anything in your way
to get to the next checkpoint.


- River of Chocolate

Move along and use jump to get past the trampolines. You can remain on the
trampoline until you're ready to make the leap the next platform.


- Chocolate Village

Proceed into the village until the four bunnies gang up on you. Take them out
one at a time by mashing the attack button. Follow the white chocolate bunny
to continue.


- Chocolate Cookies

Run ahead and double jump onto the floating cookie platforms. These will lead
you along toward the top-right part of the area, and then down to ground
level again. Hop onto solid ground.


- Giant Cake

Follow the trampolines to the right to find the white chocolate bunny and the
ladder. Climb up and follow the cake's layers to the very top platform. Fight
and defeat the white chocolate bunny to eat a special piece of white
chocolate. This'll turn Homer into Homer Ball.


- Inside the Cake

This section is a free-for-all along some ramps. Use the dash move to fly
from one level down to the next until you're at the bottom. Smash through the
bunnies until you find a large gap at the end. Fall into it to return to
reality.


-------------------------------------------------------------------------------
                              5.02  Bartman Begins
-------------------------------------------------------------------------------

- Underground Cave

Run ahead, over the chasm, to get to another chasm with a zipline above it.
Hold Up to hook onto it and get across. Climb the ladder at the end and pull
the lever to switch to Homer.

Jump onto the new platform as Homer and get across to the room with the red
button. Jump on it to lower the yellow gate and climb up.


- Ancient Pyramid Exhibit

Fight your way through the guards as Homer and jump onto the red button to
switch to Bart.

As Bart, use the newly revealed platforms that slid out of the wall to get
onto the buxom statue on the left. Hop along on the higher platforms
to get to the right. Use Bartcape to float across the chasm and pull the red
lever.

Run across as Homer and jump onto the red button.

Take Bart up to the new platforms and then float over to the platform just
below the red target. Beat up the guard and then aim up at the red target.
Shoot it with the slingshot to open the door. Jump inside to move on.


- Prehistoric Exhibit

Run along the brown brontosaurus's back and jump onto the first pterodactyl.
Float over the green skeleton to find a red lever. Pull it to switch to Homer.

Run along the same brown dinosaur and then jump onto the red tongue from the
green skeleton. Use that to jump over and run to the tar pit ahead. Jump across
the bone platform and continue to the right to jump onto a red button.

Take Bart onto the vent and then pull the lever on the right to open the door
for Homer.


- Dolph

This fight against Dolph requires you to shoot him and then shoot the red
targets down in the dinosaur exhibit. Aim down to shoot them. Dolph will try
to shoot you in the dark so jump or dodge his shots as they fly at you. It'll
take a few rounds to defeat Dolph and move on.


- History of Man Exhibit

Your goal here is to shoot the red targets in sequence so that Homer can
advance past the obstacles in the dioramas. Aim up at each target to shoot them
and clear the path. You'll also face some guards as well as security cameras
that you can shoot. Advance past the first three dioramas to get to the
'Giant Ants Are Our Overlords' display.


- Kearney

Stand underneath the middle target and use the D-pad to aim at your desired
target as Kearney appears underneath them. He won't attack you so you'll have
plenty of time to defeat him.


- Space Exhibit

Jump and climb up toward the top of the area, defeating guards as you go.
You'll need to use an asteroid platform to get from Mars to Jupiter. Keep
jumping up toward the top until you're near enough to Jimbo that he shoots
you with green laser balls. Avoid them as best you can and stand on the right
side of the top flying saucer. Aim up and shoot Jimbo's spaceship until he
gives up.

Just like a bully to cower in fear after a prolonged physical assault.


-------------------------------------------------------------------------------
                       5.03  Around the World in 80 Bites
-------------------------------------------------------------------------------

- Germany

Use Homer Ball to smash the barrels at the start of the area, then stand on
the sewer lid as regular Homer. This'll bounce you up over the building. Jump
on the button to switch to Bart.

Use the vent from the chimney to get to the oversized stein, then use that
trampoline to get to the platform with Uter on it. Pull the lever ahead to
switch to Homer.

Run across to the other side to find Das Brautwursthaus. Smash the barrels as
Homer Ball and jump up to the roof. Jump on the button to switch again.

Take Bart to the end of the area to continue.


- Mexico

Run ahead to the church and climb the ladders to get to the third floor. Pull
the lever to activate the vent on the shack to the left. Float to the roof of
that shack and use the vent to get to the wooden platform above. Float to the
moving cart on the right and then float to the top floor of the church. Smash
all the pinatas to switch to Homer.

Use Homer Ball to smash the super taco on the right and continue.


- France

Take Homer to the far right and jump on the red button.

Use Bart to float up to the second floor of the Eiffel Tower, then bounce on
the frog leg trampoline to get up to the third floor. Pull the lever.

Ride the elevator as Homer and then use the frog leg trampoline to the left of
the Eiffel Tower to reach the red button. Activate Homer Ball and dash across
to the windmill on the right side.


- Scotland

Take Homer over the bagpipes and jump on the red button.

Use the bagpipe trampoline and the vent to float up onto the arm of the
Scottish woman statue. Run across and cross the zipline to get to Australia.
Pull the lever to clear the way for Homer.


- Australia

Jump on both red buttons ahead as Homer to set up the stage for Bart.

Get to the red button platform with Homer and then go right, across the
zipline, and onto the roof of the G'Duff building. Pull the lever.

Run across Australia and past the giant beer tank.


- Italy

Run to the right and use the gondola to get across the water. Keep going and
climb the ladder when you see it. Turn left and get across the platforms until
you see the red button. Jump on it to switch over.

Take Bart up the platforms and cross to the left side. Get to the red lever
above the giant DUFF billboard and pull it.

Move Homer to the platforms above. Run to the right to get to the super
meatball and smash it as Homer Ball. Jump across onto the pizza pan and run
into America.


- America

Gather up some food and then use Homer Ball dash on the ramp in the middle of
the area to smash into the Statue of Burger Liberty. After several smashes the
Statue will collapse and drop the super burger. Time to do what gigantic fat
men do... No, smartass, I didn't mean have heart attacks.

Go smash the burger already!


-------------------------------------------------------------------------------
                             5.04  The Tree Hugger
-------------------------------------------------------------------------------

- Logging Entrance

Press X to activate that Hand of Buddha, then use the stylus to drag the stump
on the left onto the bare spot near the gate. Jump over the gate to proceed
into the logging area. Run ahead to find another Hand of Buddha. Use that one
to pick up the trees and build some steps up to the lever. Pull it to switch to
Bart.

Beat up snakes and loggers to get to the right and jump over the gate. Beat up
the logger in this area and then pull the lever next to the gate.

As Lisa, move to the next Hand of Buddha and set up the logs to build steps
toward the crane on the right. Place the large tree under the crane and the
small one to the left of that. Use them to jump up to the crane and then to the
conveyor belt.


- Springfield Forest 1

Hop along the conveyor belts and get to the one at the end, nearest to the
branch platform. Jump up and then turn left. Follow the saw trampolines and
platforms to the left until you see the yellow plunger. Use the nearby Hand of
Buddha to activate the plunger.

Hop onto the moving platform and continue to the top-right. You'll encounter
more platforms and loggers and then find another lever. Pull it to switch
characters.

Use the zipline to get across to the large machine. Cross the conveyor belts
until you can climb the ladder to the top of the behemoth, then take out the
loggers. Pull that lever to deactivate the chainsaw platforms for Lisa.

Run past the machine and get to the Hand of Buddha at the end. Use it to hit
the plunger and turn on that moving machine. Ride down to move on.


- Springfield Forest 2

Hop along the platforms toward the top and then turn right to get over the
gate. Beat up the logger and then run toward the conveyor platforms. The fire
barriers disappear and give you plenty of time to get across. Use the Hand
of Buddha to move the tall stump to the far left, past the conveyor platforms.
Run to the left again and jump onto the crane to reach that tall stump.

Get across the platforms and take out the remaining loggers to get to the
log holder at the end of the area. Use the Hand of Buddha to remove the pin and
make the logs roll into the sign on the right.


- Logger

This plays just as you'd expect it to play. Move Lisa one hop at a time and
get onto the logs, barrels, and turtles. The logs and barrels are fairly
frequent, but the turtles are more scarce. Make sure not to get caught on a
log or barrel when you're near the end of the river.

Keep hopping along until you reach the end. Repeat this as Bart--though with
the movement of the platforms sped up--to complete the area.


- Logging Factory

This area will require some speedy traversal. Your main goal is to hit the
targets and clear the saws from the path so that Lenny and Carl don't get
horribly minced. Shoot the first target and rush down under the wall. Get up
the conveyor platforms to the second target below the next saw.

Continue along and pull the lever to deactivate the saw platforms below, then
hop along to the third target. Hop along some more to find the fourth target.
The fifth target isn't much further ahead. Pull the lever to switch to Lisa.

Use the Hand of Buddha to pull the pins from the two furnace doors and damage
the factory to shut it down.

The Springfield logging industry is no more. Well done, jerk.


-------------------------------------------------------------------------------
                                5.05  Mob Rules
-------------------------------------------------------------------------------

- Sequel Stop

Tap those citizens to recruit them, then unleash the mob on those unruly
children. Children are your enemies. The next stop for the mob is that
Itchy & Scratchy sign. Assign them to it to have them knock it down.

Use the Hand of Buddha to move that orange car to the left and clear the path.

Take Marge's mob into the throng of cops and beat them mercilessly.


- Aztec Theatre

Run ahead and set up your mob to take out the enemies, then knock down the
sign. Take out the next set of cops. Click the ladder to make the mob build a
ladder for Lisa.

Climb up and use that Hand of Buddha to move the garbage bin out of the way.

Assign the mob to tear down the sign then move along to the next area.


- Parking Lot Structure

Run up to the top level and hop on that Hand of Buddha. Use it to move the
large SUV to the left, then move the two vertically positioned cars up toward
the posters.

Assign some mob members to the ledge to make them build a bridge to the next
roof. Once there, get to the vent and place Maggie inside. Assign the mob to
the sign when it's been de-electrified to build a bridge to the next roof.

Use the Hand of Buddha to place the battery in the motor.

Ride the elevator down to the ground floor. Lisa will follow.

Use the next Hand of Buddha between the buildings to clear the garbage bin and
free up some more mob members.

As Marge, use them to knock down the sign.


- Bowlarama

Run into the police squad and beat them down until the coast is clear.


- Chinatown

Recruit Otto and Comic Book Guy, then use them to build a ladder up to the
roof of the beige building.

Climb up as Lisa and use the Hand of Buddha to clear the following:

- The large SUV on the left side.
- The green garbage bin in the middle.
- The large SUV on the right side.

Gather up the mob members and knock down the sign.

Use the final Hand of Buddha in this area to move the cars on the right side.
The green car goes left, the orange car goes down, and the large SUV goes left,
then down.

Run ahead to the end to get to the next area.


- Town Hall

The cops in this area will continue to spawn from the police building, so
don't spend time trying to beat them up. Recruit a couple of mob members and
build a ladder up to the Hand of Buddha on the left side.

Use the Hand of Buddha to move the green garbage bin on the left into the
open spot at the base of the police station stairs. This is to block the cops
from getting out. Do the same to move the cars on the right side out of the
way, then move the garbage bin on that side into the other spot in front of the
stairs.

Gather up three citizens and make them attack the Itchy & Scratchy statue in
the town square.

Use the Hand of Buddha again to pick up the Scratchy statue's head. Move it
into the broken concrete on the right side next to a large open window and
yellow machine.

As Marge, run to Town Hall and get across that gap to reach the ladder up to
the roof of Town Hall. Place Maggie in the vent to get the Mayor's attention.


-------------------------------------------------------------------------------
                            5.06  Enter the Cheatrix
-------------------------------------------------------------------------------

- Next Gen-erator

Run to the right until you find a low grapple point. Engage the grapple hook
to get pulled up to the platform, and from there you can grapple to the left.
Grapple up to the top and fight off the street fighters. Grapple one more time
to the right to find some levers and a Hand of Buddha. Pull the left lever and
then the right lever.

Use the Hand of Buddha to pick up the crate and move it to the right, next to
the ledge. Use the crate to jump up to the next Hand of Buddha. Set up the
two purple platforms so that you can jump onto the beige machine on the left.
Use that Enlightenment Port to lift Lisa to the top white platform, but watch
for that street fighter's attacks. Pull the lever to switch back to Bart.

Jump up to the white platform. Move over to the right and pull the next lever.

Move Lisa to the right and enter the doorway.


- Audio Room

Beat up the street fighter, then pull the levers starting with the one on
the right. This'll bring down a Hand of Buddha. Use it to crank up the amp and
blow out the speakers on the left.

Grapple up to the speaker platform on the left and glide across to the right.
Eliminate the street fighter and jump over the gate. Pull the three levers
in this order: 1, 3, 2.

Run along to the right. Get to the Hand of Buddha below the large speaker and
use it to lift Lisa up to the platforms. Continue to the right and get rid of
the enemies in the way. The order for the four levers on the far right is:
3, 1, 2, 4. Use the next Hand of Buddha to crank up this final amp. It's back
to Bart.

Use the vents to get to the far right. The low vent will help you float up to
the top of the amp. Pull the lever to do the switcharoo.

Get Lisa up to the amp and use that Hand of Buddha to move the VOL, TREBLE, and
BARRELS switches into positions that'll allow you to jump up to the left side.
Continue along to the left onto the Hand of Buddha on an amp. Use it to lift
Lisa up to the speaker with the street fighter. Use the Hand of Buddha to
crank up the amp below.

Move Bart to the right and use the vents to get Bart to the top-left corner.
Pull the lever.


- Blood Room

Make your way to the far right until you see the chainsaw platforms. Jump under
them and pull the lever to remove the chainsaws, then quickly hop up there and
get to the ladder. Use that Hand of Buddha to turn the valve and shut off the
blood stream.

Take Bart to the right. Use the grapple hook to get up to a high platform, then
zipline to the left. Pull the lever to set the stage for Lisa. Keep going left
and cross the zipline to the top of the beige machine, then move up and
continue to the right. Pull the lever on top of the purple machine.

As Lisa, move up and to the left. Get to the purple machine with the beige
pipe. There will be a barrel underneath hiding a Hand of Buddha. Use that
Hand of Buddha to lower the purple platform on the left, then jump up and
cross all the way to the left. Use that next Hand of Buddha to hit the plunger
at the top.

Take Bart to the right until see you see a red lever. Pull 'er in.

Lisa can now cross over to the same platform to use the Hand of Buddha. Lift
her up and then jump onto the conveyor platform on the right. Ride this
platform to the lever and pull it to open the gate below. Those conveyor
platforms leads to the right, but watch the street fighters and lasers.


- Sequelizer

This room is simple. Head to the right and run past the spiked platforms as
quickly as you can. I found it easiest to simply hold Right and power through
it.


- Stubborn Ape

This room's a matter of clearing out the metal pins. Hop on the Hand of Buddhas
to pick up each of the metal pins and work your way up the platforms. Pick up
the final metal pin to defeat Stubborn Ape and save Frink.


-------------------------------------------------------------------------------
                            5.07  Treehouse of Horror
-------------------------------------------------------------------------------

- Day of the Dolphin

This one's simple, if a bit lengthy. Tap and hold the stylus on each dolphin
to take hold, then flick the dolphins away. It's easiest to flick them off to
the left or right sides. Don't let them get close to Lisa because they can tear
her apart pretty quick.


- Shadow of the Colossal Donut

The battle against Lard Lad is more of a chase. You can now use the helium
tanks to turn into a man balloon and float over obstacles. Use them to get as
far ahead as possible, and always go forward. Keep ahead of him and use both
Helium Homer and Homer Ball to stay as far away from Lard Lad as possible.
Stay on the ground when you see the Krusty Burger to grab some burgers, then
Homer Ball dash into that ramp to jump into the power lines ahead. This'll
take out Lard Lad for good.


- Invasion of the Yokel-Snatchers

They'll come in several waves, at first slowly and then more quickly. The
aliens will also increase the frequency of their fireballs and double their
health starting with the third wave. The third wave will be tough if you let
it get too far down, so make sure you take out their front rows quickly and
then pick off the remainder from one side to the other.


-------------------------------------------------------------------------------
                                5.08  Bargain Bin
-------------------------------------------------------------------------------

- Save the 8-Bit Simpsons!

This race against time means you need to stay ahead of the moving cartridge
as much as possible. Each target and lever that you see must be hit before the
cartridge containing the 8-bit Simpsons reaches it. Your first character switch
will be up ahead when you get to a lever. Pull it as Bart, then take Homer
further to the right.

Grab the burgers and then use the ramp to dash over the pit and land on a
platform with a button on it.

Now move Bart to the area ahead. Wait for the flame bursts to flash out and
then jump on the pipes to get to a lever on a platform. Pull it to switch over.

Run to the right and jump onto the second pipe to find a helium tank. Float
up and toward the right to get over the next set of flame bursts. Land on
the red button next to the yellow gate to unlock it for Bart.

The final stretch! Take Bart up the vents and past the platform. The final set
of platforms will be more of those pink breakable platforms. Get across them
quickly to reach the final lever below the furnace. Pull it to stop the machine
and save all Simpsons involved.


-------------------------------------------------------------------------------
                            5.09  The Mythos of Marge
-------------------------------------------------------------------------------

- Pierule

The goal here is to attack the Selmatty dragon until she is defeated. Your
weapon: Homer Ball. Your means of access: those ramps on the Mobbit houses.
You'll have to jump onto the houses and then use the ramp to dash into the air
and hit Selmatty. You should also learn to turn off Homer Ball in mid-air so
that you land on another house and attack again quickly. Eventually, Selmatty
will fall down and give you a chance to attack on the ground. She'll fly up
again and then you repeat the process. Keep it up until she flys away and the
dungeon opens up.


- Dungeon

Recruit Homer and use him to take down the Morc and the spawner. Destroy the
wooden chests and then take down the wall ahead. Pick up a few Mobbits from
the crates in the next area and use them to destroy the Morcs and their
spawners. Bring down the next wall to move on. Repeat this pattern of
using mob members to destroy spawners and walls until you reach the Dungeon
exit on the far right.


- Maze

The maze isn't too complicated, and you'll still have to first find the keys
to the locked yellow doors to proceed. The first key is revealed by destroying
the spawners in the area to the right of the first yellow door.

Go through the first yellow door and use your mob to take down each enemy
and spawner along the way. Make sure you clear them all out. Get to the end
of the second area to find the yellow door. If you've cleared out all enemies
and spawners you'll find the key next to the door.

The third area is much the same, but smaller. Take down everything and then
grab the key from the right side to exit this area.


- Dragon Chamber

Float across the first lava pit using Helium Homer, then cross the lava on
those flying lava rocks. The third rock will lift you up to a high platform.
Head to the left and follow the red walkway past the Morcs. When you reach the
Morcs jump over their arrows and beat them up. Go to the helium tank and get
past the giant soldier statue. Use the Homer Ball ramp just below to get down
to the stone walkway below. Jump on the red button to lower the door on the
left. Get back to the red walkway and press the red button there to switch
to Marge.

Move Marge straight to the right side until you see the large chains hanging
from the ceiling. Get across the platforms and jump onto the dragon's snout.
Drop Maggie in the tunnel to hit the switch, then jump back down and get
across the dragon door. Jump into the exit to continue.


- Selmatty Nest

Run to the right to get to the nest. This area plays just like the starting
fight against Selmatty, except you have a much smaller area in which to avoid
those fireballs. Do your best with those and keep attacking until she falls.
Run up to her and beat on her. Rinse and repeat until she goes down for good.


-------------------------------------------------------------------------------
                        5.10  Big Super Happy Fun Fun Game
-------------------------------------------------------------------------------

- Mr. Sparkle

Run up to the bonzai tree and jump on the red button. Use the cloud platform
to get across water and enter the Mr. Sparkle area. Eat some food and fight off
the dirt sumo wrestlers until they're all defeated. Mr. Sparkle will emerge
and explain that the land is in dire straits. It's up to you to clean up this
town.


- Land of Fire

Head to the right and hit the red button to switch to Lisa. Use the Hand of
Buddha to lift her up to the first pink tower. Hop on the nearby lava rock
and then onto the Hand of Buddha on the orange tower. Use the new lightning
ability to zap all of the fire sumos around the tower. Pick up the lava rock
and place it on the vent in the lower-right corner.

As Homer, head to the right and jump onto the floating rock. Follow the pink
towers to the left until you get to the helium tank. Float up and to the right
to continue into the mountain. Climb down the ladders to get to the underground
area. Press the three red buttons to open the door on the left and continue.

Move Lisa to the Hand of Buddha and then lift her up to the platform high
above. Use the Hand of Buddha to lower each of the stalactites into position as
a platform.

Move Homer up the platforms and then up to the upper-right area where the key
card and Jimbo are waiting.


- Ratachu

This battle shouldn't be too tough. Choose any attacks you like until you're
able to use the SUMMON attack. Choose it and watch Ratachu go down in defeat.


- Land of Ice

Use the helium tank and float all the way to the right. Beat up the ice sumos
and then jump on the red button to switch to Lisa.

Use the Hand of Buddha to move all of the fallen stalactite platforms into
position on the left, then run across as Lisa. Pull the lever at the end to
go back to Homer, then jump on the next red button to switch back to Lisa.
Lift Lisa up to the next platform, and then use that Hand of Buddha to lower
the stalactite on the left side. Move further to the left and move the crate
under the ladder. Now take Lisa into the left and get up the ladder. Pull the
lever to switch back to Homer.

Use Helium Homer to get up to the platform above, then head to the left. Use
the next helium tank and float up to the top, and then run to the right until
you see Ralph. Climb up and prepare for battle.


- Turdle

This one will be slightly tougher than the last battle. Focus on the attacks
that cause more damage (on the right side or bottom row) and don't let up until
the SUMMON attack is available. Use it to end the match.


- Airship

Go all the way to the right and pull the lever to lower a helium tank.

Run Homer to the tank and then float up to the upper-left corner to find a
red button. Press it to switch back to Lisa.

Use the moving cloud platforms to get up to the upper-left corner, then hop
up to the Hand of Buddha. Use it to bring down the rainbow bridges. That'll
clear the path for Lisa to get up to the Airship. Use the Hand of Buddha up
there to set up the purple crate. All that's left is to run to the left and
pull the lever.

Get Homer up to the Airship deck and use the floating cloud on the left to
move up to the crow's nest. Beat up the sky sumos in the way and get to the
crow's nest with the twins on it. Grab the key card to move on.


- Dirty Donkey

Like before, use the most powerful attacks from the get go. Keep it up until
you can bring the Battling Seizure Robot into the fight. That'll be the end
of the Dirty Donkey.


-------------------------------------------------------------------------------
                    5.11  Five Characters in Search of an Author
-------------------------------------------------------------------------------

- Courtyard

Head to the right and use the slingshot to take out all of the lawyers. Hop
onto the second level of the fountain and grapple up to the top. Jump across
the columns on the right to find a lever.

Get Homer to the other side and use Homer Ball dash with that ramp. Defeat the
lawyer, then approach the buttons on the ground. Your goal here is to replay
the first five notes in the theme song for The Simpsons. The order for the
buttons is:

Gray, blue, yellow, red, green.

Run inside to continue.


- Sketch Gallery

Use the pencil platforms to cross over the spikes and get up to the second
level. Watch out for more bees from the left and get to the next set of pencil
platforms, then onto the columns. There'll be a grapple hook when you reach the
final column but make sure to grab it quickly. Float to the other side and
make your way down the twisting hallway to find another large area. Head into
it and take out the lawyers immediately as you see them. Hop up the sketchpads
and follow the path to the left, up, and then to the right.


- Life in Hell

Run to the right and use the grapple hook to jump onto the boat in the water.
Pull the lever on the right side, near the Weenie Barn, to switch to Homer.

Get Homer across the water and float onto the Weenie Barn. Jump on the button
to switch back to Bart.

Use the vent over the Weenie Barn to get to the grapple hooks and platforms
above. Head to the left and as always get rid of the lawyers immediately.
Jump onto the televisions and turn right to get across another coffee steam
vent. Follow those television platforms to the right. Jump up to the top of
the rabbit's ear to shoot the target.

Use the new helium tank to get Homer up and over the rabbit's ear. Switch to
Homer Ball to take out the lawyers, then hit the red button.

Get Bart to the open gate.


- Money Vault

For starters, keep a look out for money bags. Great in most situations, but
in this area they'll just cause you to fall into the pits below.

Head to the right and get those pesky lawyers out of the way. Wait for the
pencil platforms to pop out and get across to the other side. Kill off the
lawyers and then move up via grapple hook. Wait for the falling money bags
to pass and then get across with the grapple hook. Hop onto the fence and climb
your way along it until you're at the same level as the safes. Wait for the
falling bags to stop and then jump to the left, although you'll also have to
time your jumps to dodge the bees. Continue up and to the right from there,
then left along some more grapple hooks. Use the vent on the left to get to
the top alongside a bunch of pencil platforms. Watch the pattern of the
platforms for a bit, as well as the falling bags and bees. When you feel
confident you can cross make your way to the right. You'll need to stand on
the top-right pencil to make the jump toward the climbing fence. Follow it
and watch for obstacles until you get to the top of the safes. Those lead to
a ladder on the left. Get to the top and pull the lever.

You now have to repeat that whole mess using Helium Homer. The first tank is
on the right of the first level, and the second one is just to the left. Float
up from there to find the next tank on the right. The tank after that is on the
left. From there, float past the safes and get up above them through the gap
on the right side. Run along to the ladder to get to the top and continue.


- Matt Groening

Your goal here is to shoot the targets above Matt Groening and shut the doors.
The Bender and Zoidberg enemies can be defeated with one shot each, so it
should be easy to get rid of them. They also give up plenty of ammo and hearts
to keep you alive. Run left to right and keep up the assault until Groening
gets to the door in the middle. Shut that door to defeat him.


-------------------------------------------------------------------------------
                                5.12  Game Over
-------------------------------------------------------------------------------

- Gardens

Send Maggie past the gate to open it then recruit Homer to the mob. Take down
the spawners and enemies and keep recruiting Homer clones until you've got the
place cleared out. Use the clones to take down that sign, then cross over.
Take out the kids and then climb up to the waterslide where you can send Maggie
down the chute. Cross the new bridge as Marge to move on.


- Land of Heavenly Chocolate

Head to the right and use the Homer Ball dash on the ramp to get over to the
cupcake, which will bounce you up the left. Get through the chocolate waters
and keep going until you see the helium tank. Hit the red button first and then
go to the right. Go up and left again to find another dash ramp. That'll get
you up to some cloud platforms.


- Block Tower

This one looks kind of messy, but it's as simple as using the Hand of Buddha
platforms to move the green block from one gap to the next to create steps
and jump toward the top of the tower. The first green block appears by pulling
the first lever. A second green block appears when you pull the six levers on
the left in a certain order. They are number from left to right, top to bottom:

4, 2, 6, 1, 3, 5

Use the second block to create more steps. Keep going along until you see the
third lever, which reveals a third green block. Use these three green blocks to
build the final steps up to the top-right corner.


- Golf Course

First up is a fight against Ben Franklin. It plays in two phases. Phase 1
requires you to pick up the umbrella with the Hand of Buddha and use it to
block the lightning strikes from the storm clouds above. You can judge the
order of the lightning bolts by looking at the clouds and moving the umbrella
accordingly.

You control Bart in Phase 2 of the attacks. Your goal is to aim up and shoot
the slingshot to push the kite toward the yellow cloud. Push it all the way
into it to strike Franklin. Later Bart phases include attacks from the aliens
that get in the way.


- Pathway to God

Follow the path to the right, then up, then left again. You'll see platforms,
trampolines, and columns as you go along. You can increase vent height by
dropping a bit then pressing the button again to float. That'll give you a nice
push up into the air. When you see the moving clouds you'll need to use them
to move to the upper-right platform. Turn left from there and follow the path
to the end to reach an escalator to God's place.


- God

Your goal here is to attack the handheld gaming device in God's hands to get
his attention. But, you'll have to do it several times. Conserve your health
and use the slingshot to pick off enemies from afar.

Get to the right and jump on the trampoline to get onto the easy chair. Run to
the left. Get within range of God's stylus and shoot it.

He'll knock you down and it's time for another go round. Get rid of the street
fighters in the way and go to the far right. Shoot the pop top on the can of
Buzz Cola and use that vent to get back on the easy chair. Shoot the stylus
again.

The third time will involve the heavy ranged hitters: Morcs and lawyers. Keep
with the slingshot strategy and work your way through the enemies until you're
back on the armrest.

Once you shoot it a third time you'll be done with the level and God will
finally have to explain himself and the meaning of existence. Well, the
Simpsons' existence. You'll have to wait until you meet your own maker, buddy.

                                     ---

That'll do it! Enjoy the ending and make sure to go back for the challenges,
collectibles, multiplayer, or whatever freaky stuff you like to do with your
video games.


===============================================================================

===== 6.0 LEVEL CHALLENGES ====================================================


You can find these challenges in the Noiseland Arcade. They allow you to earn
a bronze, silver, or gold medal for each challenge.


Logger Lives
==============

Play a game of Logger with only 5 lives available. Each successive level gets
more difficult than the last with objects floating faster each time.


Logger Timed
==============

You have 3 minutes to complete as many Logger levels as possible. Objects float
more quickly with each passing level.


Day of the Dolphin Elimination
================================

Your goal here is to get rid of as many dolphins as possible before your
health is depleted. The dolphins become more numerous with each wave.


Day of the Dolphin Survival
=============================

The only thing that matters here is how long you survive. The dolphins become
more numerous with each wave.


Springfield Invaders Elimination
==================================

Kill as many aliens as possible with no time limit. Each successive wave of
aliens gets faster, more aggressive, and each alien's health doubles.


Springfield Invaders Survival
===============================

Survive as long as possible against endless waves of aliens. Each successive
wave of aliens gets faster, more aggressive, and each alien's health doubles.


===============================================================================

===== 8.0 EXTRAS ==============================================================


-------------------------------------------------------------------------------
                               8.01  Collectibles
-------------------------------------------------------------------------------

The Land of Chocolate
=======================

  #01 This one's on the main path just before the first candy cart.
  #02 On the main path just after the first marshmallow trampoline.
  #03 On the main path just past the previous bottle cap.
  #04 On the main path just after you arrive in the chocolate village.
  #05 Get the Helium Homer upgrade and use the tank on the Giant Cake to reach
      the bottle cap in the upper-left.
  #06 Get the Helium Homer upgrade and use the tank on the Giant Cake to reach
      the bottle cap in the upper-left.
  #07 Get the Helium Homer upgrade and use the tank on the Giant Cake to reach
      the bottle cap in the upper-left.
  #08 Get the Helium Homer upgrade and use the tank on the Giant Cake to reach
      the bottle cap in the upper-left.
  #09 Inside a gap on the right side when you're falling through the Giant
      Cake as Homer Ball. You'll need to use the dash move to reach it.
  #10 About midway through the cake interior. You'll be on a long, flat
      platform with a ramp on the right side. Use a Homer Ball dash and jump at
      the end of the platform to fly far to the upper-right corner where there
      is a completely flat vertical wall. The bottle camp is floating in the
      air at the top of this wall.
  #11 About midway through the cake interior. You'll be on a long, flat
      platform with a ramp on the right side. Use a Homer Ball dash and jump at
      the end of the platform to fly far to the upper-right corner where there
      is a completely flat vertical wall. Fall down right on top of a cupcake
      trampoline and bounce toward the left where a bottle cap is floating
      just beneath the ramp.
  #12 Get to the bottom level of the cake interior. Clear the bunnies but do
      not fall down into the hole. Instead, use Homer Ball dash and jump to
      cross the gap and land on a cupcake trampoline at the end. Use it to
      bounce up to the bottle cap floating near the ceiling over the hole
      in the ground.


Bartman Begins
================

  Bart
  ======

  #01 Jump over the first gap in the Underground Cave.
  #02 Break open the first crate in the Underground Cave.
  #03 Next to a ladder at the end of the Underground Cave.
  #04 Floating above a lever at the end of the Underground Cave.
  #05 On the leg of the large statue in the Ancient Pyramid.
  #06 On the hefty chest of the large statue in the Ancient Pyramid.
  #07 In the air above the wide chasm in the Ancient Pyramid. Grab it during
      the long glide from the left to the right.
  #08 In the air just to the left of the sword from the large statue on the
      right side of Ancient Pyramid. Use the platforms and vines on the right
      side of the statue to get to it.
  #09 In the air below the red target on the far right side of the Ancient
      Pyramid.
  #10 Above a blue platform attached to the brontosaurus in the Prehistoric
      Exhibit.
  #11 Jump down onto the ground in the Prehistoric Exhibit. Run past the brown
      brontosaurus to find a green skeleton. The coupon is floating just to the
      left of the green skull.
  #12 Run along the back of the brown brontosaurus and jump onto the first
      pterodactyl. Float down to grab the coupon floating above a green
      skeleton.
  #13 In the air vent above the volcano in the Prehistoric Exhibit.
  #14 In the air above a pterodactyl hanging high above the starting area in
      Prehistoric Exhibit. To get there, use the vent from the volcano to float
      onto the pterodactyl above, then zipline and jump across the pterodactyls
      on the left.
  #15 Hiding behind a bush at the start of the History of Man exhibit.
  #16 On the ground at the start of the Space Exhibit.
  #17 On the left side of Jupiter in the Space Exhibit.
  #18 In the air near a flying saucer at the top of the Space Exhibit.


  Homer
  =======

  #01 Get the Helium Homer upgrade and then use the helium tank at the start
      of the level to float up to the collectible near the ceiling.
  #02 Get the Helium Homer upgrade. Run toward the helium tank from the right
      side and jump at it. Tap the X button to stay in the air and use the
      momentum from the run to reach the bottle cap in the air on the left side
      of the large pit.
  #03 On the second ladder leading up into the light in the Underground Cave.
  #04 On the tongue platform that crosses the chasm in the Ancient Pyramid.
  #05 In the air above a broken statue on the far right side of the Ancient
      Pyramid. You must grab it before you step on the red button.
  #06 On the tongue extended out from the green skeleton in the Prehistoric
      Exhibit.
  #07 Floating above the bone platform stuck in the tar in the Prehistoric
      Exhibit.
  #08 Inside the first diorama in the History of Man Exhibit. Homer will
      automatically pick it up after Bart shoots the first target.
  #09 Inside the American Civil War diorama in the History of Man exhibit. You
      need to quickly run ahead as Bart and shoot the target underneath the
      canon before Homer runs to that point.


Around the World in 80 Bites
==============================

  Homer
  =======

  #01 Next to the barrels at the start of Germany.
  #02 Above the barrels at the start of Germany.
  #03 Above Das Pretzelhouse building at the start of Germany.
  #04 On the ground just past the giant beer tap in Germany.
  #05 In the air just to the left of Das Brautwursthaus in Germany. Use the
      trampoline hidden beneath the barrels to reach it.
  #06 In the air just to the left of Das Brautwursthaus in Germany. Use the
      trampoline hidden beneath the barrels to reach it.
  #07 On the tall orange beer stein to the left of Das Brautwursthaus in
      Germany.
  #08 On the tall orange beer stein above Das Brautwursthaus in Germany.
  #09 To the right of the shack near the start in Mexico.
  #10 On the ground floor of the church in Mexico.
  #11 On the ground to the left of the super taco in Mexico.
  #12 On the roof of the building next to the super taco in Mexico.
  #13 On floor 2 of the church in Mexico.
  #14 In the air to the left of floor 3 of the church in Mexico. Use the dash
      move to speed up and then jump to the left.
  #15 In the air to the left of floor 3 of the church in Mexico. Use the dash
      move to speed up and then jump to the left.
  #16 In the air to the left of floor 3 of the church in Mexico. Use the dash
      move to speed up and then jump to the left.
  #17 Underneath the arch in France.
  #18 Just to the right of the arch in France.
  #19 Above the red button on the ground on the far right side of France.
  #20 In the air to the right of floor 3 of the Eiffel Tower in France. Use
      Homer Ball's dash to reach it.
  #21 In the air to the right of floor 3 of the Eiffel Tower in France. Use
      Homer Ball's dash to reach it.
  #22 In the air to the right of floor 3 of the Eiffel Tower in France. Use
      Homer Ball's dash to reach it.
  #23 In the air to the right of floor 3 of the Eiffel Tower in France. Use
      Homer Ball's dash to reach it.
  #24 Next to the windmill on the far right side of France.
  #25 On the giant bagpipes in Scotland.
  #26 Over the red button next to the bagpipes in Scotland.
  #27 Over the red button next to the beer tap that marks the start of
      Australia.
  #28 On the giant hand pointing to the right in Australia. Use the ramp on the
      right side to Homer Ball dash to the left toward the bottle cap.
  #29 Over the red button on a high metal platform in Australia.
  #30 On the ground below the forked kangaroos in Australia.
  #31 On the ground next to the G'Duff building in Australia.
  #32 On the ground below the giant beer tap on the right side of Australia.
  #33 Above the water where the gondola platform is floating in Italy.
  #34 On the ground just to the right of the gondola in Italy.
  #35 On the plate of spaghetti in Italy.
  #36 On a red button on the floor 2 platforms near the spaghetti in Italy.
  #37 On the second metal scaffold platform that gets lowered by Bart in Italy.
  #38 On the roof of the shack at the start of Italy. You need to make your
      way through the area and get to the platform above the large DUFF
      billboard, then use Homer Ball dash to reach it.
  #39 In the air next to the long wooden platform before you arrive at the
      super meatball in Italy.
  #40 On the giant spoon that holds the super meatball in Italy.
  #41 Use the sewer lid trampoline to reach the bottle cap in the far left
      corner in America.


  Bart
  ======

  #01 Right above the stein near the start of Germany.
  #02 In the air far above the stein near the start of Germany. Use the sewer
      lid trampoline to reach it.
  #03 In the air between the oversized stein from the start of Germany and the
      platform with Uter, the fat German kid.
  #04 On the beer tap lever that Bart pulls to stop the stream of beer in
      Germany.
  #05 On the right side of the giant beer tap in Germany.
  #06 On the tall orange beer stein to the left of Das Brautwursthaus in
      Germany.
  #07 On the roof of Das Brautwursthaus in Germany.
  #08 Underneath the giant beer tap on the far right side of Germany.
  #09 Next to the shack at the start of Mexico.
  #10 On floor 2 of the church in Mexico.
  #11 On the left side of floor 3 of the church in Mexico.
  #12 On the right side of floor 3 of the church in Mexico.
  #13 On the roof of the shack at the start of Mexico.
  #14 On the wooden platform above the vent on the left side of Mexico.
  #15 On the top floor of the church in Mexico. Approach from the moving cart
      on the left side.
  #16 On a high wooden platform on the far right side of Mexico. Use the
      zipline to the left of it to reach it.
  #17 Underneath the arch in France.
  #18 On floor 2 of the Eiffel Tower in France.
  #19 Above a frog leg trampoline to the left of the Eiffel Tower in France.
  #20 Above a frog leg trampoline to the left of the Eiffel Tower in France.
  #21 Above some barrels on top of the arch in France.
  #22 Above the lever on floor 3 of the Eiffel Tower in France.
  #23 Above a frog leg trampoline to the right of the Eiffel Tower in France.
  #24 Above a frog leg trampoline to the right of the Eiffel Tower in France.
  #25 Above the bagpipe vent on the left side of Scotland.
  #26 In the hand of the Scottish woman statue in Scotland.
  #27 Above the zipline just past the Scottish ladies in Scotland. You'll need
      to press the red button below as Homer to activate a vent for Bart.
  #28 Above the lever next to the giant beer tap at the start of Australia.
  #29 On a metal platform just above the first forked kangaroo in Australia.
  #30 Along the zipline above the forked kangaroos in Australia.
  #31 Above one of the forked kangaroo trampolines in Australia.
  #32 Next to the red lever above the G'Duff building in Australia.
  #33 On a platform just to the left of the metal scaffold that Homer brings
      down in Italy.
  #34 On the platform below a ladder and two wooden barrels in the colosseum
      area of Italy.
  #35 On a small platform on the right side of the colosseum in Italy.
  #36 On a small platform on the right side of the colosseum in Italy.
  #37 On a platform on the left side of the colosseum in Italy.
  #38 On a platform just to the left of the colosseum and above the DUFF
      billboard in Italy.
  #39 On a platform just to the left of the colosseum and above the DUFF
      billboard in Italy. Near the lever.
  #40 In the air far to the left of the huge DUFF billboard in Italy. Jump onto
      the platform above the billboard and glide to the left to find it.


The Tree Hugger
=================

  Lisa
  =======

  #01 Move the first stump at the entrance to reveal a collectible.
  #02 On the gate at the start of the Entrance.
  #03 On the AUNTIE NATURE sign near the crane in the Entrance. Use the Hand of
      Buddha and those trees to build platforms toward the left.
  #04 Right on the main path when you get to the pink conveyor belt at the
      Entrance.
  #05 In the air at the start of Springfield Forest 1.
  #06 On a leafy platform at the end of the conveyor belts in Springfield
      Forest 1.
  #07 On a saw trampoline midway through the Springfield Forest 1 platforms.
  #08 In the air next to the Hand of Buddha on the far left of the platforms
      in Springfield Forest 1. Activate the moving platform to reach it.
  #09 In the air along the third tier of platforms in Springfield Forest 1.
  #10 On a platform to the far right of the third tier in Springfield Forest 1.
  #11 In the air past the last chainsaw platform in Springfield Forest 1.
  #12 Use the saw trampolines at the start of Springfield Forest 2 to reach
      the collectible on a leafy platform in the top-left corner.
  #13 Near the start of Springfield Forest 2 you'll see a collectible on a high
      cut tree.
  #14 In the air to the right of the first crane in Springfield Forest 2.
  #15 Just past the first fire barriers in Springfield Forest 2.
  #16 On a tall stump near the crane on the left side of Springfield 2. You
      first need to set up a tall stump to use as a platform and reach it.
  #17 Below a saw blade trampoline on the left side of a log holder
      in Springfield Forest 2.
  #18 On a high stump to the left of the log holder in Springfield Forest 2.
  #19 In the air on the right side of the log holder in Springfield Forest 2.
  #20 Remove the pin in the log holder to make the logs roll to the right side
      of Springfield Forest 2. The collectible is inside the contraption.
  #21 On the pier on the left side of the Logger area. Make sure to go in that
      direction when you're playing as Lisa.


  Bart
  ======

  #01 To the right of the lever in the Entrance.
  #02 Set up the tree stumps in the Entrance area so that the shortest one is
      on the right, the middle one to the left of that, and the tallest one
      to the left of that. Lisa can reach her platform and then Bart can use
      the tallest one to glide to the platform on the left and grab the
      collectible.
  #03 Unlock the grapple hook, then run into the latter half of the Entrance
      area as Bart. Grapple up to the crane and use the ziplines to the left
      to get to a saw trampoline. Use that to get to the collectible.
  #04 Unlock the grapple hook, then get to the part of Springfield Forest 1
      where you control Bart for the first time. Get into the leafy platforms
      in the trees and look for a grapple hook point up in a high tree. Grapple
      up to it and swing to the right to grab the collectible.
  #05 On a small metal platform just before the large machine on the far right
      of Springfield Forest 1.
  #06 In the air over the first tier platforms of the large machine in
      Springfield Forest 1.
  #07 In the air over the second tier platforms of the large machine in
      Springfield Forest 1.
  #08 At the top of the large machine in Springfield Forest 1.
  #09 On the pier on the right side of the Logger area. Make sure to go in
      that direction when you're playing as Bart.
  #10 On a small platform past the first target in Logging Factory.
  #11 In the air next to a deactivated saw platform in Logging Factory. It's
      just past the first red lever.
  #12 On a small gray platform below the third target in Logging Factory.
  #13 Shoot the third target in Logging Factory and quickly head to the left.
      The next collectible is on a wall that was previously blocked by a
      yellow gate.
  #14 In the space between two conveyor platforms and under the fourth target
      in Logging Factory.
  #15 In the air underneath the fifth target in the Logging Factory.


Mob Rules
===========

  Marge
  ======

  #01 In front of the Sequel Stop store.
  #02 On the street near the orange car past the Sequel Stop.
  #03 On the sidewalk next to the brown office building past the Sequel Stop.
  #04 In the Aztec Theatre's parking lot.
  #05 Near the yellow building past the Aztec Theatre.
  #06 Next to a broken wall past the Aztec Theatre.
  #07 Along the path toward the edge of the top level of the Parking Lot.
  #08 On the roof of the building next to the Parking Lot.
  #09 In the Bowlarama parking lot.
  #10 In the Bowlarama parking lot.
  #11 On the street at the beginning of Chinatown.
  #12 Past the first sign on the street in Chinatown.
  #13 Next to a puke green high-rise building in Chinatown.
  #14 In the lower-left corner of the Town Hall area.
  #15 In the upper-right corner of the Town Hall area.
  #16 At the foot of the stairs to Town Hall.
  #17 On the roof of Town Hall.


  Lisa
  =======

  #01 On the street past the Sequel Stop.
  #02 On a building terrace past the Sequel Stop.
  #03 On the second floor fire escape past the Aztec Theatre.
  #04 On the third floor fire escape past the Aztec Theatre.
  #05 On the lower level of the Parking Lot.
  #06 On the second roof past the Parking Lot.
  #07 On the ground floor sidewalk next to the Parking Lot.
  #08 On the roof of the beige building in Chinatown.
  #09 On the roof of the green building at the start of Chinatown. Run across
      the wooden bridge from the adjacent building.
  #10 On the sidewalk next to a purple building in Chinatown.
  #11 On the scaffolding on the left side of Town Hall.


Enter the Cheatrix
====================

  Lisa
  =======

  #01 On the ground to the right of the CRATES and BARRELS machine in the
      Next Gen-erator area.
  #02 On the ground on the far right side of the Next Gen-erator area.
  #03 On the BARRELS pipe in the Next Gen-erator area.
  #04 On the white platform above the CRATES and BARRELS machine. You'll get
      up there by using the Enlightenment Port to lift Lisa to the platform.
  #05 On a white platform in the upper-right corner of the Next Gen-erator
      area.
  #06 Next to the giant amp in the Audio area.
  #07 On the middle speaker platform on the right side of the Audio Area.
  #08 On the ground below the VOL, TREBLE, and BASS signs in the Audio area.
  #09 On a large speaker in the middle of the Audio area. Use the purple
      platforms to the right to reach it.
  #10 In the air to the left of the large speaker in the middle of the Audio
      area.
  #11 In the air next to a piece of sheet music in the Audio area. Use the Hand
      of Buddha just under the sheet music to move a purple crate under it.
      Jump up and pull the lever, then cross the music notes.
  #12 On the moving platform near the end of the Audio area.
  #13 On the ground near the start of the Blood Room.
  #14 Next to the Hand of Buddha near the blood valve in the Blood Room.
  #15 On a small white platform next to the blood vat farthest to the right
      in the Blood Room. Use the missiles floating in the blood to get there.
  #16 On a white platform at the far left of the Blood Room, next to a
      Hand of Buddha.
  #17 On a gray platform high in the middle of the Blood Room. Use the Hand of
      Buddha to lift Lisa up to it.
  #18 On a white platform in the top-left corner of the Blood Room. You have
      to jump there via the high platform in the middle of the room.
  #19 On the conveyor belt platform with the lasers in the Blood Room.
  #20 On the first conveyor platforms in the Sequelizer room.
  #21 At the end of the Sequelizer room.
  #22 On the ground on the right side of the Stubborn Ape room.
  #23 On the middle platform in the Stubborn Ape room.
  #24 In the air above the middle platform in the Stubborn Ape room.
  #25 On the wide platform just below Stubborn Ape.


  Bart
  ======

  #01 Get up to the first grapple hook in Next Gen-erator, then go the left to
      find the collectible on a platform.
  #02 Get up to the first grapple hook in Next Gen-erator, then go the left
      onto the platform to the left of the sign. Use the grapple hook above to
      get to the collectible at the top.
  #03 On the CRATES pipe next to the Next Gen-erator machine.
  #04 On the moving platform above the CRATES and BARRELS machine.
  #05 On a moving platform to the right of the white one above the CRATES and
      BARRELS machine.
  #06 In the air on the far right side of the Next Gen-erator area. Use the
      grapple hooks to reach it.
  #07 On the speaker platform on the left side of the Audio area.
  #08 In the air to the right of the first gate in the Audio area.
  #09 In the air above the speaker vent in the middle of the Audio area.
  #10 In the air above the speaker vent on the far right side of the Audio
      area.
  #11 In the air next to the VOL, TREBLE, and BASS sliders in the Audio area.
  #12 Just past the blood valve in the Blood Room.
  #13 At the end of the Blood Room, on the lower platform.
  #14 Around the middle of the Blood Room, after you've pulled the lever to
      make the missiles appear in the blood vats. Head to the left.
  #15 On top of a beige machine on the left side of the Blood Room.
  #16 In the air next to a purple machine with a buzzsaw on top of it. You get
      here after several grapple hooks to some higher platforms.
  #17 Start on the left side of the blood vats in the Blood Room. Grapple up
      to the first high grapple hook, then swing across from one to the next
      toward the right side. The collectible is on a small white platform.


Treehouse of Horror
=====================

  Lisa
  ======

  #01 Obtained during the Day of the Dolphin battle.
  #02 Obtained during the Day of the Dolphin battle.
  #03 Obtained during the Day of the Dolphin battle.


  Homer
  =======

  #01 In the air past the first wall of flame in the Lard Lad battle.
  #02 Underneath some broken pink platforms past the Krustylu Studios building
      in the Lard Lad battle.
  #03 On a platform next to a PowerSauce billboard in the Lard Lad battle.
  #04 Inside the three stacked barrels in front of the Phineas Q. Butterfats
      during the Lard Lad battle.
  #05 Over a pit just before the Frying Dutchman building in the Lard Lad
      battle. Use the ramp to reach it.
  #06 In the air near the Frying Dutchman in the Lard Lad battle. You have to
      get to the Phineas Q. Butterfats roof by jumping on the stacked barrels
      on the left side, then use the helium tank to reach it.
  #07 On the roof of the Krusty Burger in the Lard Lad battle. You'll have to
      climb the ladder on the left side to get there.
  #08 On the awning in front of the Wall E. Weasel's building in the Lard Lad
      battle.


  Bart
  ======

  #01 It appears during the Invasion of the Yokel-Snatchers battle.
  #02 It appears during the Invasion of the Yokel-Snatchers battle.


Bargain Bin
=============

  Bart
  ======

  #01 On a small platform below the first target.
  #02 Next to the first red lever.
  #03 Between the two moving platforms before the first yellow gate.
  #04 In the air to the left of the high target near the flame bursts.
  #05 In the group of air vents that used to be flame bursts.
  #06 Near some pink breakable platforms at the end of the level.


  Homer
  =======

  #01 Over the first moving platform.
  #02 Next to the first yellow gate.
  #03 On the left side of a long walkway past the first Homer Ball ramp.
  #04 Up on a high platform to the left of the flame bursts. Use the helium
      tank to float up there.
  #05 In the air above the flame bursts. You can reach it by using the helium
      tank.


The Mythos of Marge
============

  Marge
  =======

  #01 In a spawner in the first part of the Dungeon.
  #02 In a spawner past the first wall in the Dungeon.
  #03 In a chest near the second wall in the Dungeon.
  #04 In a spawner past the second wall in the Dungeon.
  #05 In a chest before the fourth wall in the Dungeon.
  #06 In one of the three spawners just before the end of the Dungeon.
  #07 In one of the three spawners just before the end of the Dungeon.
  #08 In one of the three spawners just before the end of the Dungeon.
  #09 In the first spawner in the Maze.
  #10 In a chest near the first yellow door in the Maze.
  #11 In a spawner on the way to the first key in the Maze.
  #12 In a spawner on the way to the first key in the Maze.
  #13 In a spawner on the way to the first key in the Maze.
  #14 In a spawner past the first yellow door in the Maze.
  #15 In a chest past the first yellow door in the Maze.
  #16 In a spawner past the first yellow door in the Maze.
  #17 In a spawner past the first yellow door in the Maze.
  #18 In a spawner past the first yellow door in the Maze.
  #19 In a spawner past the first yellow door in the Maze.
  #20 In a chest past the first yellow door in the Maze. It's in the far left
      side of the area.
  #21 In a spawner close to the second yellow door in the Maze.
  #22 In a spawner next to the second yellow door in the Maze.
  #23 In a spawner just past the second yellow door in the Maze.
  #24 In a chest in a small room just past the second yellow door in the Maze.
  #25 On a platform in the first lava pit in the Dragon Chamber.
  #26 On a platform just below the giant soldier statue in the Dragon Chamber.
  #27 On a platform just to the right of the giant soldier statue in the
      Dragon Chamber.
  #28 Next to the large chains near the dragon in the Dragon Chamber.
  #29 On the dragon's snout at the end of the Dragon Chamber.
  #30 On the ground just past the dragon door in the Dragon Chamber.


  Homer
  =======

  #01 On the ground at the start of Pierule.
  #02 In the air to the left of the first big hill in Pierule.
  #03 In the air at the start of the first big hill in Pierule.
  #04 In the air at the start of the first big hill in Pierule.
  #05 Over the well at the top of the hill in Pierule. You have to use the
      Homer Ball dash ramp to the left of the well.
  #06 On the ground to the left of the dungeon door in Pierule.
  #07 Over the first lava pit in the Dragon Chamber.
  #08 In the air at the top of the third lava rock platform in the Dragon
      Chamber.
  #09 On the red platform just below the Morcs in the Dragon Chamber.
  #10 In the air past the giant soldier statue in the Dragon Chamber.
  #11 In the air to the right of the high platform just past the giant soldier
      statue in the Dragon Chamber. Just Homer Ball dash and a ramp to get
      there.
  #12 On a stone walkway just above the lava, past the giant soldier statue in
      the Dragon Chamber.
  #13 In the air at the start of the Selmatty Nest.
  #14 Directly below the Selmatty nest.
  #15 In the air in the top-right corner of the Selmatty Nest area.
  #16 In the air in the top-left corner of the Selmatty Nest area.


Big Super Happy Fun Fun Game
==============================

  Lisa
  ======

  #01 Above the first Hand of Buddha in the Land of Fire.
  #02 On top of the first pink tower in the Land of Fire.
  #03 In the air to the right of the first pink tower in the Land of Fire.
  #04 On the ground next to the second Hand of Buddha in the Land of Fire.
  #05 On the ground next to the second Hand of Buddha in the Land of Fire.
  #06 In the air over the platform on the left inside the mountain of the
      Land of Fire.
  #07 On a platform at the start of the Land of Ice.
  #08 On the stalactite platforms toward the right side of the Land of Ice.
  #09 On the stalactite platforms toward the right side of the Land of Ice.
  #10 On the stalactite platforms toward the right side of the Land of Ice.
  #11 On the stalactite platforms toward the right side of the Land of Ice.
  #12 On the stalactite platform in the air in the Land of Ice.
  #13 On the clear ice walkway on the left side of the Land of Ice.
  #14 On the first cloud in the Airship area.
  #15 On the second cloud in the Airship area.
  #16 On the third cloud in the Airship area.
  #17 Below a ladder on the right side of the Airship area.
  #18 Above a ladder on the right side of the Airship area.
  #19 In the air on the right side of the area below the Airship.
  #20 In the air in the middle of the area below the Airship.
  #21 In the air on the left side of the area below the Airship.
  #22 On the left rainbow bridge below the Airship.
  #23 On the right rainbow bridge below the Airship.
  #24 On the left side of the Airship deck.


  Homer
  =======

  #01 On the ground at the start of the Mr. Sparkle area.
  #02 Next to the bonzai tree at the start of the Mr. Sparkle area.
  #03 Next to the bonzai tree at the start of the Mr. Sparkle area.
  #04 Next to the bonzai tree at the start of the Mr. Sparkle area.
  #05 On a large cloud over the first sushi platform in the Mr. Sparkle area.
      Use the helium tank from the bonzai tree to reach it.
  #06 On the ground just past the bonzai tree in the Mr. Sparkle area.
  #07 Next to the lamp and well in the the Mr. Sparkle area.
  #08 Next to the gate at the end of the Mr. Sparkle area.
  #09 In front of the pink towers at the start of the Land of Fire.
  #10 On a cloud in the top-left corner of the Land of Fire. Use the helium
      tank to float to it.
  #11 Past the purple block barrier in the mountain of the Land of Fire.
  #12 Over a button below the ground in the Land of Fire.
  #13 Above the helium tank inside the mountain of the Land of Fire.
  #14 Near Jimbo at the end of the Land of Fire.
  #15 In the air past the first helium tank in the Land of Ice.
  #16 In the air past the first helium tank in the Land of Ice.
  #17 In the air past the first helium tank in the Land of Ice.
  #18 In the air past the first helium tank in the Land of Ice.
  #19 In the air past the first helium tank in the Land of Ice.
  #20 In the air past the first helium tank in the Land of Ice.
  #21 In the air past the first helium tank in the Land of Ice.
  #22 On an ice platform at the far right of the first area in Land of Ice.
  #23 On a platform in the air in the middle of the Land of Ice.
  #24 On the ground along the middle walkway in the Land of Ice.
  #25 On the left side of the high platform in the Land of Ice.
  #26 Underneath a clear ice platform near Ralph in the Land of Ice.
  #27 On a cloud below the right side of the Airship.
  #28 On the cloud in the upper-left corner of the area beneath the Airship.
  #29 In the first crow's nest in the Airship. It appears when you beat up
      the sky sumo.
  #30 In the second crow's nest in the Airship. It appears when you beat up
      the sky sumo.
  #31 In the third crow's nest in the Airship. It appears when you beat up
      the sky sumo.


Five Characters in Search of an Author
========================================

  Homer
  =======

  #01 On the lowest level of the fountain in the Courtyard.
  #02 On the ground to the right of the fountain in the Courtyard.
  #03 On a column to the far left of the Courtyard.
  #04 In the Simpsons family statue in the Courtyard.
  #05 On the column directly to the right of the fountain in the Courtyard.
  #06 In the air above the large pool in the Courtyard. Use the ramp to get
      to it.
  #07 On the left side of the pool in the Life in Hell area.
  #08 Over the Weenie Barn in the Life in Hell area.
  #09 On the left side of the one-eared rabbit's head in the Life in Hell area.
      Use the helium tank near the Weenie Barn to get there.
  #10 On a television below the chalkboard in the Life in Hell area.
  #11 Next to the red button at the end of the Life in Hell area.
  #12 Between a couple of safe platforms near the bottom of the Money Vault.
  #13 Just under the cluster of pencil platforms about midway through the
      Money Vault.
  #14 On a small platform to the right of the cluster of pencil platforms about
      midway through the Money Vault.
  #15 On the right side of the entrance to Matt Groening's office in the
      Money Vault.


  Bart
  ======

  #01 Next to the first gold pile in the Courtyard.
  #02 In the air next to the fountain in the Courtyard.
  #03 On a column to the left of the fountain in the Courtyard.
  #04 In the air high above the right side of the fountain in the Courtyard.
  #05 In the air between two columns on the right side of the Courtyard.
  #06 In the air between two columns on the right side of the Courtyard.
  #07 In between the first pencil platforms in the Sketch Gallery.
  #08 In the air above the pencil platforms in the Sketch Gallery.
  #09 In the air on the second level of the Sketch Gallery. You'll grab it as
      you jump along the pencil platforms.
  #10 On a gold attack dog on the left side of the second level in the
      Sketch Gallery.
  #11 On the bottom level of the pink hallways on the right side of the
      Sketch Gallery.
  #12 In the air above the first pencil platform on the far right side of the
      Sketch Gallery.
  #13 Above the sketchpads on the far right side of the Sketch Gallery.
  #14 High up in the sketchpad area of the Sketch Gallery, on the left side.
  #15 In the air near the televisions on the left in the Life in Hell area.
  #16 Below a grapple hook near the televisions on the left in the Life in
      Hell area.
  #17 On the chalkboard at the top of the Life in Hell area. Use the vents
      on the right to reach it.
  #18 At the top of the one-eared rabbit's head in the Life in Hell area.
  #19 In front of the Matt Groening rabbit on the far right of the Life in
      Hell area.
  #20 In front of the one-eared rabbit on the far right of the Life in Hell
      area.
  #21 Next to the snake at the start of the Money Vault.
  #22 Near some moving pencil platforms on the far right of the Money Vault.
  #23 On a small platform to the left of the safe platforms in Money Vault.
  #24 In the air next to a bunch of pencil platforms in the top-left corner of
      the Money Vault.
  #25 In the air on the left side of the bunch of pencil platforms in the
      top area of the Money Vault.
  #26 In the air on the right side of the bunch of pencil platforms in the
      top area of the Money Vault.


Game Over
===========

  Marge
  =======

  #01 In front of the golden gate in the Gardens.
  #02 Inside a gazebo in the early part of the Gardens.
  #03 Next to the breakable wall in the early part of the Gardens.
  #04 In the Gardens area with the kids.
  #05 Near the waterslide in the Gardens.
  #06 At the top of the waterslide in the Gardens.
  #07 On the cloud bridge at the end of the Gardens.


  Homer
  =======

  #01 On the first cloud platform in the Land of Heavenly Chocolate.
  #02 In the air above the last marshmallow trampoline on the left in the
      Land of Heavenly Chocolate.
  #03 Floating over the chocolate water on the far right of the third level in
      the Land of Heavenly Chocolate.
  #04 In between some cloud platforms high up in the Land of Heavenly
      Chocolate.
  #05 In the air to the right of those cloud platforms at the top of the
      Land of Heavenly Chocolate.
  #06 On a small cloud platform with a Morc on it near the end of the Land
      of Heavenly Chocolate.
  #07 On the cloud platform just before the exit in the Land of Heavenly
      Chocolate.


  Lisa
  ======

  #01 On the first cloud platform in the Block Tower area.
  #02 On a cloud platform beneath a brown horizontal set of blocks on the right
      side of the Block Tower area.
  #03 In the air above some blue blocks on the lower-left side of the
      Block Tower area.
  #04 On a brown horizontal set of blocks on the right side of the Block Tower.
  #05 In the air on the right after you get the second green block in the
      Block Tower area.
  #06 On a cloud platform in the top-left corner of the Block Tower area.
  #07 In the air to the right of the Block Tower. You have to get to the top of
      the tower to reach it.
  #08 On the exit platform in the Block Tower area.


  Bart
  ======

  #01 In the air along the path of the first rotating cloud platform in the
      Pathway to God.
  #02 In the air just past the first column building in Pathway to God.
  #03 In the air just past the first column building in Pathway to God.
  #04 On a column about midway through Pathway to God.
  #05 On a column on the right side in the Pathway to God.
  #06 On a cloud platform on the right side in the Pathway to God.
  #07 In the air on the left side of the Pathway to God. You need to use a vent
      and the moving cloud platforms to reach it.
  #08 In the air to the left of a column building on the right side. It's past
      the moving clouds in the Pathway to God.
  #09 In the air above a cloud platform near the end of the Pathway to God.
  #10 On the ground next to a Buzz Cola can in God's place.
  #11 On the ground on the far right in God's place.
  #12 In the air on the far right in God's place.
  #13 In the air just below God's hands.


-------------------------------------------------------------------------------
                                 8.02  Clichés
-------------------------------------------------------------------------------

 #01 AI Running into Walls - Around the World in 80 Bites
     Look at Otto running into a stream of beer in Germany.

 #02 Chasm Death - Bartman Begins
     Fall into the first chasm below the zipline in the Underground Cave.

 #03 Collectible Placement - Game Over
     Collect Lisa's collectible from the top of the tower in the Block Tower.

 #04 Combo Punch - Around the World in 80 Bites
     Use a combo attack on contestants in Mexico.

 #05 Copy Paste - Game Over
     Start the Land of Heavenly Chocolate area.

 #06 Wooden Crate - Enter the Cheatrix
     Release the crate from the pipe in the Next Gen-erator area.

 #07 Crossover - Five Characters in Search of an Author
     Get to the battle with Matt Groening.

 #08 Double Jump - Land of Chocolate
     Double jump when you arrive at the chocolate cake.

 #09 Elemental Enemies - Big Super Happy Fun Fun Game
     Attack the first ice sumo in the Land of Ice.

 #10 Enemy Spawners - The Tree Hugger
     Come across the first port-a-potty in the Entrance area.

 #11 Collecting Every Collectible
     Collect all character collectibles in the game.

 #12 Evil Genius - Bargain Bin
     In the beginning of the Bargain Bin episode.

 #13 Flying Boat - Big Super Happy Fun Fun Game
     Reach the Airship.

 #14 Giant Saw Blades - The Tree Hugger
     Get to the top of the large machine in Springfield Forest.

 #15 Water Warp - The Land of Chocolate
     Fall into the chocolate lake beneath the floating cookie platforms.

 #16 Invisible Barrier - The Mythos of Marge
     Run into the barrier on the left side of the Selmatty Nest.

 #17 Key Card - Big Super Happy Fun Fun Game
     Pick up the key card next to Jimbo in the Land of Fire.

 #18 Lame Tutorials - Mob Rules
     Start the episode.

 #19 Lava - The Mythos of Marge
     Get across the lava falls in the Dungeon.

 #20 Obvious Weakness - Game Over
     Shoot the target on God's stylus.

 #21 Pressure Pads - Bartman Begins
     Step on the last red button in the Prehistoric Exhibit.

 #22 Re-Used Enemies - Game Over
     Fight the first enemies in the Gardens.

 #23 Switches and Levers - Bartman Begins
     Pull the first red lever in the Underground Cave.

 #24 The Doors - Mob Rules
     Get through the Chinatown district.

 #25 Time Trial - The Tree Hugger
     Start the Logging Factory area.

 #26 Trampolines - Around the World in 80 Bites
     Jump on the frog leg trampolines in France.

 #27 A Wizard Did It - Five Characters in Search of an Author
     Solve the button puzzle at the end of the Courtyard area.


-------------------------------------------------------------------------------
                                8.03  Trophies
-------------------------------------------------------------------------------

Trophies can be viewed at the Android's Dungeon. They are obtained when all
of the collectibles in an episode have been found.


Homer
=======

  #01 High Cal Duff - Around the World in 80 Bites
  #02 Eight Bit Duff - Bargain Bin
  #03 Dino Duff - Bartman Begins
  #04 Turn Based Duff - Big Super Happy Fun Fun Game
  #05 Chocolate Duff - The Land of Chocolate
  #06 Star Spangled Duff - Treehouse of Horror
  #07 Pearly Duff - Game Over
  #08 Ye Olde Duff - The Mythos of Marge
  #09 Special Reserve Duff - Five Characters in Search of An Author
  #10 Giant Keg Duff - Collect all other trophies


Bart
======

  #01 Krusty Begins - Bartman Begins
  #02 Krusty Burger Ad - Around the World in 80 Bites
  #03 Krusty Toothpick - The Tree Hugger
  #04 Krusty Krappy Kartridge Game - Enter the Cheatrix
  #05 Attack of the 50 ft. Klown - Treehouse of Horror
  #06 Krusty's Stop and Go - Bargain Bin
  #07 Krusty Klownface - Five Characters in Search of an Author
  #08 Saving Krusty's Privates - Game Over
  #09 EA Krusty Doll - Collect all other trophies


Marge
=======

  #01 Hair Street Blues - Mob Rules
  #02 Lord of the Ringlets - The Mythos of Marge
  #03 Hairway to Heaven - Game Over
  #04 Salon Chair - Collect all other trophies


Lisa
======

  #01 Tree Hugger Stacy - The Tree Hugger
  #02 Political Scandal Stacy - Mob Rules
  #03 Next Gen Stacy - Enter the Cheatrix
  #04 Marine Biology Stacy - Treehouse of Horror
  #05 Anime Stacy - Big Super Happy Fun Fun Game
  #06 Heavenly Stacy - Game Over
  #07 Malibu Stacy Dream House - Collect all other trophies


-------------------------------------------------------------------------------
                                8.04  Upgrades
-------------------------------------------------------------------------------

Homer
=======

- Helium Homer - Treehouse of Horror
  Start the Lard Lad battle.


Bart
======

- Bartman Grapple - Enter the Cheatrix
  At the start of the episode.


Lisa
======

- Lisa's Lightning - Big Super Happy Fun Fun Game
  Get to the orange tower in the Land of Fire.


-------------------------------------------------------------------------------
                             8.05  Pet Homer Items
-------------------------------------------------------------------------------

You unlock items for Pet Homer as you complete episodes in Story Mode.


Default
=========

- Chocolate
- Pizza
- Hot Dog
- Broccoli
- Defibrillator


The Land of Chocolate
=======================

- Razor
- Shaving Cream


Around the World in 80 Bites
==============================

- Tennis Ball


The Tree Hugger
=================

- Carrot
- Pretzel
- Chicken Leg


Mob Rules
===========

- Target
- Handheld Game


Treehouse of Horror
=====================

- Shrimp on the barbie
- Taco
- Haggis
- Pink Book


Bargain Bin
=============

- Steak
- Burger
- Buzz Cola


The Mythos of Marge
=====================

- Soap
- Hair Brush


Big Super Happy Fun Fun Game
==============================

- Donut
- Chili Pepper


Five Characters in Search of an Author
========================================

- Bowling Ball
- Sunglasses


===============================================================================

===== 7.0 MULTIPLAYER =========================================================


Play a multiplayer game with up to three other players. You can use one cart
for all devices or each device with its own cart.


Modes
=======

Bart Match: This is a death match mode where players battle each other using
            slingshots. You can set a max number of knock-outs or have the
            player with the highest number of knock-outs win.

Kapture the Koveted Krusty: A hold the ball mode in which players must hold
                            onto the Koveted Krusty for as long as possible.
                            Other players must attack the holder to steal it.
                            The player with the longest amount of time wins.

Hungry Homer: Players run around as Homer and eat as much food as possible.
              You can set a max number of calories or have the player with
              the most calories consumed by the end of the match win. You can
              also punch and kick other players to slow them down.

Golden Donut: The goal is to hold onto the Golden Donut for as long as
              possible. Other players must attack the holder to steal it. The
              player with the longest amount of time wins. The player holding
              the Golden Donut cannot transform into Homer Ball.


Power-Ups
===========

Invincible: A chili pepper powers up your character to gain temporary
            invincibility. No one can harm you while it is active.

Speed Increase: A can of Buzz Cola gives your character a speed boost for
                a limited amount of time. Good for catching up to other
                players or avoiding them.

Unlimited Calories/Ammo: The infinity icon gives your characters unlimited
                         calories or ammo for a short time. Good for unleashing
                         assaults on other players.


===============================================================================

===== 9.0 CODES & SECRETS =====================================================


There are no known codes or secrets that aren't already elsewhere in the guide.


===============================================================================

===== 10.0 LEGAL / MISC. ======================================================


-------------------------------------------------------------------------------
                             10.01  Version History
-------------------------------------------------------------------------------

2013.10.02 - Version 1.0: Guide completed.


-------------------------------------------------------------------------------
                              10.02  Guide Credits
-------------------------------------------------------------------------------

Thanks to these folks...

1. The developers who made the game, including EA Redwood Shores and the folks
   at Amaze Entertainment

2. Wilson Lau for his excellent guide to 'Bart vs. the Space Mutants'. It
   inspired the more than 70 game guides I've written to date.

3. You for reading.


-------------------------------------------------------------------------------
                           10.03  Contact Information
-------------------------------------------------------------------------------

subsane at gmail dot com


-------------------------------------------------------------------------------
                               10.04  Legal Stuff
-------------------------------------------------------------------------------

1. The Simpsons Game software (C) 2007 Electronic Arts Inc. All rights
   reserved.

2. This guide copyright (C) 2013 SubSane. This guide may be distributed freely
   as long as it remains in its ORIGINAL and UNALTERED form. It is only for
   private use and may not be reproduced for commercial purposes.

   If I discover that this guide has been altered in any way and is being
   displayed publicly, I reserve the right to have the guide removed from that
   location.